| Introduction I recently read a forum posting from a model railroader who was interested in adding sounds to some of his buildings. This got me thinking about the simplest way that you could use my favorite MP3 player, the DFPlayer, for this purpose. I
experimented a bit and put together a device that has only a dozen
parts, requires no soldering and costs well under $10. Way under
$10 if you have a good junk box!
|
|
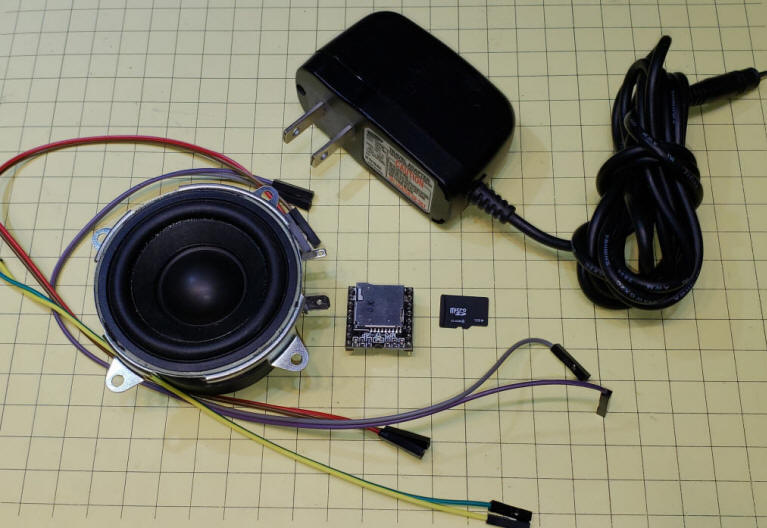
Parts
|
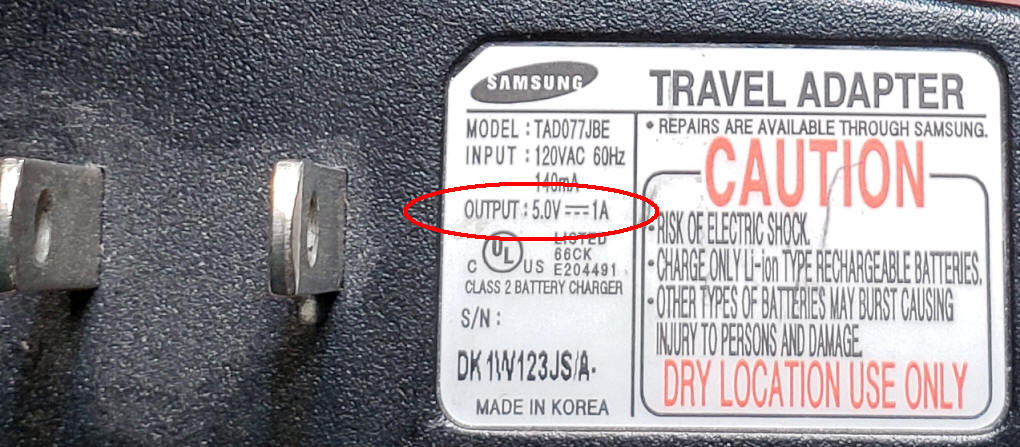
| Power Supply The power supply that I chose to use was in my junk box. It was used with an old Samsung cell phone. Most of us have a box or drawer full of such wall warts. The important information is circled in red in this photo. The power supply is 5 volts at 1 amp. The horizontal line with three dashes below it indicates that the output is DC, not AC.
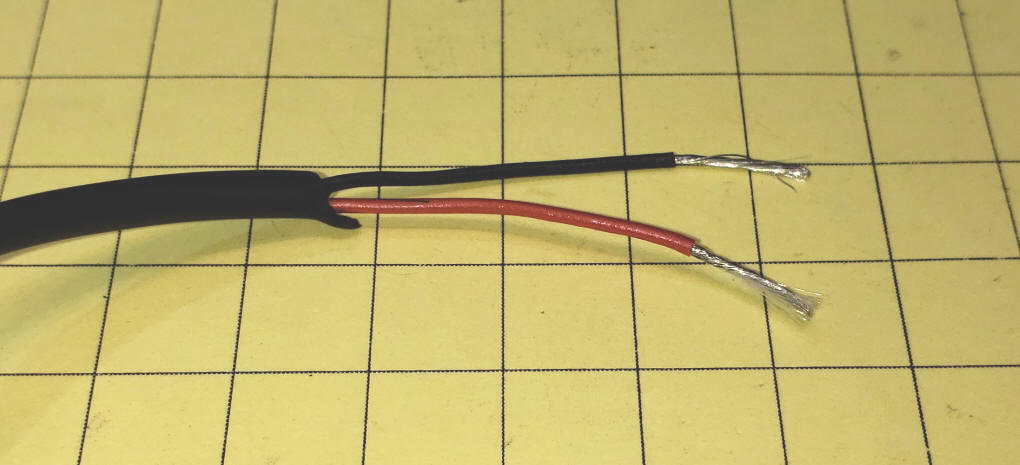
I cut off the end of the cable and used a hobby knife to strip off the insulation and found two wires, one red and one black. While most power supplies use red to indicate positive and black for negative I always check with a volt meter just to be sure!
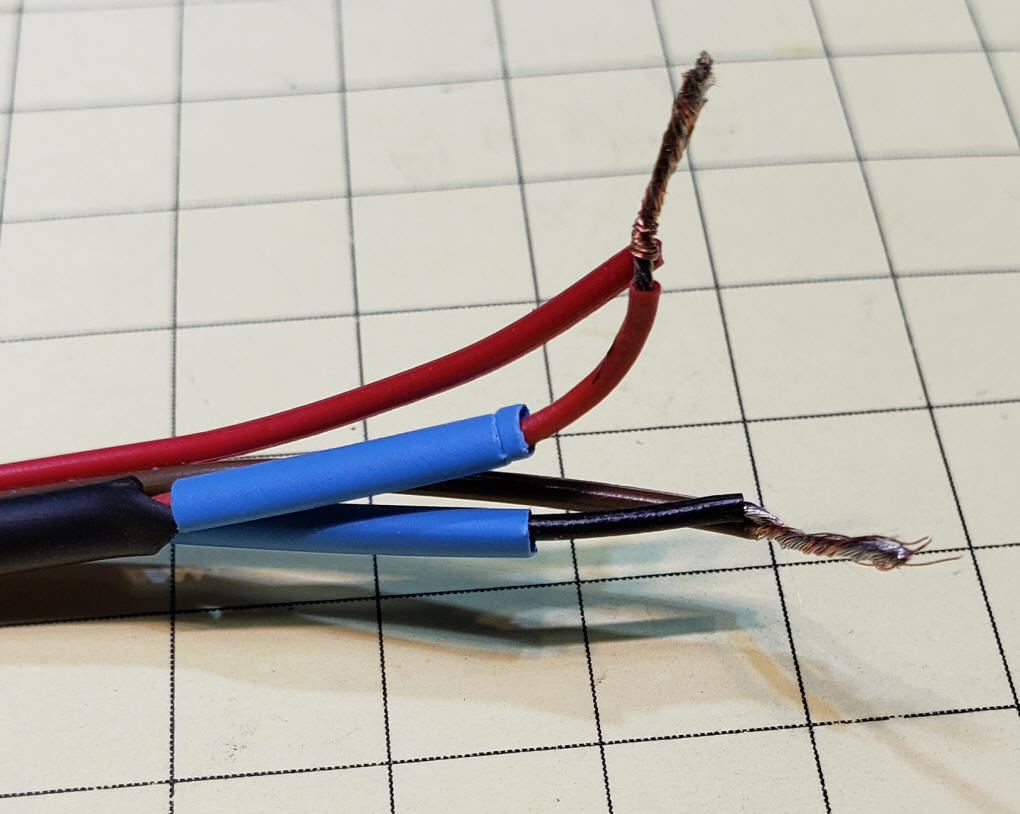
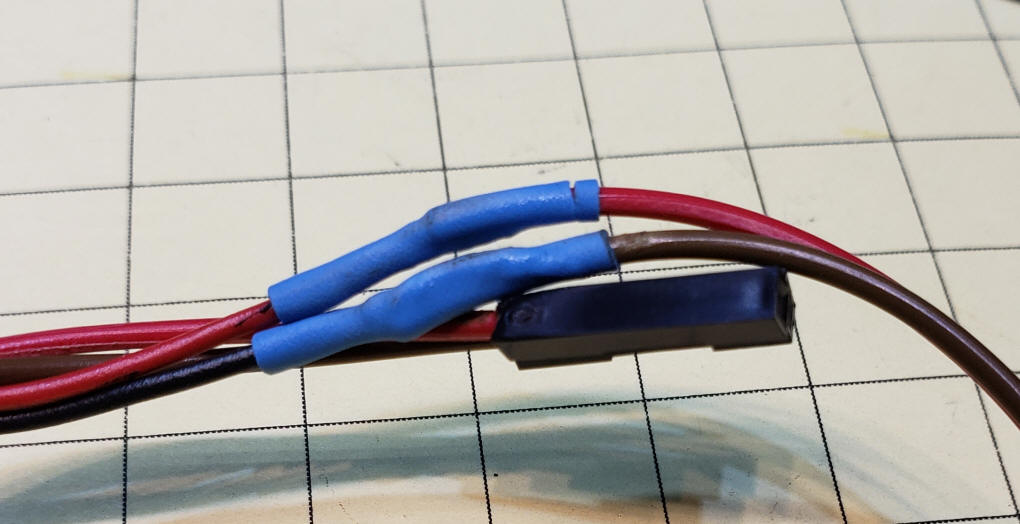
Slip a piece of heat shrink tubing over each power supply wire then twist the leads to the Dupont leads - I used red for positive and brown for negative.
Here the heat shrink tubing has been exposed to a flame and has completed the connection.
You can use any DC power source that delivers 4 to 5 volts. Three AA Alkaline cells or four NiCad or NiMh cells work, too. DO NOT use a 9 volt battery! |
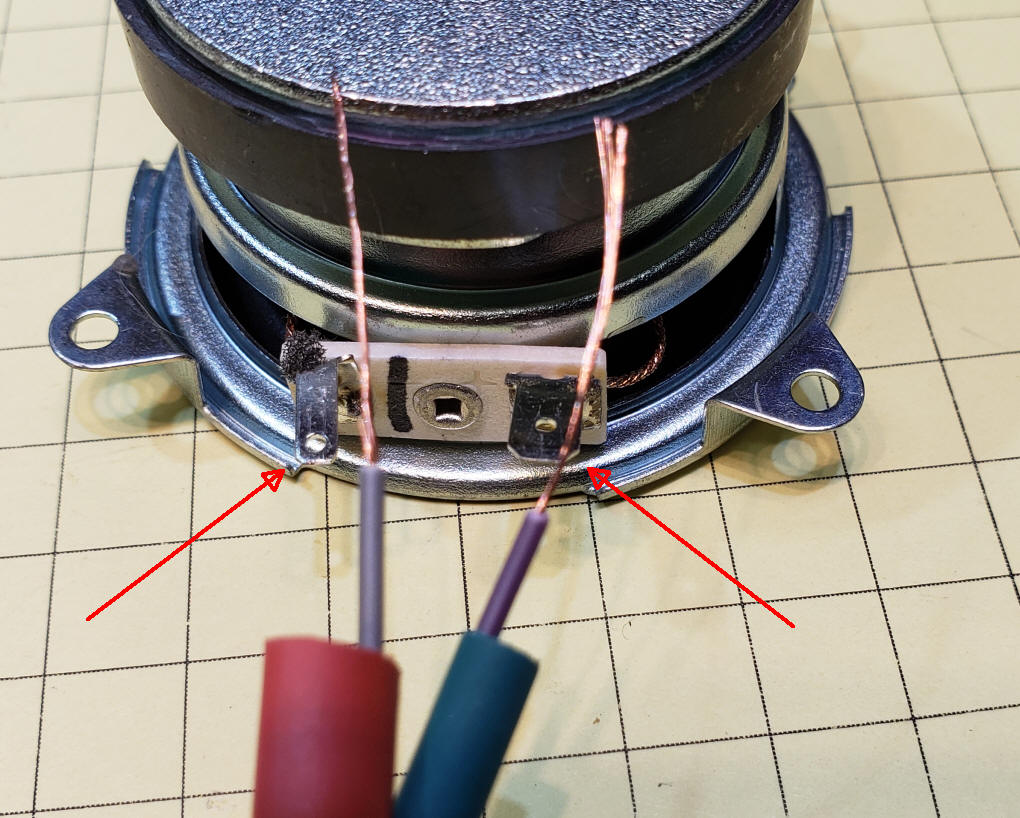
| Speaker The speaker that was in my junk box had two connections, one large and one smaller. Each connection had a small hole in the center (see red arrows in photo).
I put each stripped wire through the hole and wrapped it around the contact. Note the heat shrink tubing that was put on the wires before wrapping.
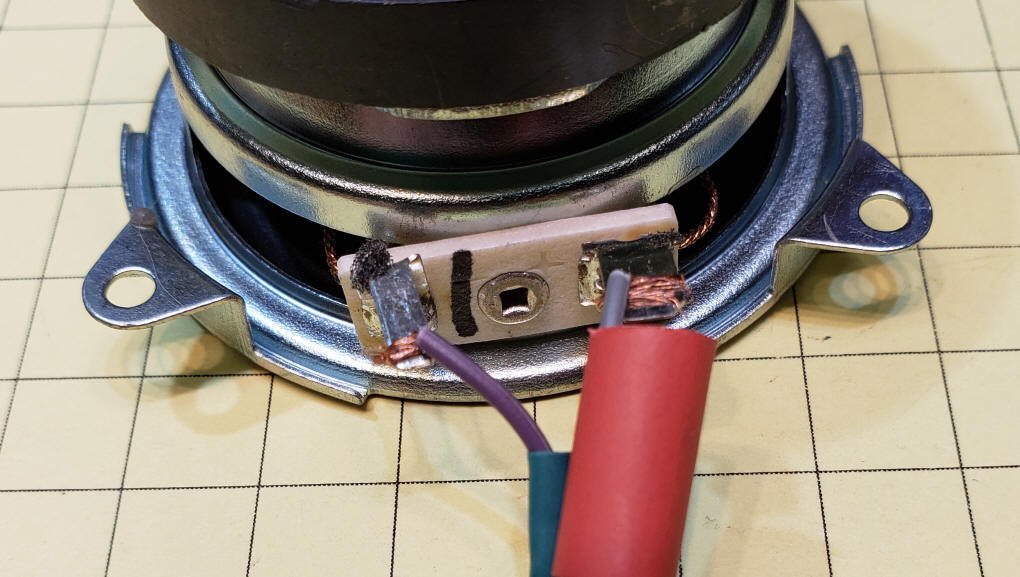
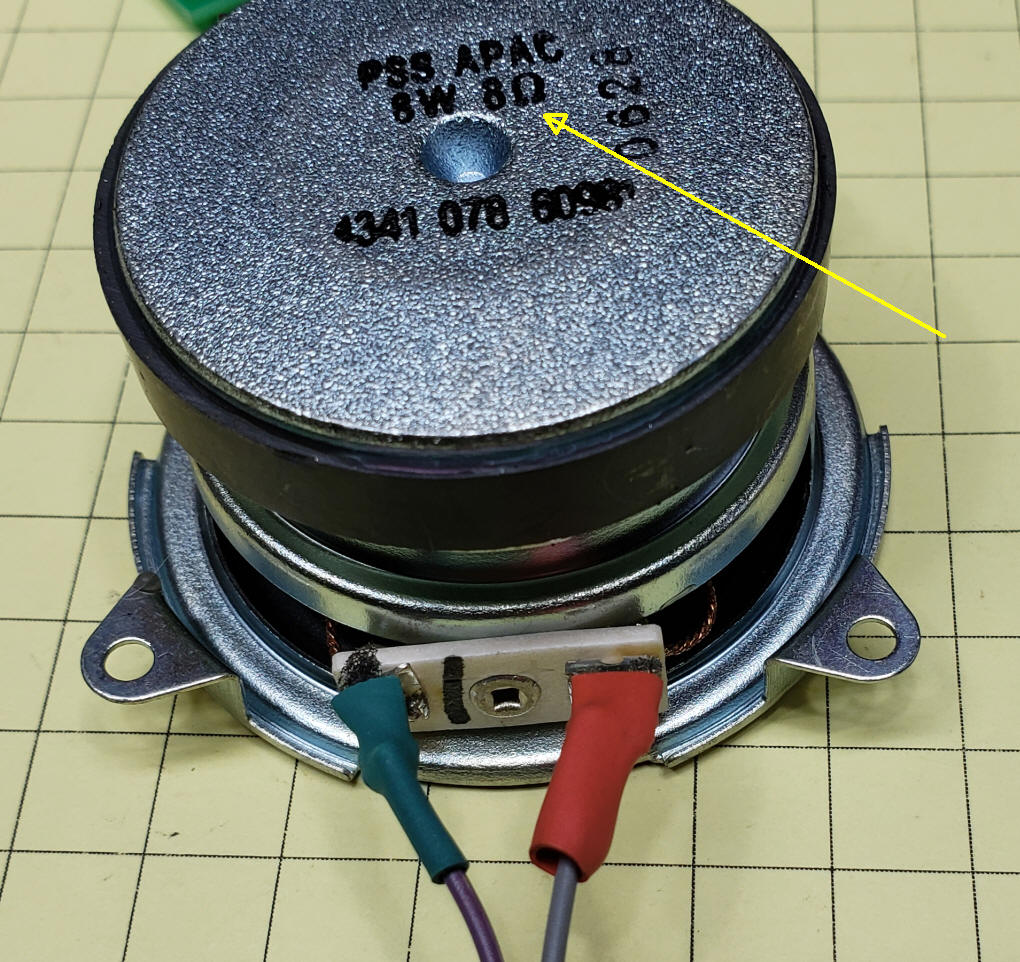
Applying a quick flame finished the installation. Note the marking on the speaker the indicates that it is an 8 ohm device.
|
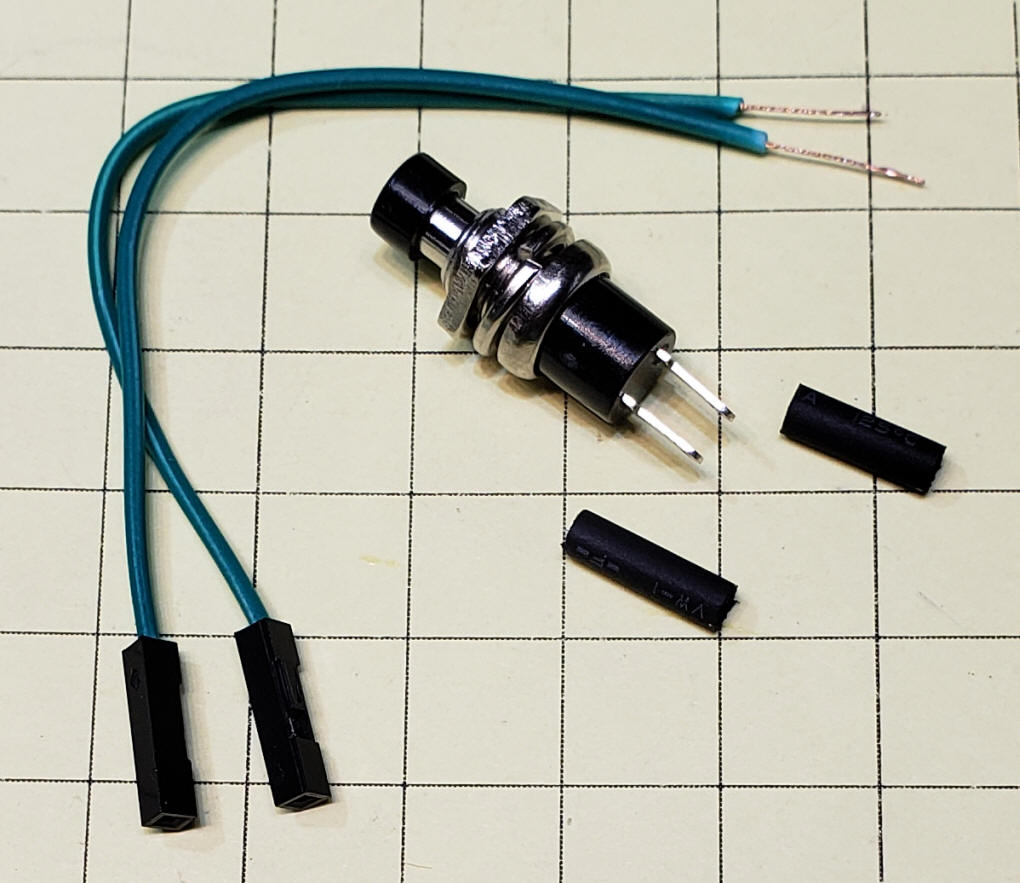
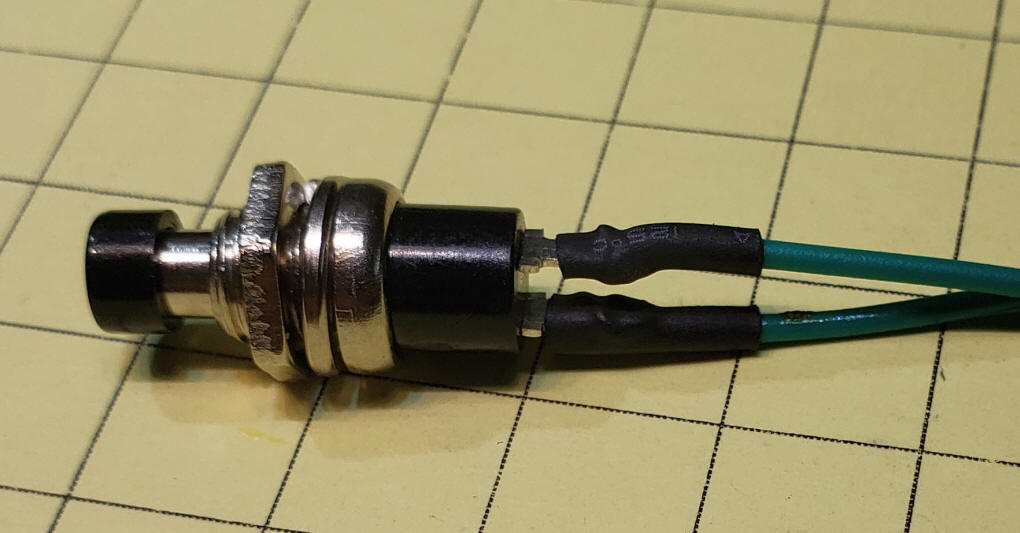
| Pushbutton Switch Any normally open single pole single throw pushbutton switch will work. The one that I used is shown here. Each of the terminals has a small hole in it that makes wrapping the stripped end of the Dupont wire around the terminal very easy.
Here the heat shrink tubing has been heated securing the wires to the terminals.
A normally closed reed switch is an ideal way to trigger a sound when a train goes by. Just put the reed switch on the ties of the track and put a magnet on the train. |
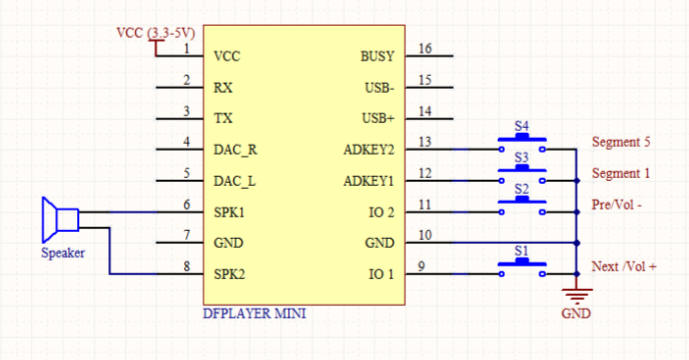
| Connections If you use the Dupont connectors you should have four female ends. Two come from the power supply and two from the speaker. The DFPlayer has 16 pins on it. Their layout and labels are shown here. The pins are numbered from 1 to 16 starting in the upper left corner (next to the notch in the board) and going around in a counter clockwise direction. We will use the following pins
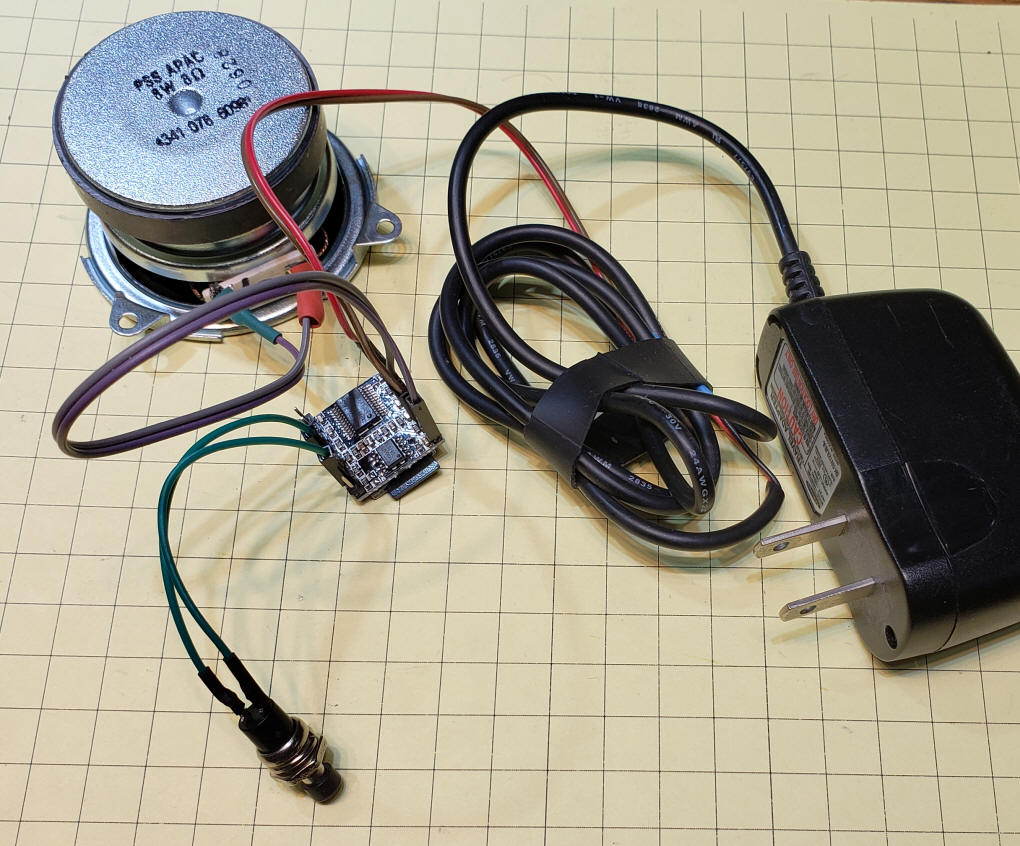
Here the DFPlayer, speaker, power supply and pushbutton are shown wired together. The microSD card has been inserted.
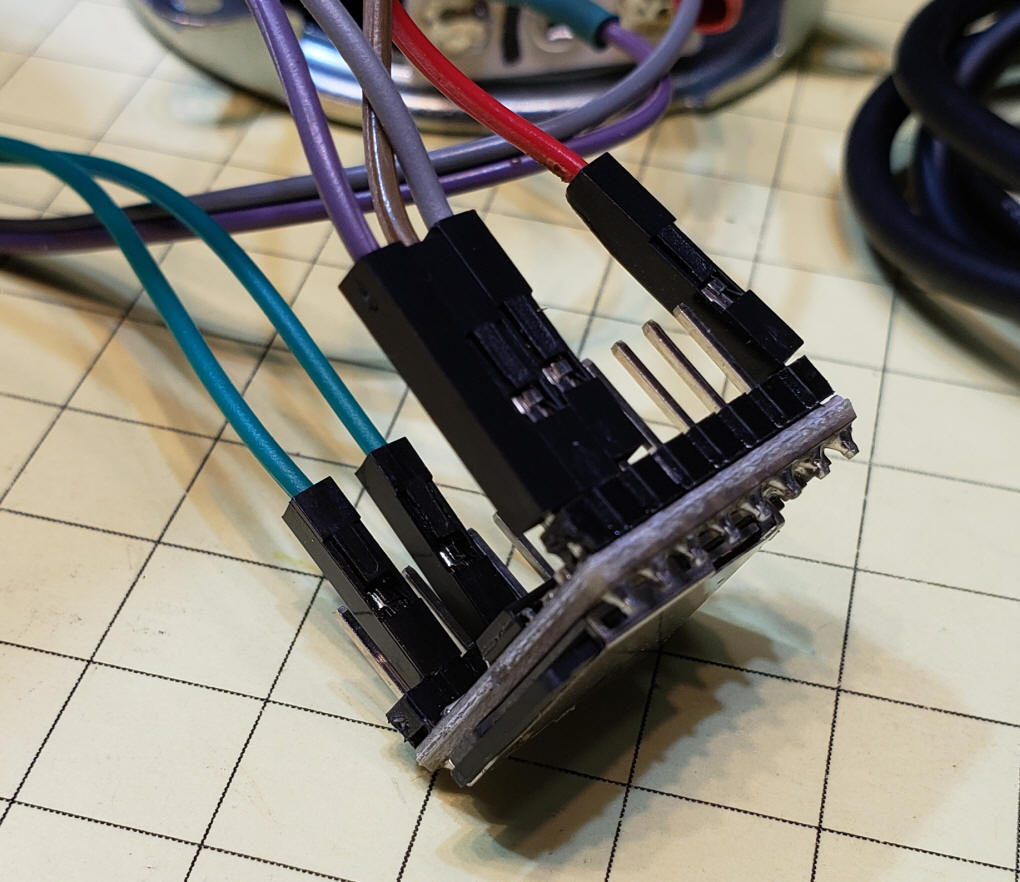
Here is a close-up of the connections on the DFPlayer. The two green wires go to the pushbutton switch. The red and brown wires go to the power supply and the purple and grey wires go to the speaker.
|
| Sound Files The DFPlayer will work with just about any MP3 file. The files must be renamed so that the first file is called 0001.mp3, the second (if you use more than one) as 0002.mp3 and so on, These files must be copied to a microSD card and stored in a folder called MP3.
There are details on how to edit and gather sound files in this article: http://www.trainelectronics.com/Arduino/MP3Sound/TalkingTemperature/
|
| Using the DFPlayer To use the player install at least one file (called 0001.mp3) on a blank microSD called in a folder called MP3. Connect the sparker, power supply and switch to the board. Press the button and you should hear the 0001.mp3 file play. If you saved multiple files you can connect the wire that normally goes to ADKEY_1 and connect it to IO_2. Now each time the button is pressed the DFPlayer plays the next MP3 file. |
| Going Farther If you look over the pin notes below you will see that IO1 and IO2 can be used to change the volume. Just add two pushbutton switches that go to each of those pins and ground. Holding IO2 will increase volume and holding IO1 will decrease it.
|
| What each pin does.
|


