G-Scale Drag Strip Controller
Revised 07-23-08
Initial Setup
- Place the Start and Finish sensors under each track being careful to place the sensor for lane 1 under track 1 and the one for lane 2 under track 2.
.JPG)
- I have had good luck placing a small rubber band under each sensor then onto the adjacent ties to hold them firmly in place.
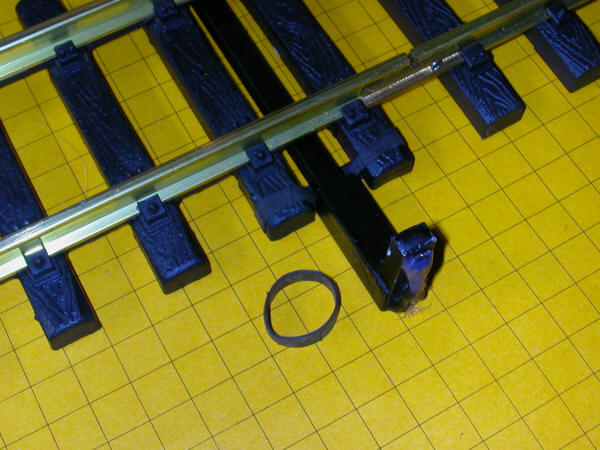
- The rubber bands I use are made from old bicycle tubes (road bike tubes are best as they are smaller)
- Connect the RJ-11 connectors from each set of sensors to the appropriate connection receptacle on the controller.
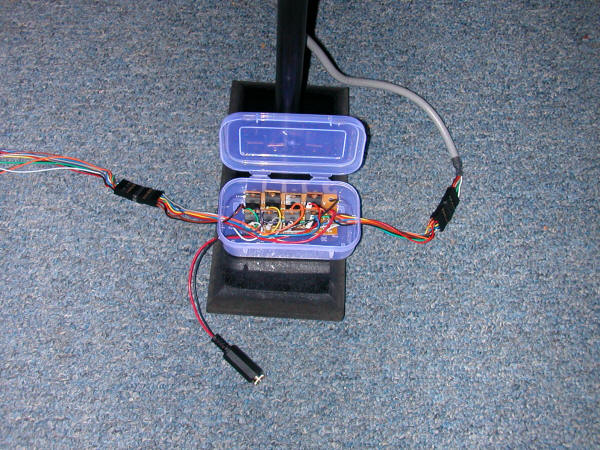
- Connect the "Christmas Tree" lights to the connector on the controller being careful to observe polarity by aligning the sliver markings on the plug and receptacle.
- Connect power to the "Christmas Tree" power board (the separate jack
coming out of the small plastic box that goes to the tree)
-
- Connect power to the controller
Testing the Lights and Sensors
- Once everything is connected you can test the tree lights by briefly
pressing the Reset button. The lights will briefly illuminate in this
order:
- Blue 1
- Blue 2
- Both Amber 1
- Both Amber 2
- Both Amber 3
- Both Green
- Red 1
- Red 2
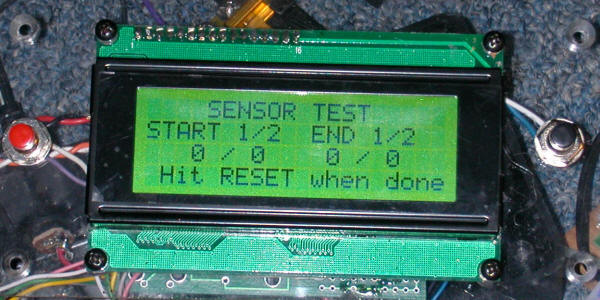
- Press Reset again and, while the copyright page is on the display, press
the Start button. This will take you to the Sensor Test screen.
-
- Briefly place your hand across each of the sensors. While blocking a sensor you should see the count for it increase rapidly. Note that this count only goes to 255 then resets.
- Confirm that the sensors are working and in the proper lane.
Testing Power to the Track
- Connect power to each track and test an engine on each track.
- Note the transformer setting that sends the train in a forward direction. Switch power lines if it is not correct.
- If cut track with diodes is used at either or both ends remember that power must be applied between the cut sections, not at one end.
- Remember that there is no connection between the timing system and the power to the track. Each competitor should be able to independently control their engine.
Running a Race
- Place an engine behind each of the start sensors
- Press the Reset button on the controller
- Wait till the copyright screen clears and it displays "Press Start to Begin Staging"
- Press the Start button. Note that both blue lights are illuminated indicating that neither lane has been staged
- Manually move one engine forward towards the sensor until the red light lights indicating that it is blocking the sensor.
- Move it back just enough to completely extinguish the red light.
- Do the same with the other engine
- Once both blue lights are out the display shows "Press Start to Race"
- Remind the competitors that the timing starts when they cross the sensor and that crossing the sensor before the green light is lit will constitute a false start lighting their lane's red light.
- Press the Start button to start the countdown.
- As the engines cross the start sensor the display shows the reaction time
- Once both engines have crossed the finish the race time is displayed.
- The blue light shows the winning lane.
- Press Reset to start another race