|
Introduction Unfortunately the laptop's screen saver cuts in after 30 minutes and blanks the screen. That forces me to get off of my chair and press the spacebar or shift key to bring the screen back. Having a voice activated Alexa controlled "finger" that could touch a key on the keyboard is surely not the simplest solution but it sounded like a fun project. This servo device places a movable arm just above a key on the keyboard. The statement "Alexa turn on keyboard" cycles the servo arm, pressing down on the shift key & renewing the screen - nice! The application presented here is just one way that the servo can be used. Other applications include throwing a wall switch that turns lights on/off or moving some other device, perhaps a latch on a door or cabinet. If you come up with other applications please drop me an email and let me know (dave@davebodnar.com). |
Hardware
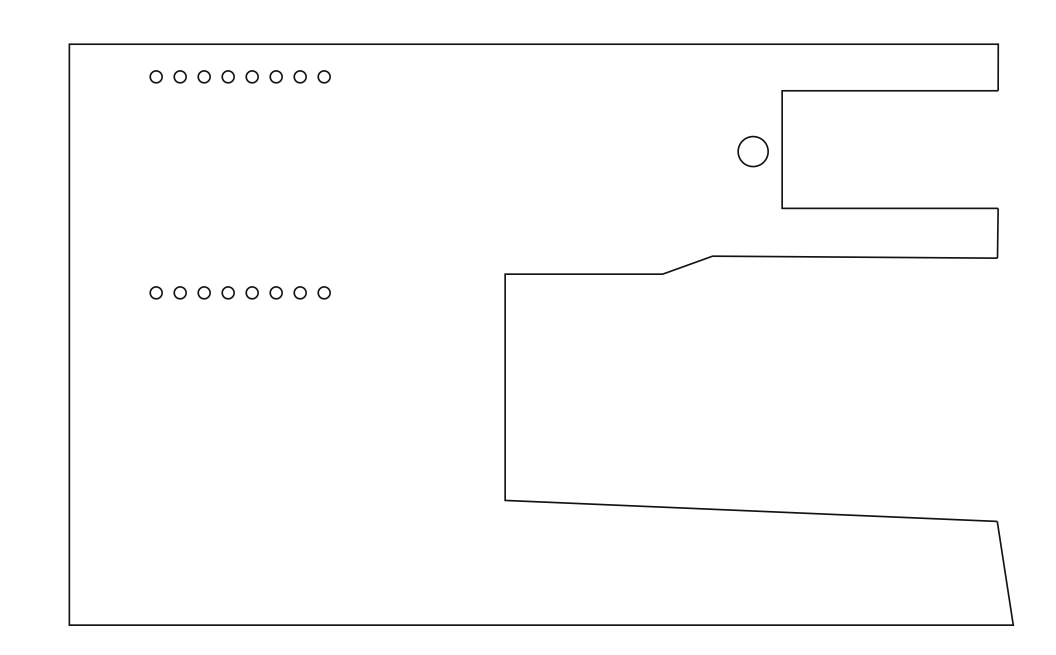
The "clamp" that holds it all together is shown here. The servo goes in the upper right and the Wemos goes into the holes to the left. The large tapered slot holds it to the side of the laptop. You will need to be changed the dimensions of that slot to fit your laptop. Click here to download a PDF or CorelDraw version of this clamp. The sixteen small holes for the Wemos are not electrically connected to anything - the are just there to help hold the controller in place.
|
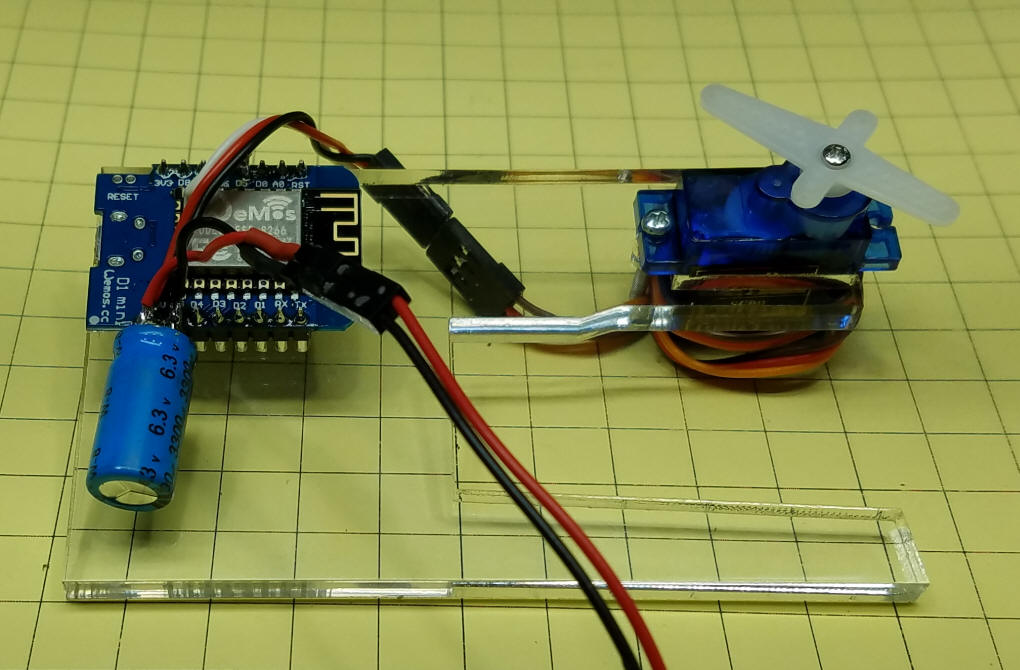
| Putting it Together The parts that I used are listed above and shown here.
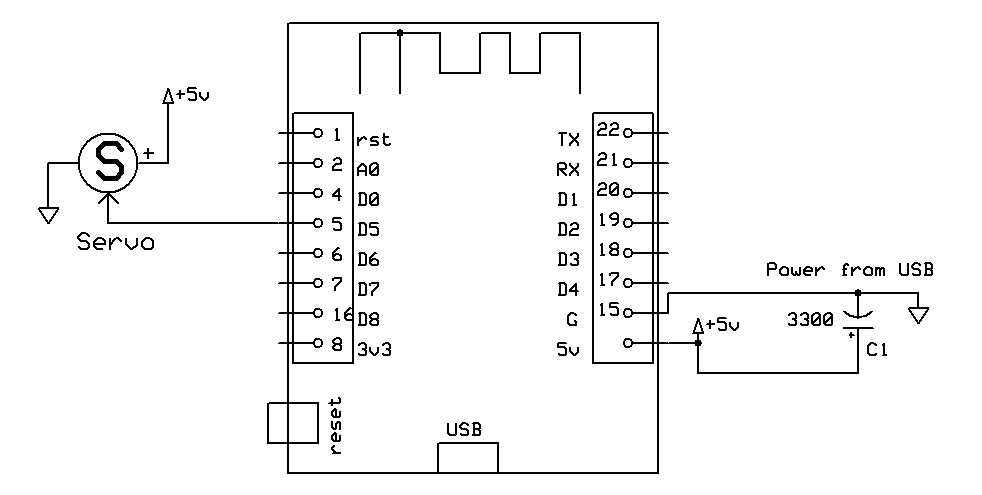
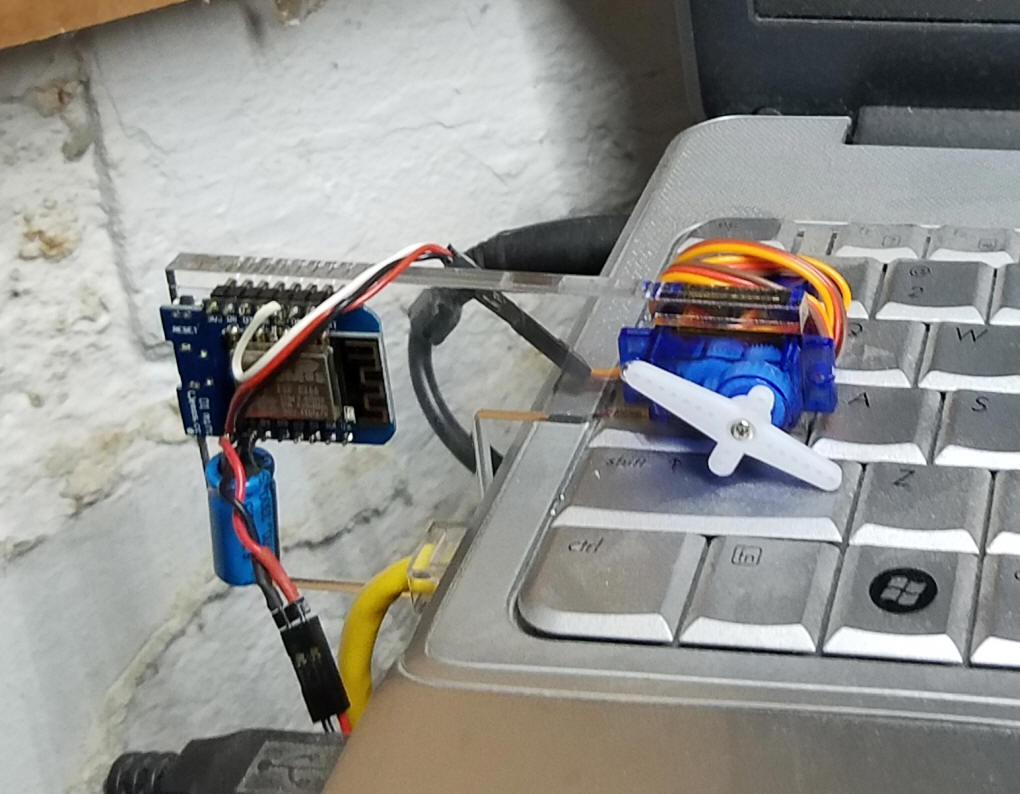
All of the connections are made by soldering right to the Wemos D1. The capacitor and 5 volt power connecting go to the 5v and G pins. The servo also connects to these pins for power. The servo's data line (the white wire in this photo) goes to pin D5. Those are the only connections that are needed. Power can be supplied from an external 5 volt power supply or, as in this case, by a USB cable plugged into the laptop. The 3300 uf capacitor was added when the Wemos crashed periodically, probably due to variations in the supply voltage. Since the cap was added the unit has been very stable. Other electrolytic caps of 1000 uf or more should work.
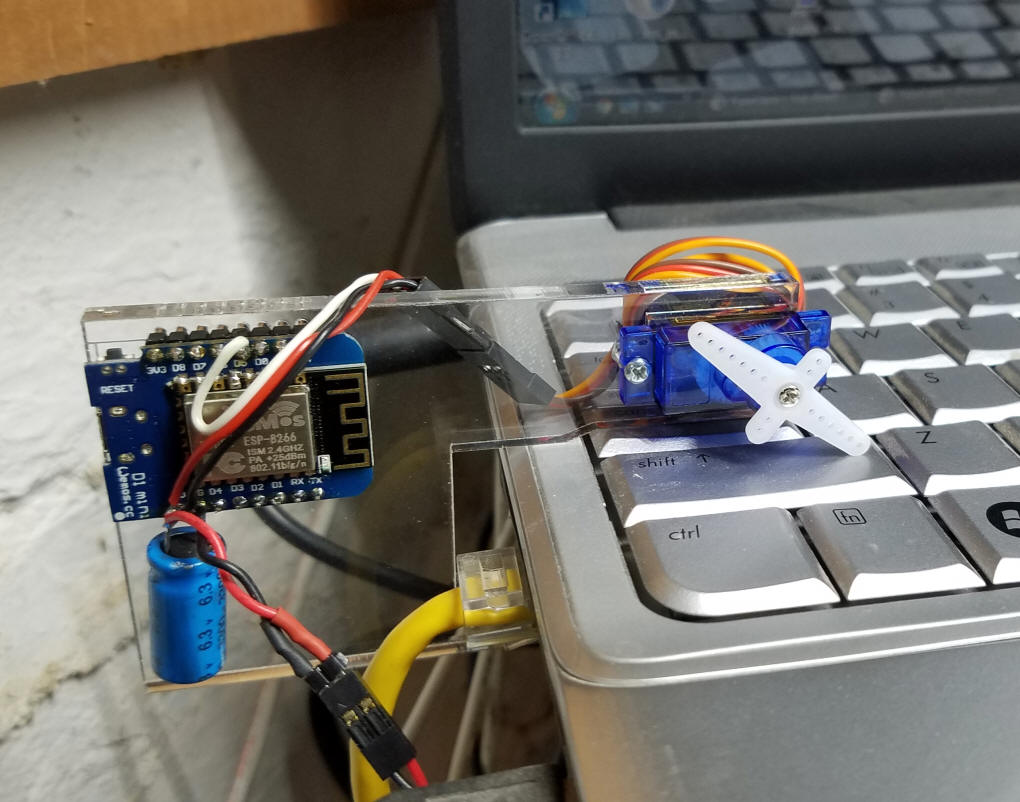
Here the Wemos & servo are mounted and the acrylic clamp has been placed on the keyboard.
|
| Using with Alexa After programming with the code below (be sure to change the SSID and password to match your system) I told Alexa to discover devices. In a minute or so she reported that she had found a new device called keyboard. Once that is set the servo can be activated by saying "Alexa turn on keyboard" - note that there is no need to say "Alexa turn OFF keyboard" as the servo arm returns to the off position after pressing a key. |
| Other Uses The servo can be used to move other things as well. Thingiverse.com has several designs for a servo operated light switch including this one that can be 3D printed: https://www.thingiverse.com/thing:1156995/#comments |
Software - file name: wemos-3-oneLED-SERVO-test-v2-4 The core code is below - you need to download this ZIP file to get the other tabs that are needed. If you want to change the name that Alexa uses with this device from "keyboard" to something else you need to change the word "keyboard" to your word in a number of places. To simplify this I just changed ALL instances of "keyboard" to the new word using the search and replace function (edit / find). The code includes a routine that blinks the on-board LED on the Wemos every second. This was added to give the controller a "heart beat" during testing. If you find it unnecessary or distracting it can be deleted. Note that a number of libraries must be added to your Arduino IDE for this sketch to compile - They are at the top of the listing in the "#include" statements. You also have to add the Wemos to the IDE (see: http://www.instructables.com/id/Wemos-ESP8266-Getting-Started-Guide-Wemos-101/ ) // working d. bodnar 12-21-2017
/*
static const uint8_t D0 = 16;
static const uint8_t D1 = 5;
static const uint8_t D2 = 4;
static const uint8_t D3 = 0;
static const uint8_t D4 = 2;
static const uint8_t D5 = 14;
static const uint8_t D6 = 12;
static const uint8_t D7 = 13;
static const uint8_t D8 = 15;
static const uint8_t RX = 3;
static const uint8_t TX = 1;
*/
#include <Servo.h>
#include <ESP8266WiFi.h>
#include <ESP8266WebServer.h>
#include <WiFiUdp.h>
#include <functional>
#include "switch.h"
#include "UpnpBroadcastResponder.h"
#include "CallbackFunction.h"
unsigned long previousMillis = 0;
const long interval = 1000;
boolean connectWifi();
void shiftkeyOn();
void shiftkeyOff();
// Change this before you flash
const char* ssid = "main2";
const char* password = "pppppppp";
boolean wifiConnected = false;
UpnpBroadcastResponder upnpBroadcastResponder;
Switch *shiftkey = NULL;
Servo myservo; // create servo object to control a servo
int pos = 0; // variable to store the servo position
void setup()
{
pinMode(BUILTIN_LED, OUTPUT); // set onboard LED as output
Serial.begin(9600);
wifiConnected = connectWifi();
if (wifiConnected) {
upnpBroadcastResponder.beginUdpMulticast();
shiftkey = new Switch("shiftkey ", 80, shiftkeyOn, shiftkeyOff);
Serial.println("Adding switches upnp broadcast responder");
upnpBroadcastResponder.addDevice(*shiftkey);
}
}
void loop()
{
if (wifiConnected) {
upnpBroadcastResponder.serverLoop();
shiftkey->serverLoop();
}
// unsigned long currentMillis = millis();
if (millis() - previousMillis >= interval) {
previousMillis = millis();
digitalWrite(BUILTIN_LED, !digitalRead(BUILTIN_LED));
}
}
void shiftkeyOn() {
myservo.attach(14); // attaches the servo on pin 12 to the servo object
Serial.print("Switch 1 turn on ...");
for (pos = 0; pos <= 90; pos += 1) { // goes from 0 degrees to 180 degrees
myservo.write(pos); // tell servo to go to position in variable 'pos'
Serial.println(pos);
delay(15); // waits 15ms for the servo to reach the position
}
for (pos = 90; pos >= 0; pos -= 1) { // goes from 180 degrees to 0 degrees
myservo.write(pos); // tell servo to go to position in variable 'pos'
Serial.println(pos);
delay(15); // waits 15ms for the servo to reach the position
}
myservo.detach(); // attaches the servo on pin 12 to the servo object
}
void shiftkeyOff() {
Serial.print("Switch 1 turn off ...");
}
// connect to wifi – returns true if successful or false if not
boolean connectWifi() {
boolean state = true;
int i = 0;
WiFi.mode(WIFI_STA);
WiFi.begin(ssid, password);
Serial.println("");
Serial.println("Connecting to WiFi");
// Wait for connection
Serial.print("Connecting ...");
while (WiFi.status() != WL_CONNECTED) {
delay(500);
Serial.print(".");
if (i > 10) {
state = false;
break;
}
i++;
}
if (state) {
Serial.println("");
Serial.print("Connected to ");
Serial.println(ssid);
Serial.print("IP address: ");
Serial.println(WiFi.localIP());
}
else {
Serial.println("");
Serial.println("Connection failed.");
}
return state;
}
|