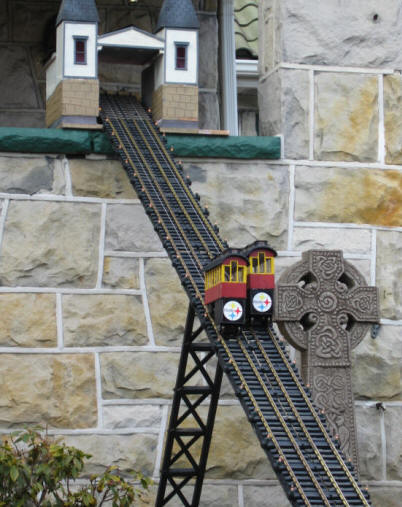
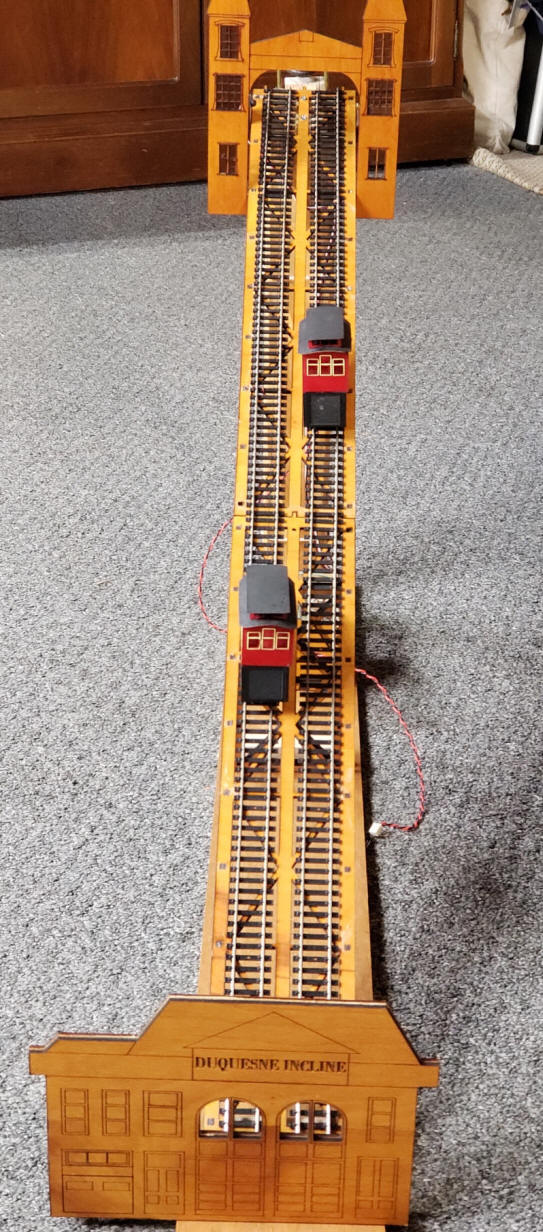
| Some years ago I built a G-Scale model of
the Duquesne Incline and put it in front of my house for Christmas.
I also set it up each time the Steelers made it to the Super Bowl.
Details on how this was built are here: http://www.davebodnar.com/railway/incline/index.htm
I was very happy with the model but thought it would be fun to do another incline model utilizing my laser cutter. This web page and the accompanying video describe my current design & implementation. |
||
|
The objective of this project is to design the
incline cars and related items in CorelDraw and cut them out on my
50 watt laser cutter.
An
existing auto-reverse controller
will be modified to control the up/down movement of the two cars.
The initial design will be done in HO scale (1:87). CorelDraw allows for increasing or decreasing scale so any size can be accommodated. |
||
| Laser Cutter Software Two programs are used with the laser cutter. The first is called CorelDraw. I have been using it since the early 1990's and have upgraded its version many times. The version that I currently use is X6 and was released in 2012. While it is not the newest version it is compatible with my laser cutter and works very well. CorelDraw cannot "talk" directly to the laser cutter. That is done with a program called RDWorks . There is a plug-in for CorelDraw that allows you to transfer CorelDraw files right to RDWorks where you can send them to the laser cutter. Files can either be sent to the laser cutter using a USB stick, by a USB cable or by Ethernet. While CorelDraw is not simple to learn it is very powerful and does a wonderful job of creating files for the laser cutter. Hundreds of CorelDraw tutorial videos are on YouTube. My favorite series is by Doug Green. I am a much better CorelDraw user thanks to his videos - highly recommended. The CorelDraw files that I used for the HO version are at the bottom of this page. |
||
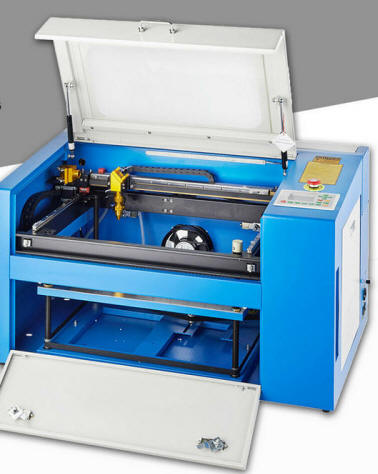
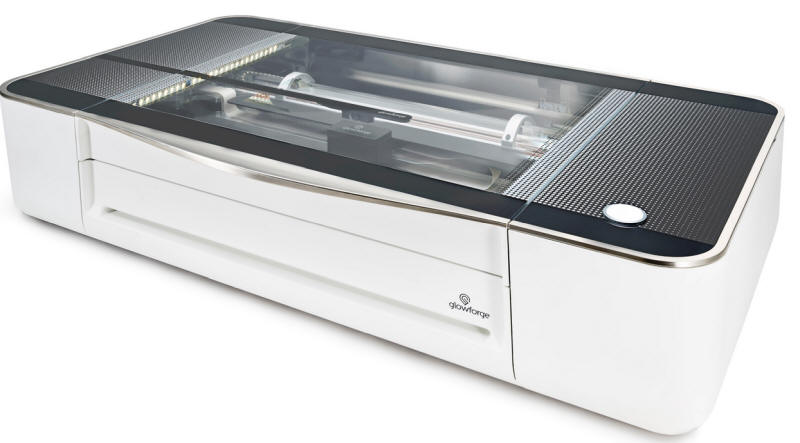
| My Laser Cutters I have two laser cutters. The oldest one and my "go-to" machine is a 50 watt unit that I purchased in 2016 for about $1500. It replaced a 40 watt laser cutter that I got the year before. The 50 watt laser cutter is MUCH more capable than the 40 watt and surely worth the $1000 increase in price.
The unit that I use and that is compatible with the software that I use is shown below.
The other laser cutter is a Glowforge Pro that was many times more expensive than the 50 watt unit. It works very well and has great software but takes a good bit of time to wake up when first turned on and that can be frustrating.
The older machine can be up and running and cutting inside of 30 seconds - a real plus! |
||
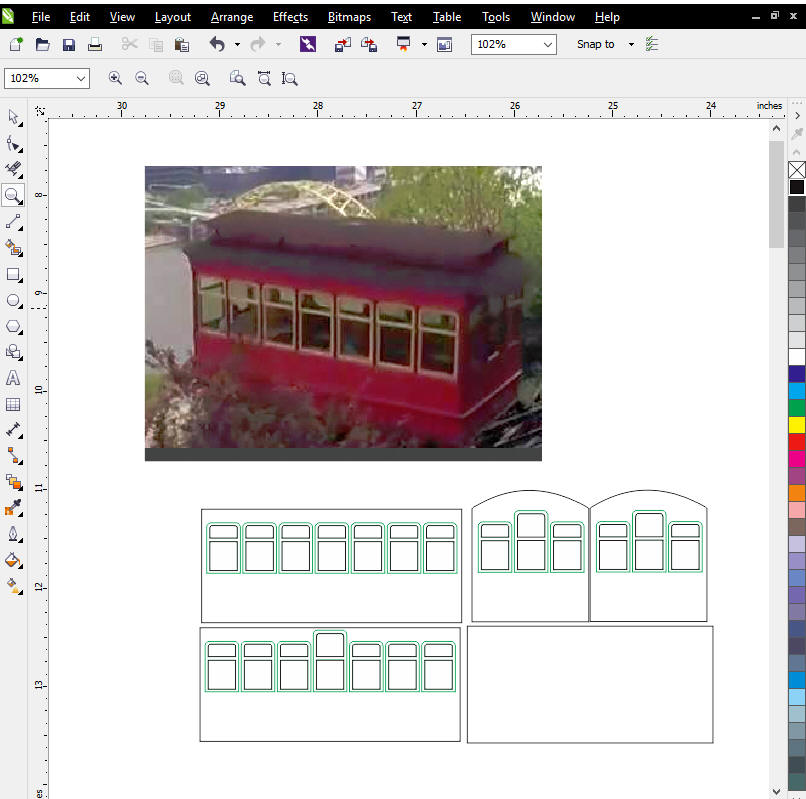
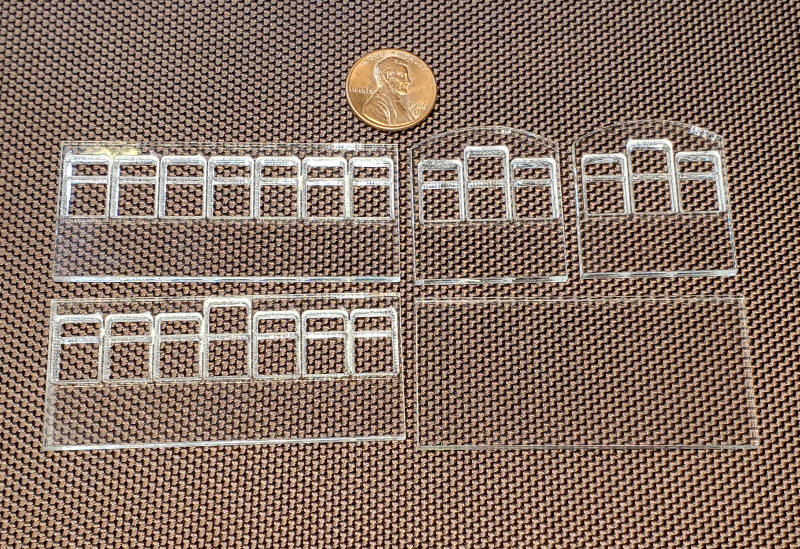
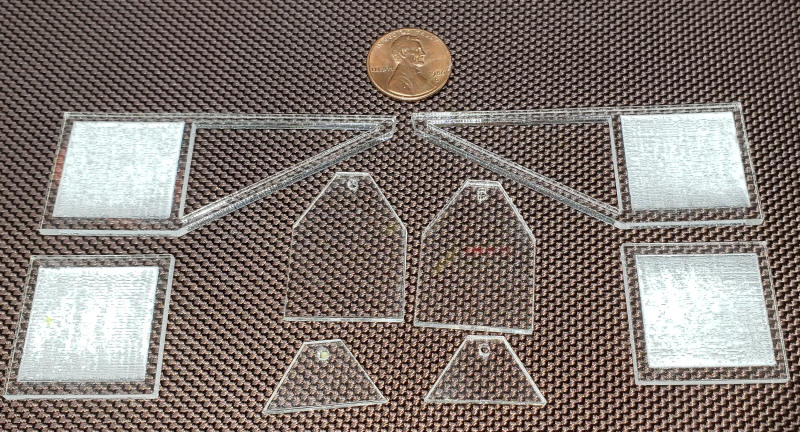
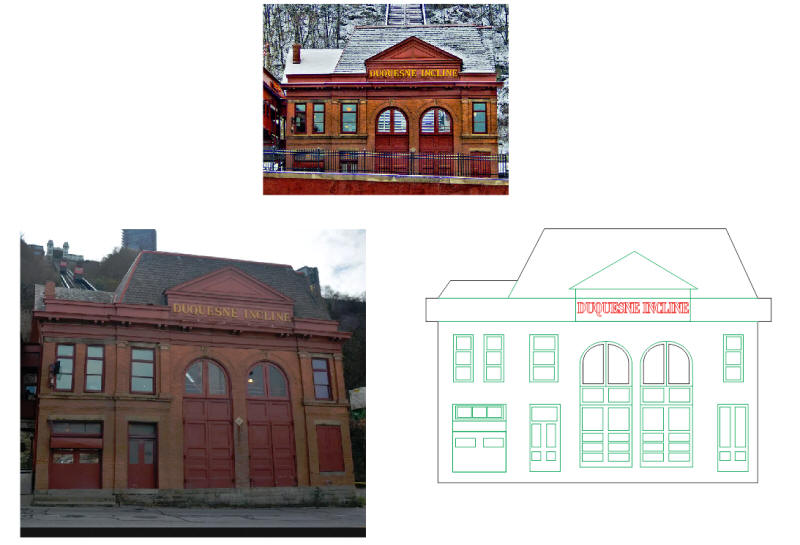
| Creating the Incline I searched the Internet and could not find any drawings or dimensions for the Duquesne Incline. I did find photos and took a good many of my own. For HO I decided that the car should be about 2.6" long and a bit over 1" wide.
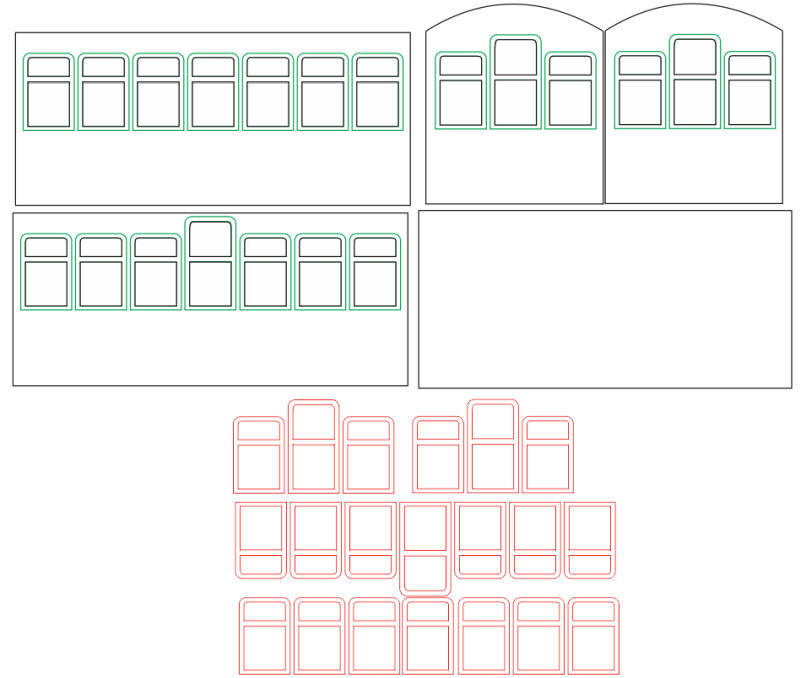
To create the drawings I imported a photo of the side of the incline into CorelDraw and did the design next to it. This allowed me to preserve the perspective of the cars. This image shows a photo above the drawing of two sides, two ends and the bottom of each car. The outline of each part and the inside of each window are drawn in black. These items will be cut at high power so that they will be cut out. The outside border of each window is done in green. These areas will be engraved (etched) so that they are thinner than the surrounding material but not cut clear through.
At the bottom of this image you can see the trim for each window in red. These were cut from thin, yellow cardboard. The fit perfectly into each etched area around each window. This saved me from trying to mask and paint each window. Something I did not look forward to doing!
All of the car parts were cut from acrylic that I purchased at the local hardware store. It was about 0.09" thick.
|
||
|
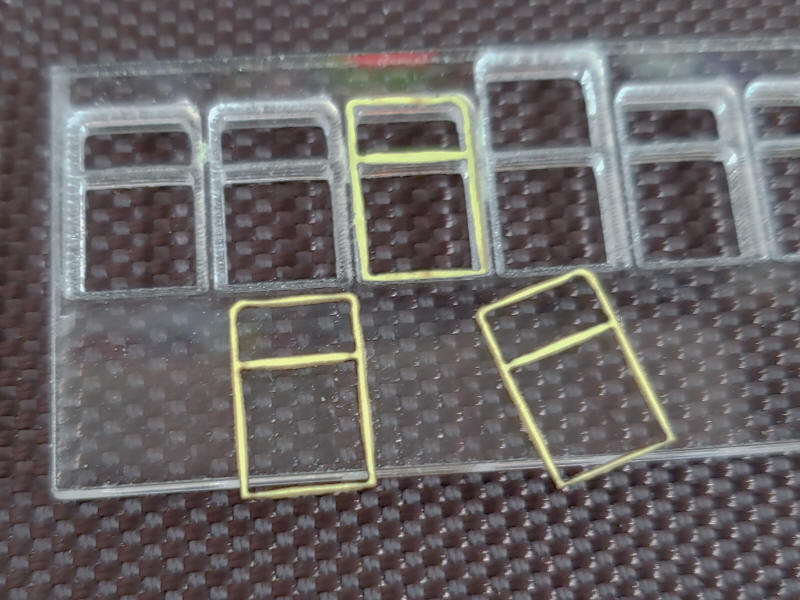
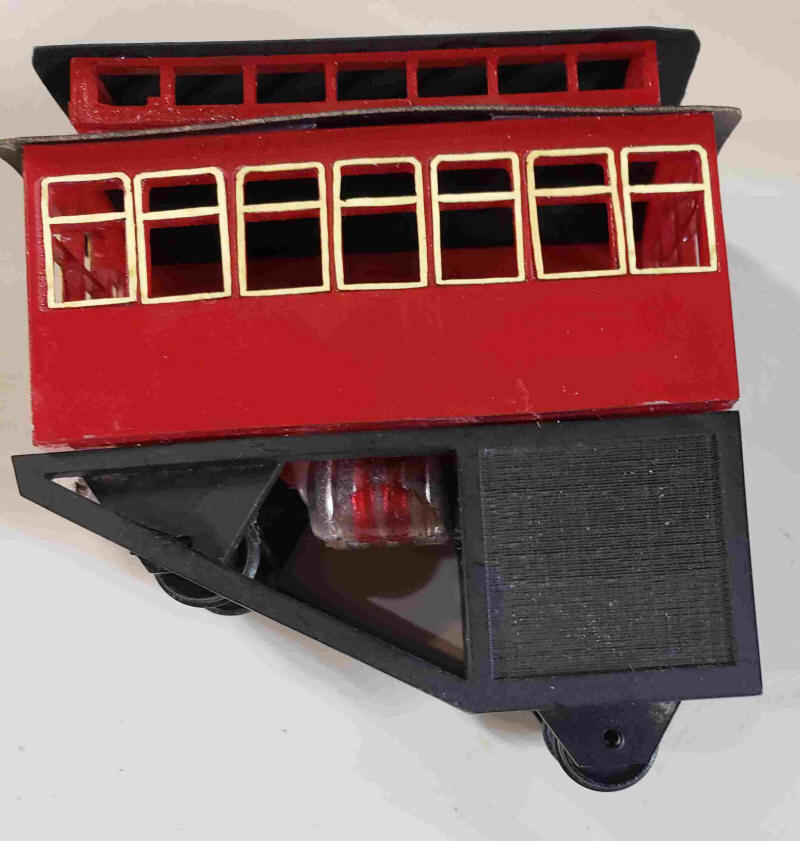
Here you can see three of the window edge pieces that were cut from thin yellow card stock. The fit nicely into the recesses around each window.
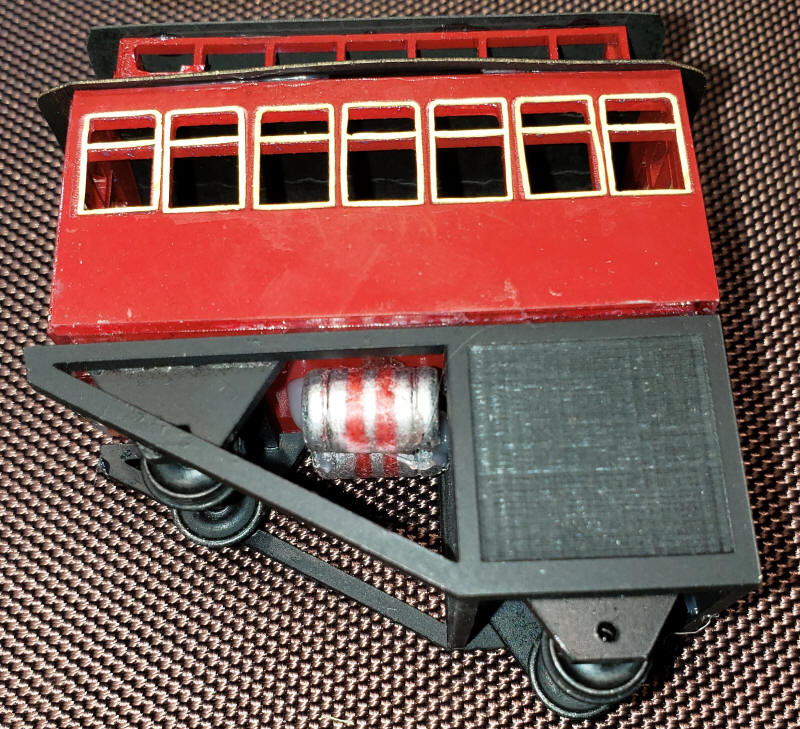
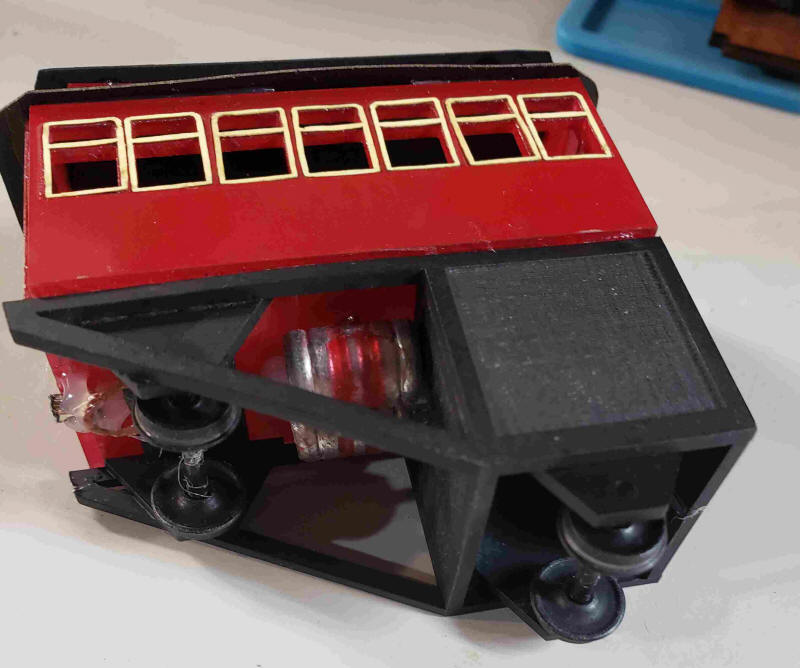
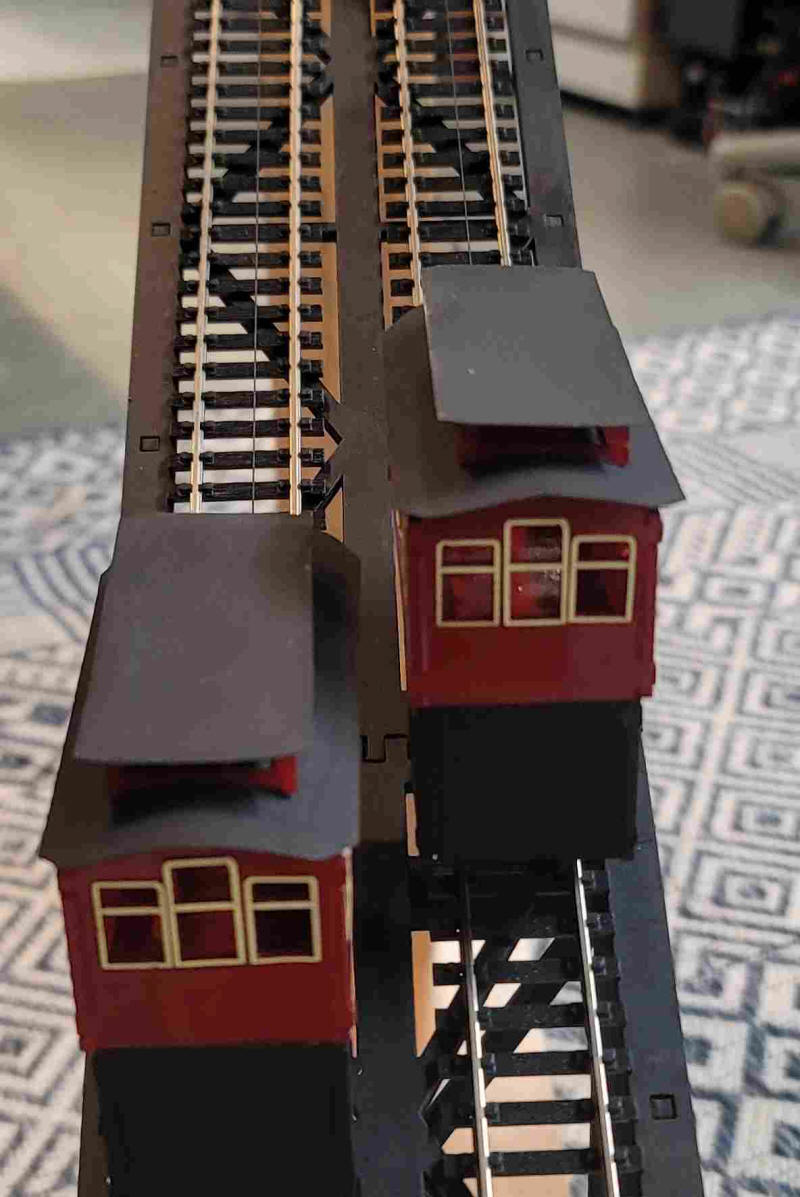
Here is the car after painting it red and adding the window trim. The two objects under the car are lead weights. You can also see the HO scale wheels that fit under each car.
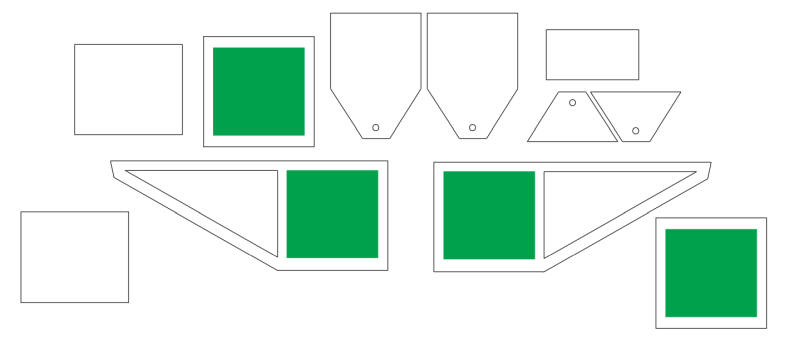
The base for each car is made up of these parts. The square sections have a smaller, square section engraved in them. The angle of the base matches the angle of the track, 30 degrees.
The roof is made up of two pieces of thin card stock that were bent into a curve that matched the ends of the cars. In between is a clearstory made from acrylic
|
||
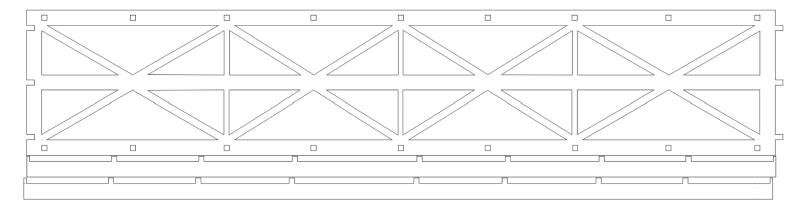
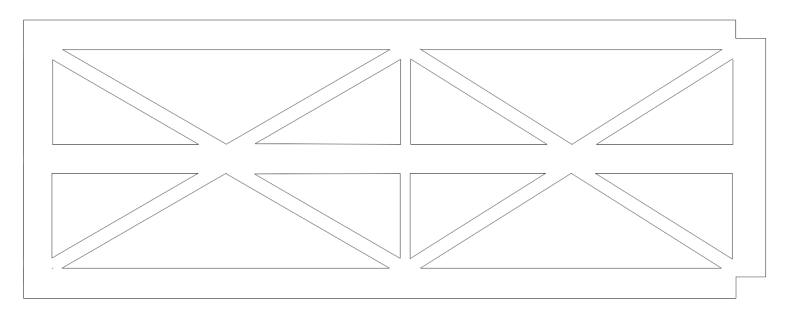
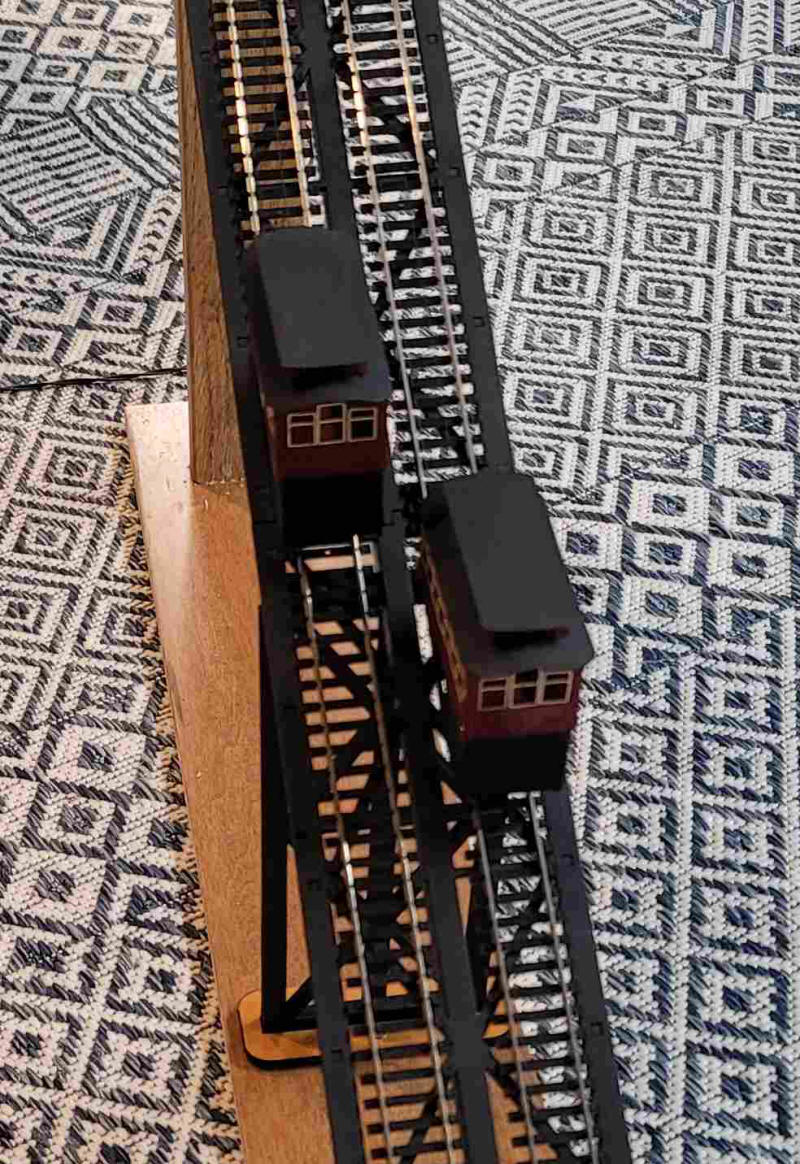
| Track Support For an HO scale incline I was able to cut the track support base from 1/8" plywood. The laser cutter is limited to an 18" wide cut so I had to make it into two pieces with joints between the sections.
These supports were mounted at a 30 degree angle between a base board and a vertical support. The support shown here was used to hold up the center of the track support.
|
||
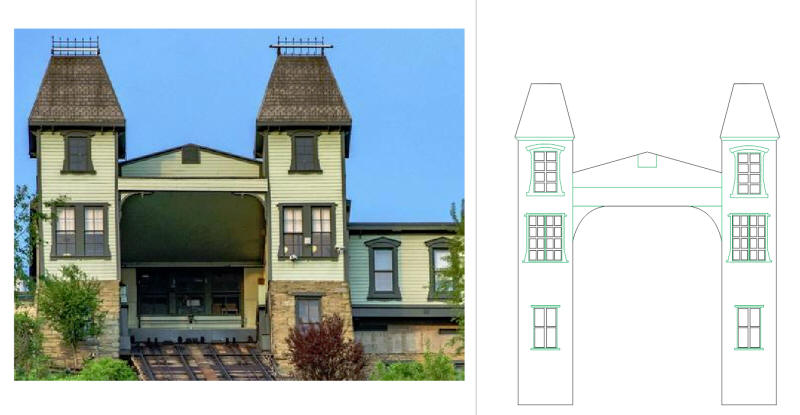
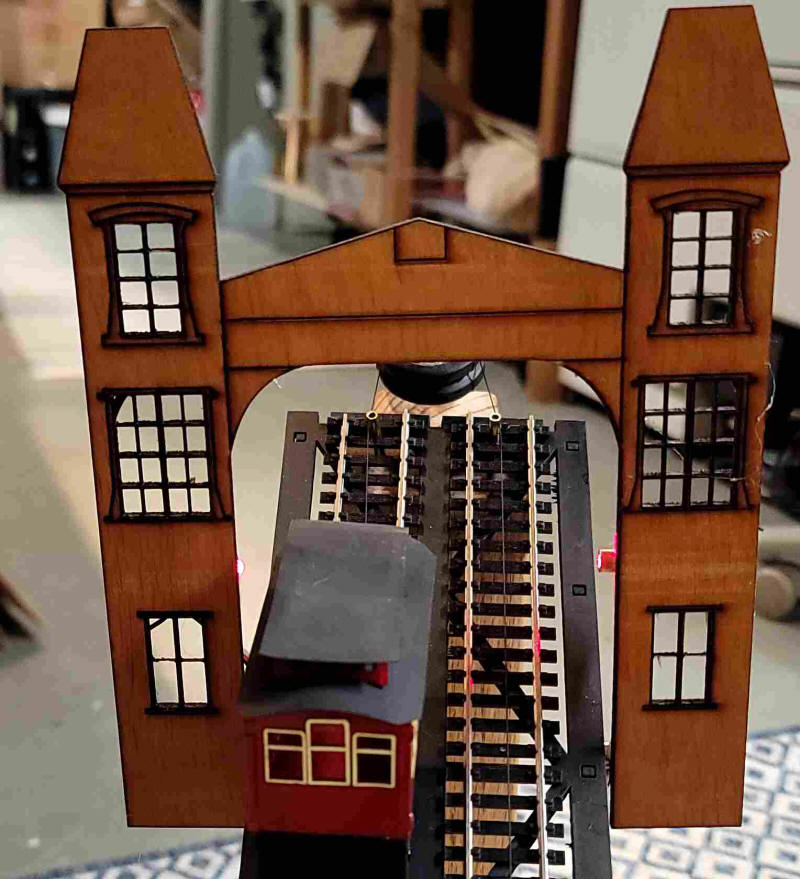
| Top and Bottom Buildings There are buildings at the top and the bottom of the incline. I did not invest the time that it would take to make 3D buildings but did do 2D representations of them. Here you can see how the CorelDraw images were done next to photos. The parts to be cut are in black while the etched parts are in green.
|
||
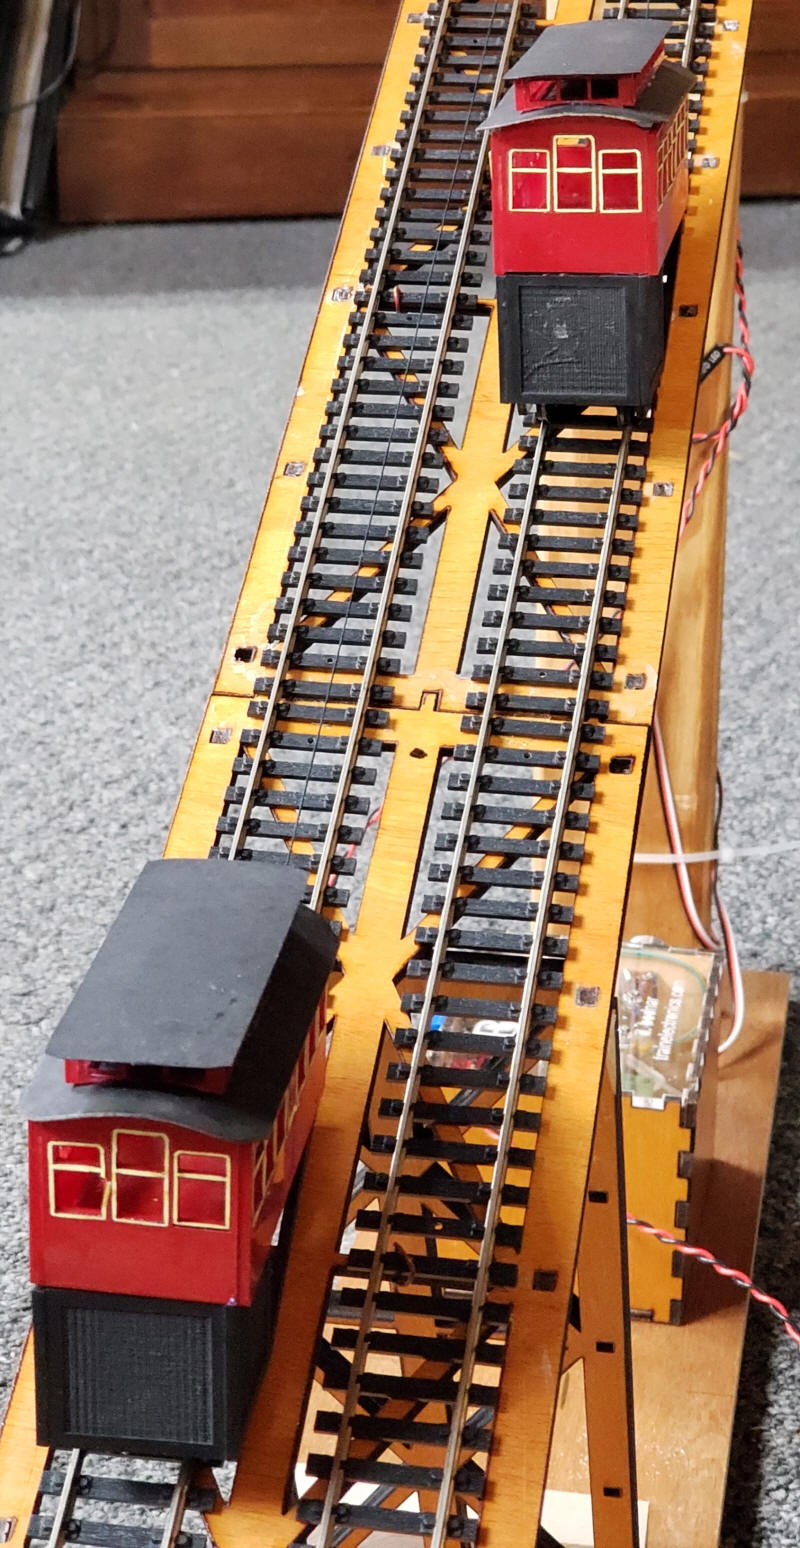
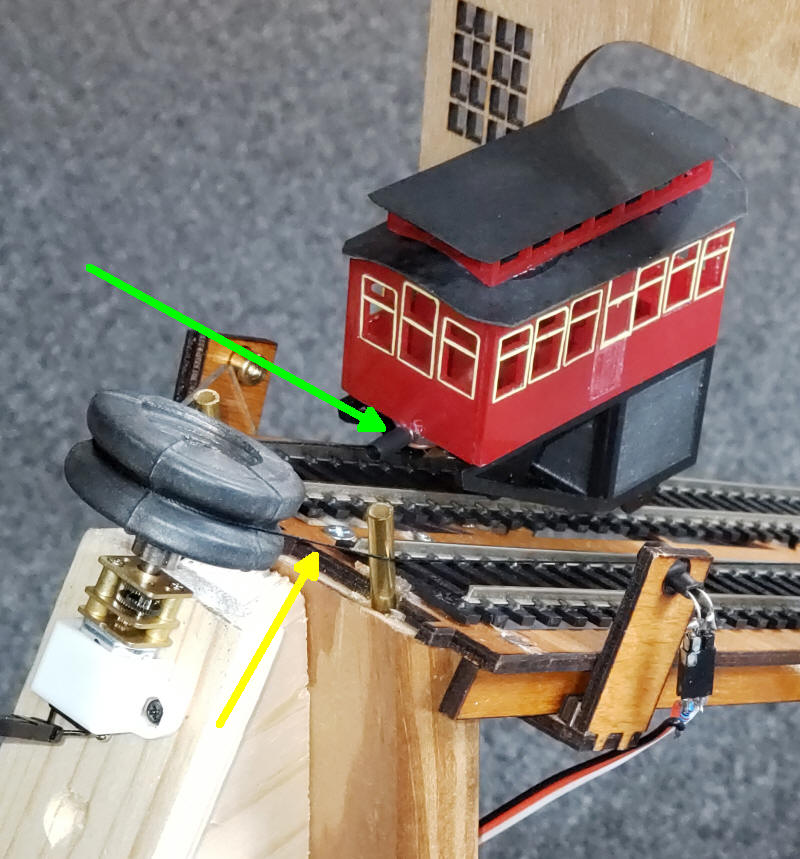
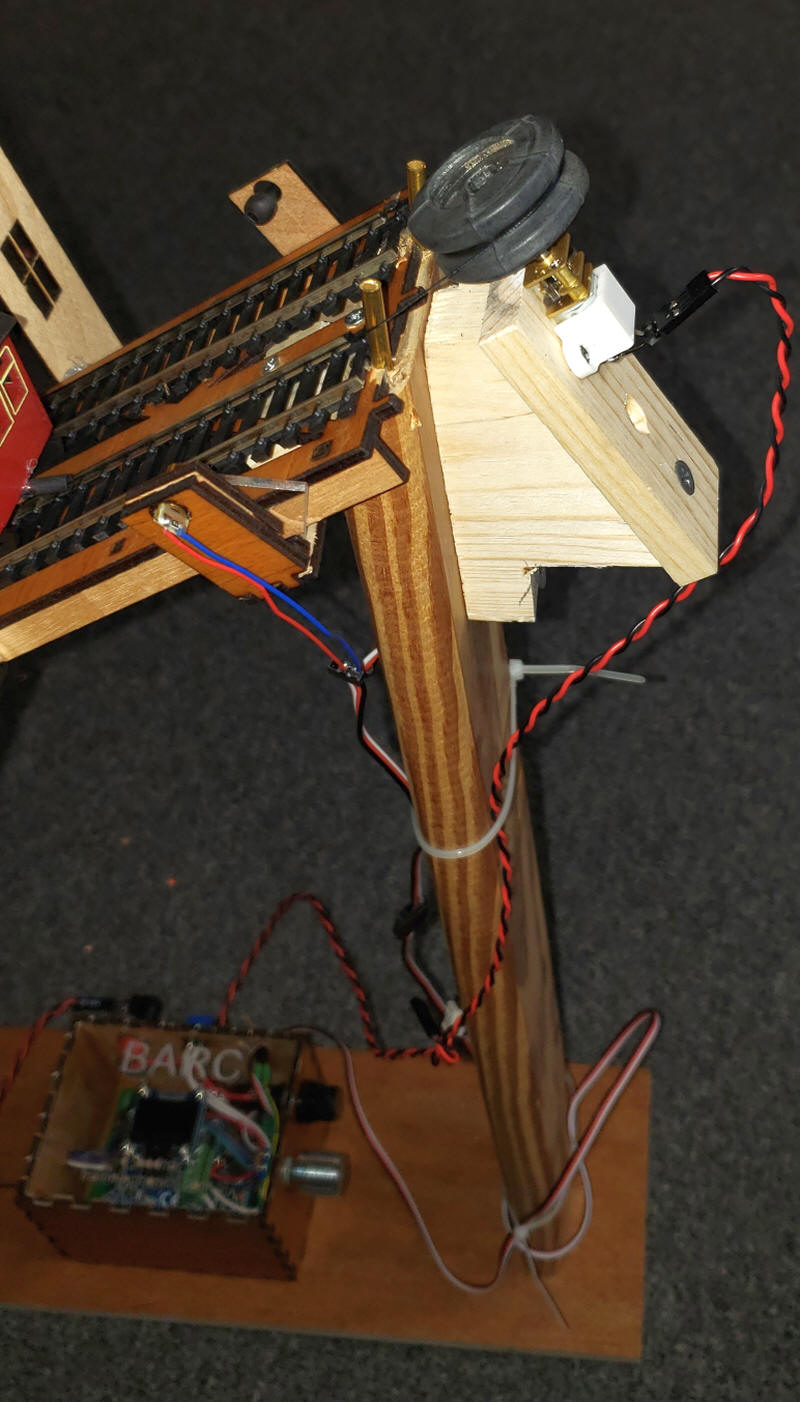
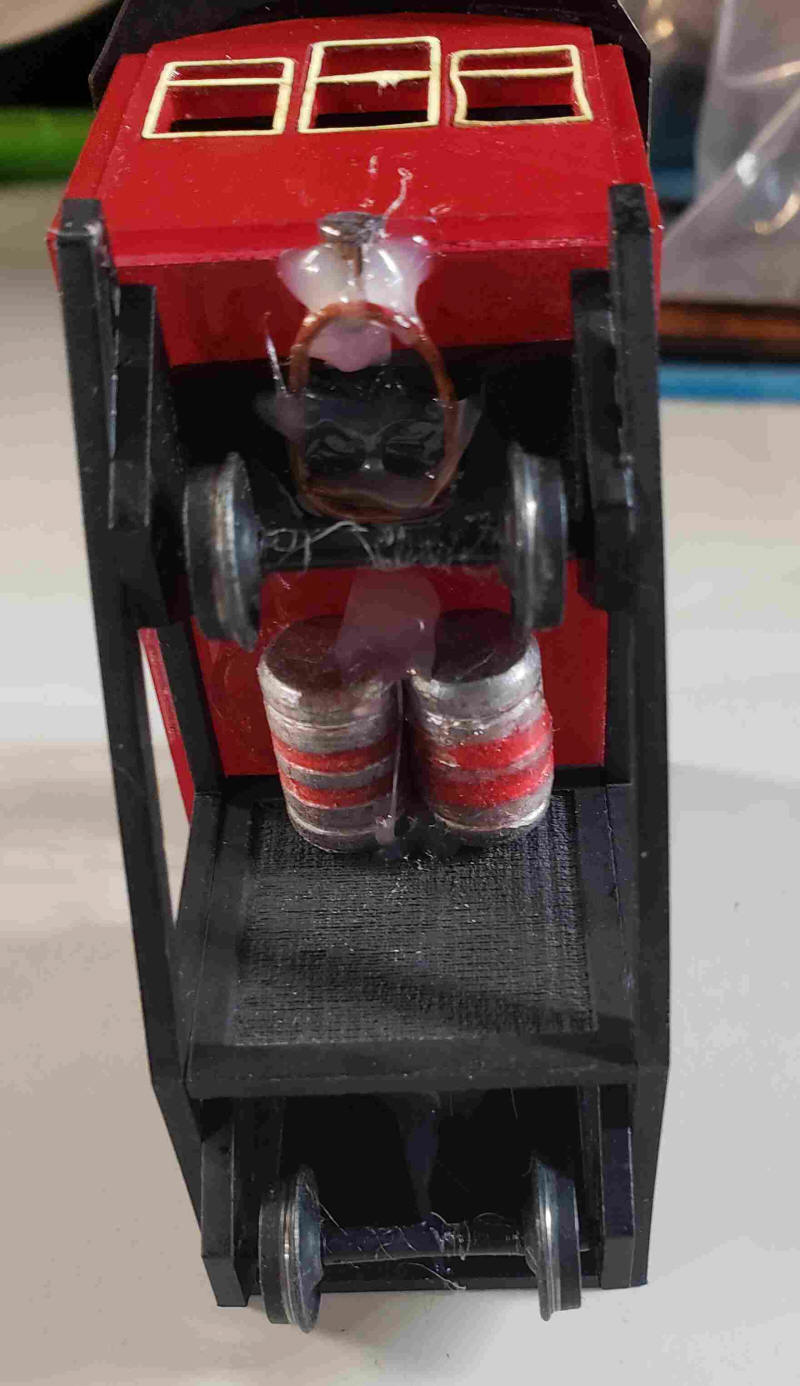
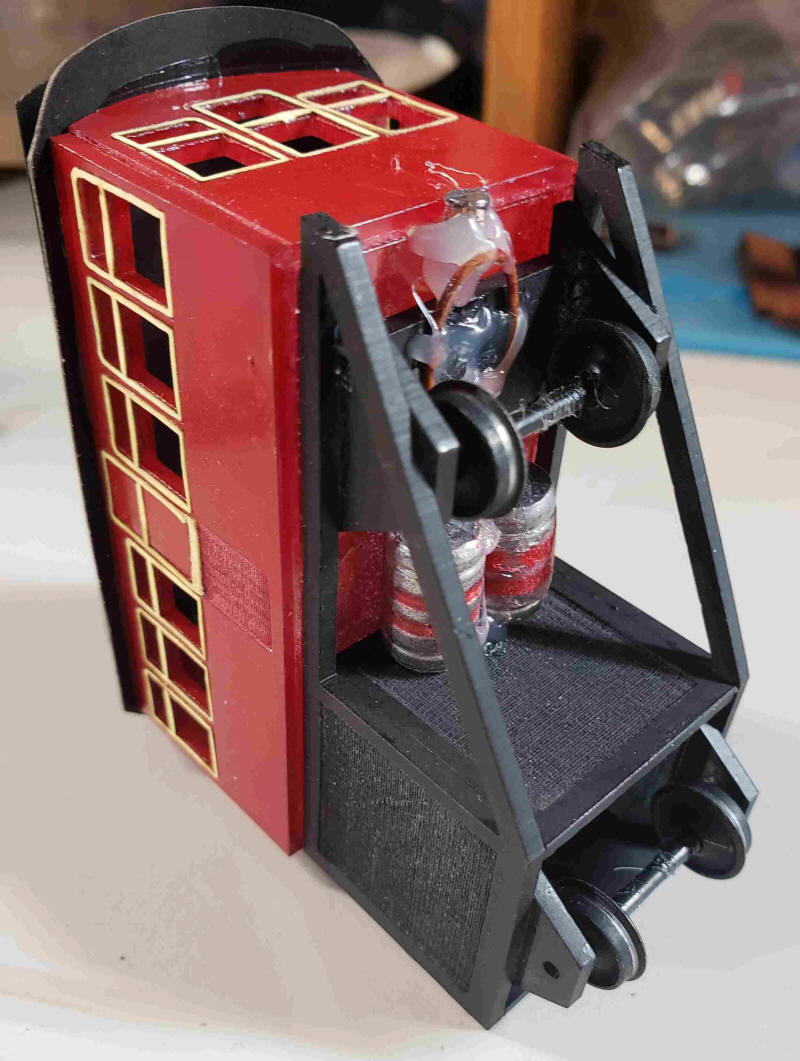
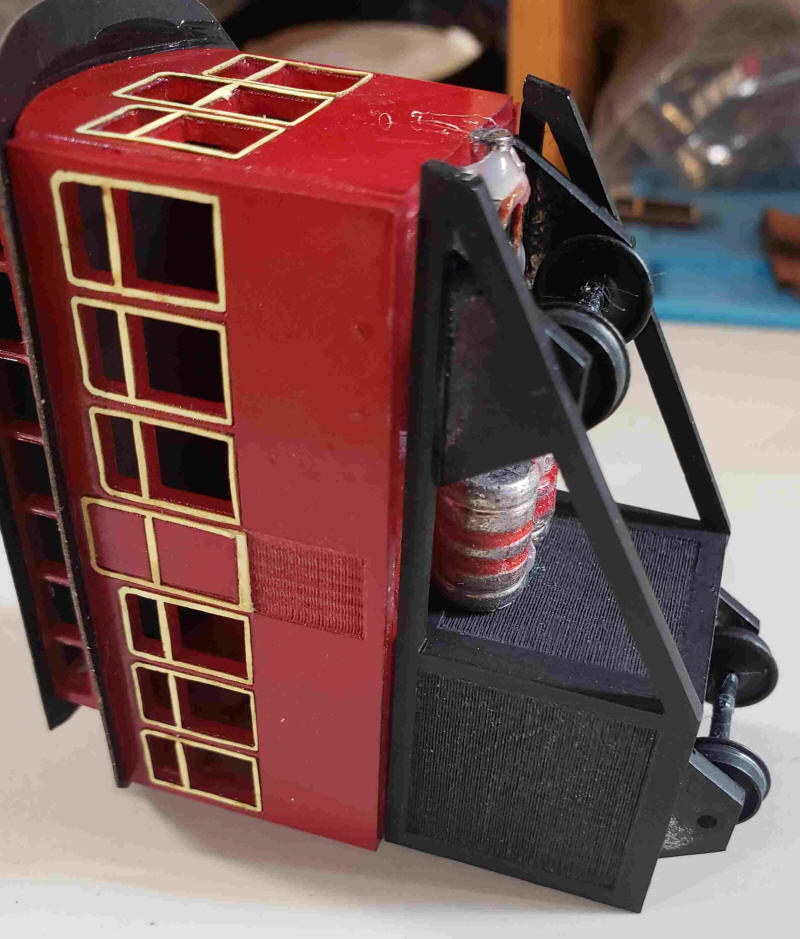
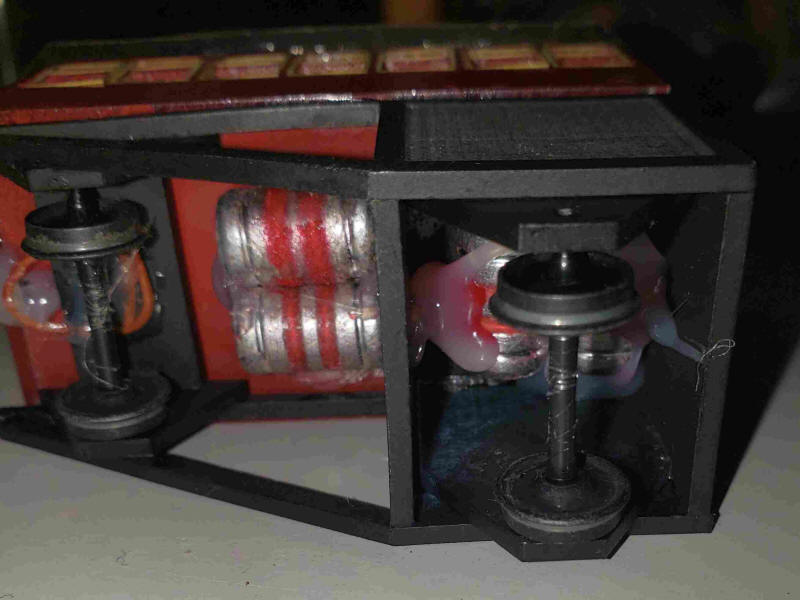
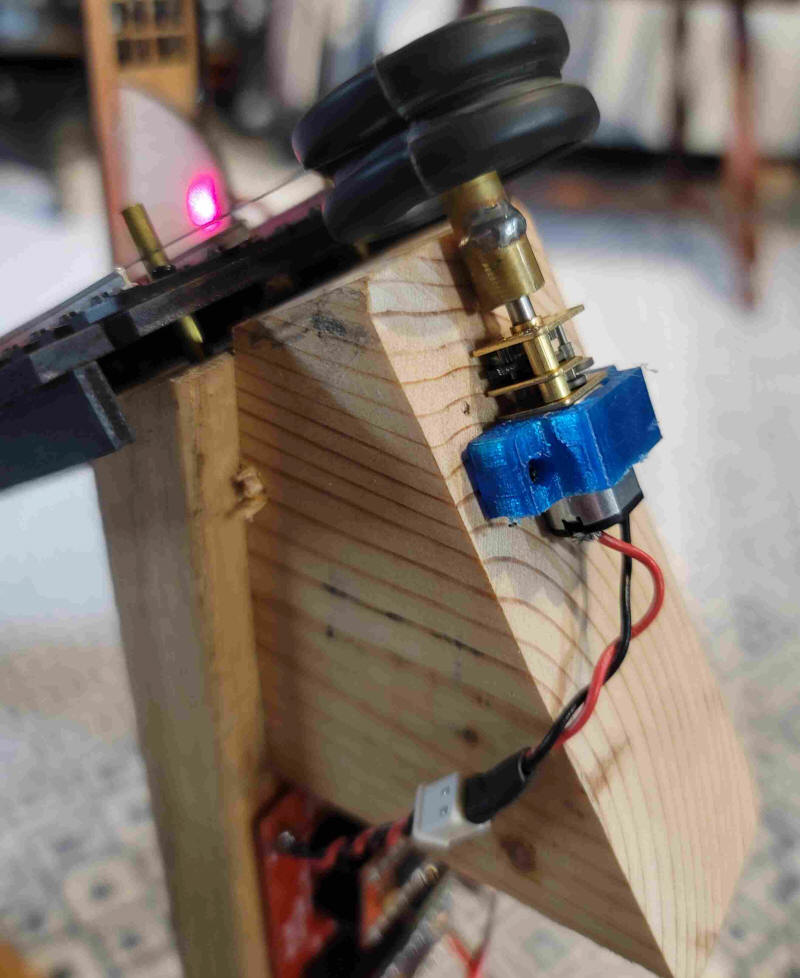
| Making it Move The incline cars run on standard HO track and are pulled up and down by a single line that attaches to the front of each car. The line is made from button thread, a heavier than normal thread. It goes from one car to the top of the incline where it loops around a pulley that is attached to a small, geared motor. The green arrow points to where the line attaches to the front of each car. I used small magnets to make hookup simpler. You could easily tie the line to each car rather than use magnets. The yellow arrow points to the thin thread.
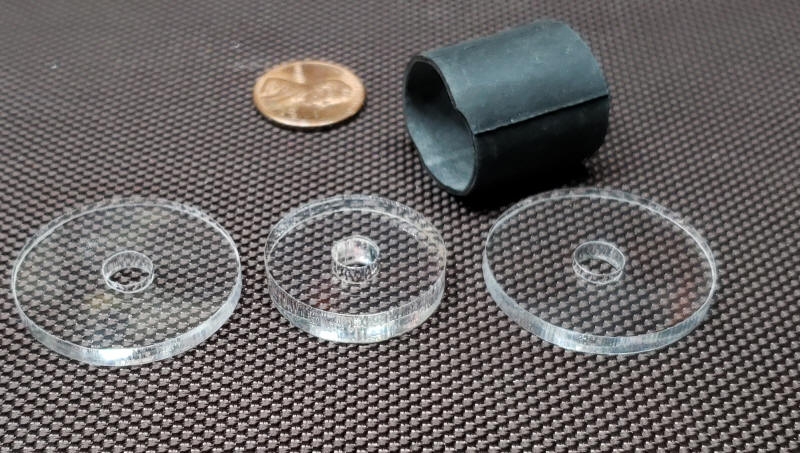
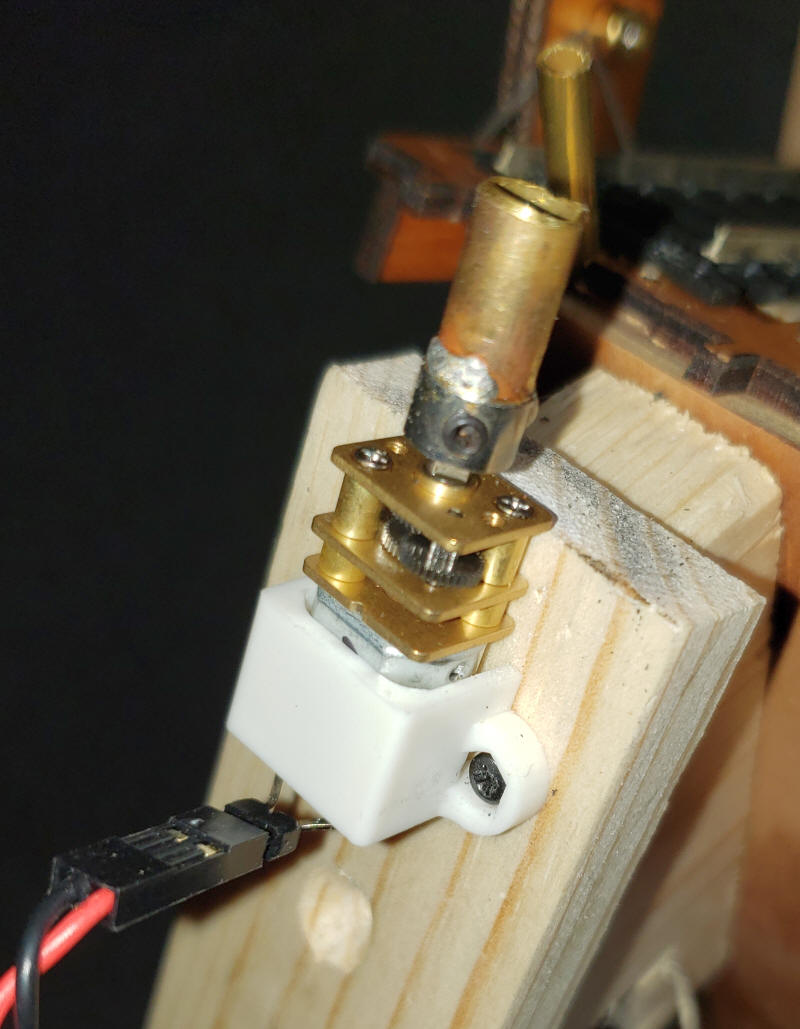
The black pulley is made from two 1 1/4" acrylic disks and one 1" disk. These are glued together. To provide a surface that grips the thread a piece of bicycle tube was stretched over the pulley disks.
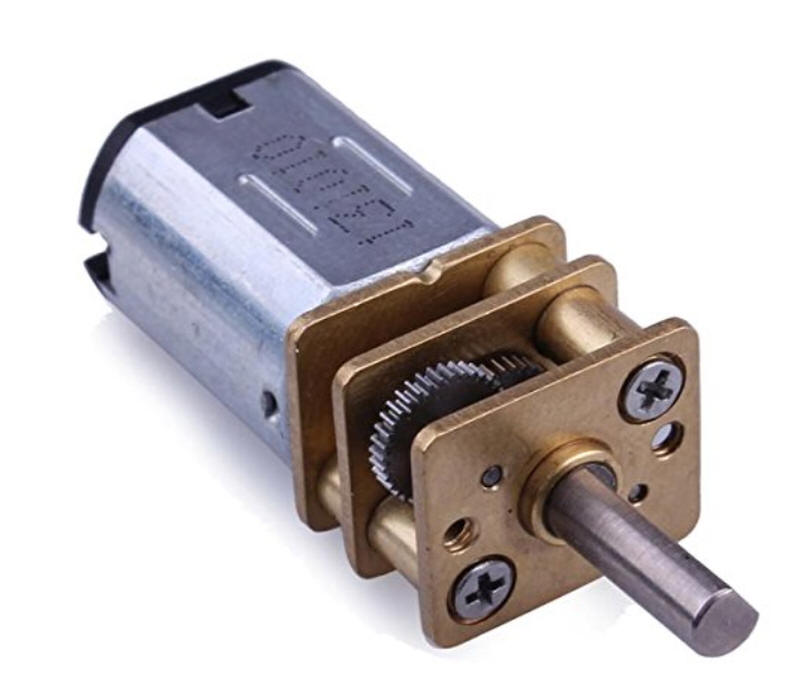
The motor is a small gear-head motor that can be purchased from Amazon or Banggood. They are available in a number of speeds and voltage. I used a 12 volt unit that rotates rather slowly.
I soldered a piece of 1/4" brass tubing to a Dubro collar. The 1/4" brass force fit into the acrylic pulley and the Dubro collar goes to the motor shaft and is secured with a small set screw. The 1/8" Dubro collars fit the shaft perfectly
|
||
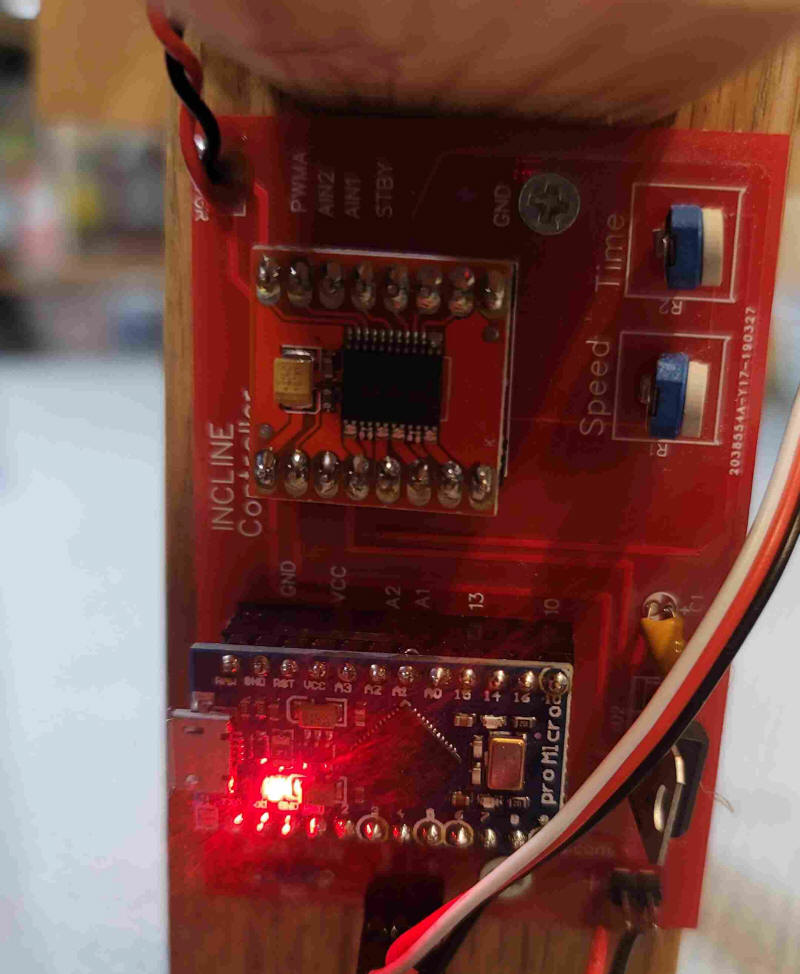
| Motor Controller In order to send the incline cars up and down the pulley needs to turn in one direction until one of the cars reaches the top. Once that happens the motor needs to shut down, pause for a few seconds, reverse and continue until the other car reaches the top. Rather than developing a new controller to do this job I opted to redo the Arduino BARC that I created recently. I modified a bit of code and added a sensor that would detect a car being at the top. |
||
|
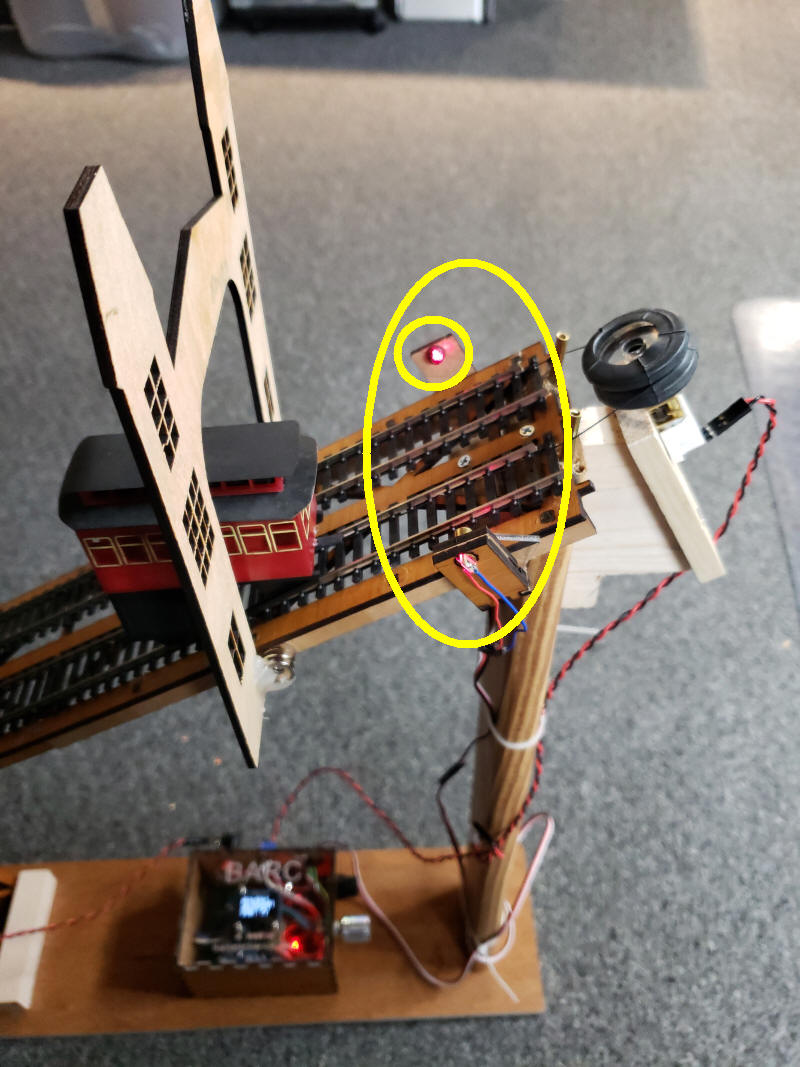
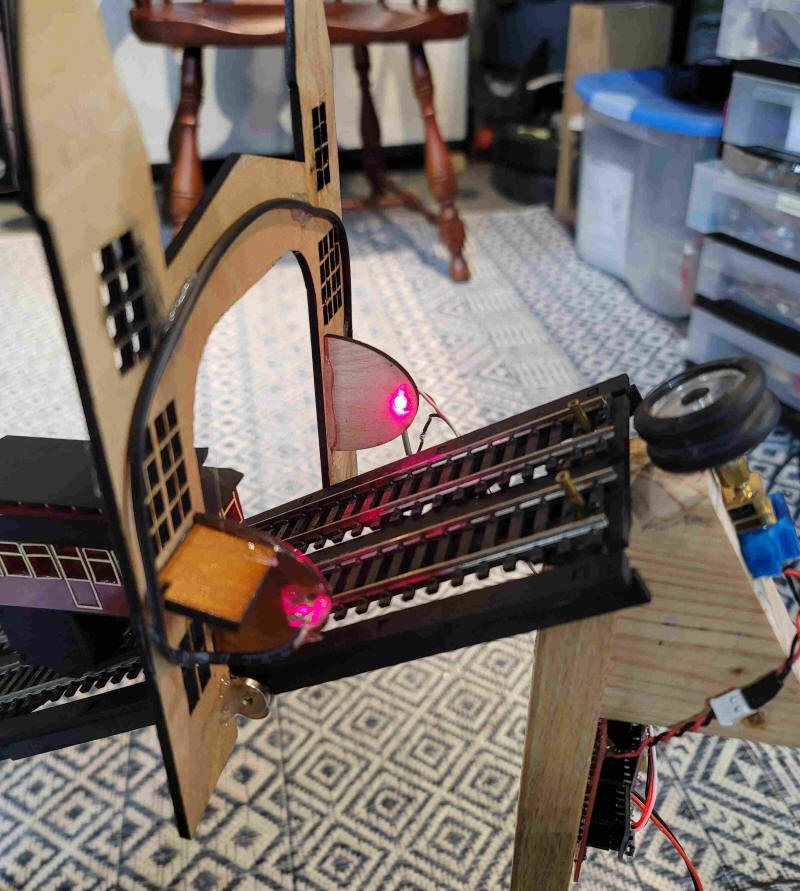
The "top of track" sensor is shown here. A small laser diode shines a red beam across both tracks (you can see it landing on the sensor at the small yellow circle). The sensor is a phototransistor. That and a single resistor connects directly to the BARC.
This schematic shows the parts of the laser
sensor. The output of the circuit goes to pin 10 on the
Arduino, one of the station stop pins.
The modified BARC code is here: Incline/BARC_INCLINE_basedOn_RunOnceV4-1-c.ino |
||
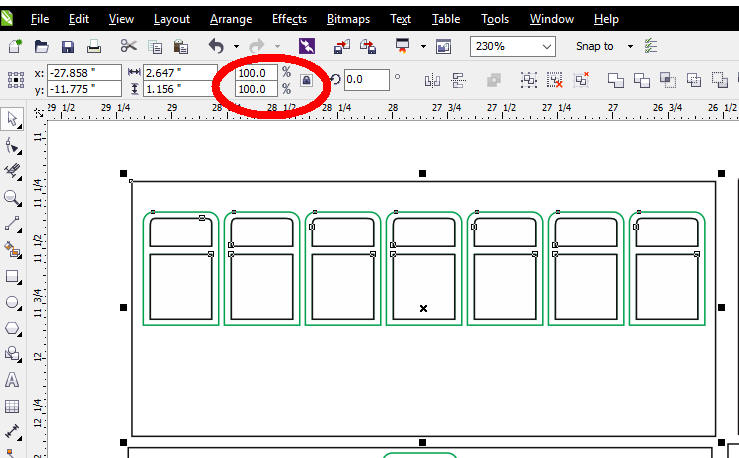
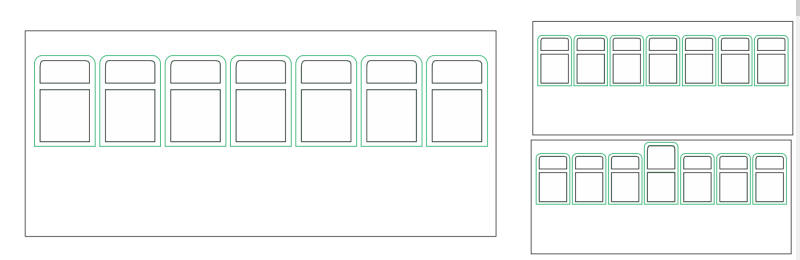
| Resizing for Other Scales CorelDraw is a vector based drawing program. This means that you can easily scale the size of your laser cut item up or down in size without any loss in precision or detail. I made my incline for HO scale to make it small enough to easily move from place to place. To make the cars larger for G-scale all I need to do is select the car parts and change the percentage (see red circle) to make the item larger or smaller. To go from HO to O scale (1:87 to 1:48) change the percentage from 100% to 181% (87/48 = 1.8125 = 181%) - note that the small lock to the right of the two percentage boxes is locked which will force any change to modify both the length and width of the object. If the lock is open you have to enter 181 twice.
Here you can see the larger item on the left after it has been resized.
|
||
| Other Thoughts The incline works very well and has been quite reliable. I hope to change the cars to represent the Monongahela Incline, Pittsburgh's other functional incline. I would also like to try to build a passing siding, single track incline - see: http://www.wikiwand.com/en/Passing_loop Lots of options and lots of opportunities for modeling!
|
||
|
CorelDraw Files
- saved in version X6 -
if you need another version or format
please let me know and I'll try to accommodate your needs.
email:
dave@davebodnar.com Incline/Incline_BottomBldg.cdr Incline/Incline-Track-Supports.cdr SVG files are here as ZIP file
|