| I came across the DF Player a few years ago
and since then I have used them exclusively when I need to add sound to
a project or animation. This link will take you to a list of
videos using the DF Player on YouTube: https://www.youtube.com/results?search_query=dfplayer+n3enm
and this link takes you to my web pages that
relate to the DF Player: If you search out places that sell the DFPlayer you may be amazed at the cost considering the device's capability and ease of use. You can purchase 5 units from Amazon for less than $3.00 each. eBay and Banggood have similar or lower prices but may have longer delivery times. Most of these projects use the DF Player along with an Arduino or other microcontroller. While this is a super way to control which sounds come from the MP3 player many of us are not comfortable enough with programming to go that route. This page and the accompanying video explore ways that the DF Player can be used without any microcontroller or programming. We'll take a look at a number of topics: How to:
|
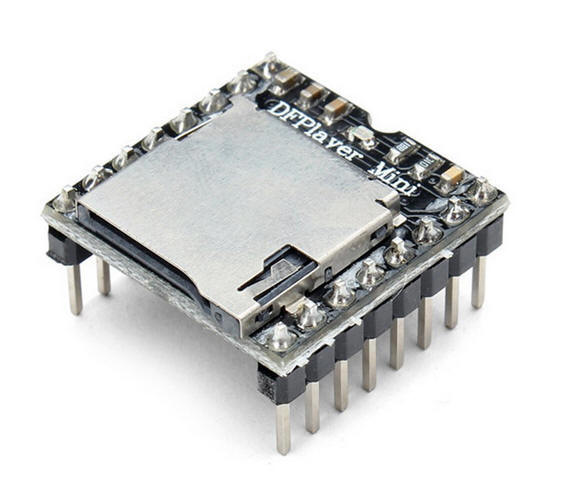
| The DFPlayer's Parts & Pins The circuitry that makes up the DFPlayer sits on top of 16 connecting pins
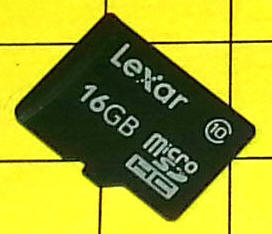
On top is a socket that will hold a microSD memory card.
The 16GB (16,000,000,000 byte) card shown here has way more capacity than we are likely to need. I do most of my projects using 1 or 2 GB cards. You can purchase microSD cards from Amazon, eBay and local stores. You can also check any old cell phones that you may have as many of them have a small size microSD that works well with the MP3 player. The player's pins are shown here. Note the notch at the top/center of the board. This identifies pin 1, which is the VCC pin in the upper left corner. Keep this diagram handy as the player itself is not labeled. (VCC refers to the positive power connection -- for this device it should not exceed 5 volts -- the negative connection from the power supply goes to ground)
More information about each pin is presented in this chart.
We will be using VCC, SKP2, SPK1, GND, IO1, IO2, ADKEY1, ADKEY2 and BUSY.
|
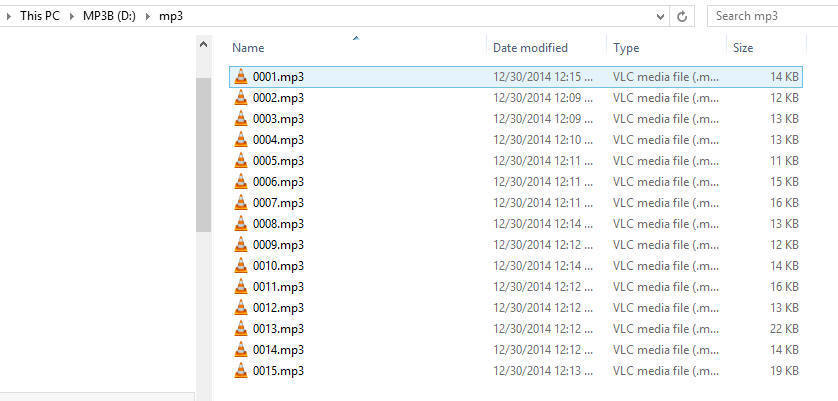
| Adding MP3 Files to the microSD Card The DFPlayer will play both MP3 and WAV (16 bit only) files. Most references on the player say that they must be in a folder called /mp3 and must be named 0001.mp3, 0002.mp3, 0003.mp3 and so on. If you like you can add additional identification after the first 4 digits. For example you could call the first file 0001fireworks.mp3 and the second file 0002thunder.mp3. I have also had success putting the files in the root of the microSD card without a 4 digit number as a prefix. While I recommend that you follow the above convention it does seem to work if you don't. Leaving the number off will also make it difficult to play a specific file. The file structure should look like this in Windows Explorer - note that the folder is called "mp3" and that the files are 4 digit numbers starting with 0001.mp3.:
|
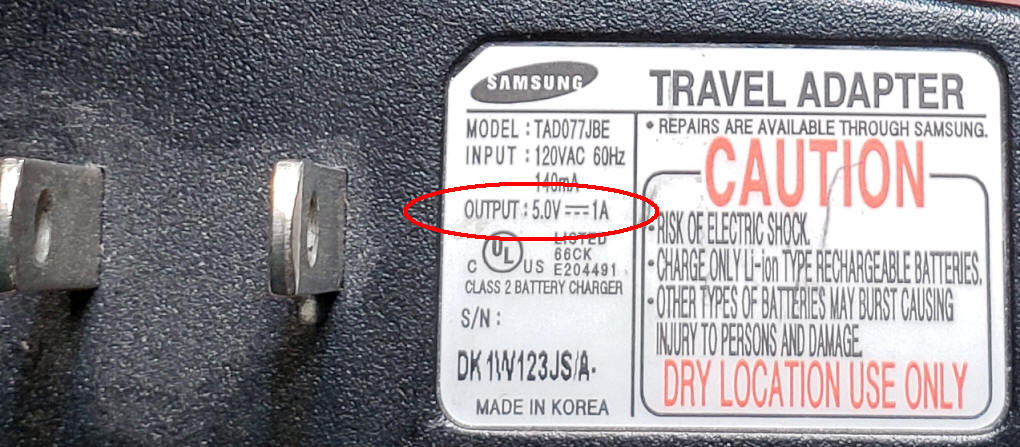
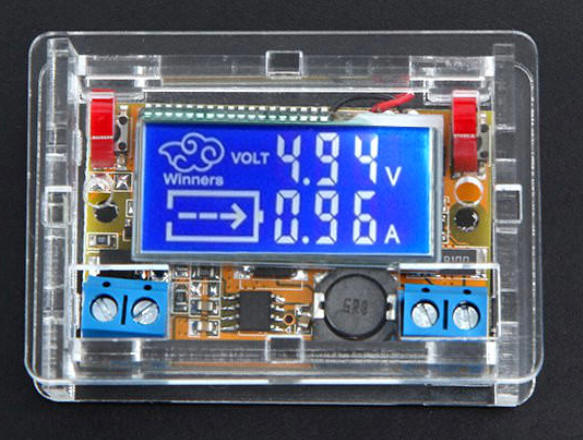
| Supplying Power to the DFPlayer The VCC pin on the DFPlayer expects to see 5 volts. Even though the specifications say that it will work with as little as 3.2 volts I have had trouble when supplying less than a 5 volt power supply unless it can provide at least 1 amp of current. There are a number of ways to get 5 volts for the MP3 player.
|
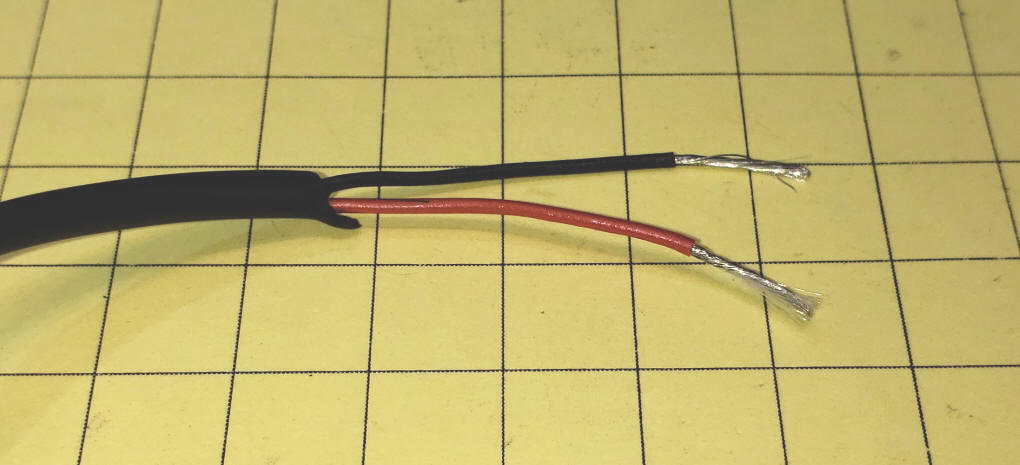
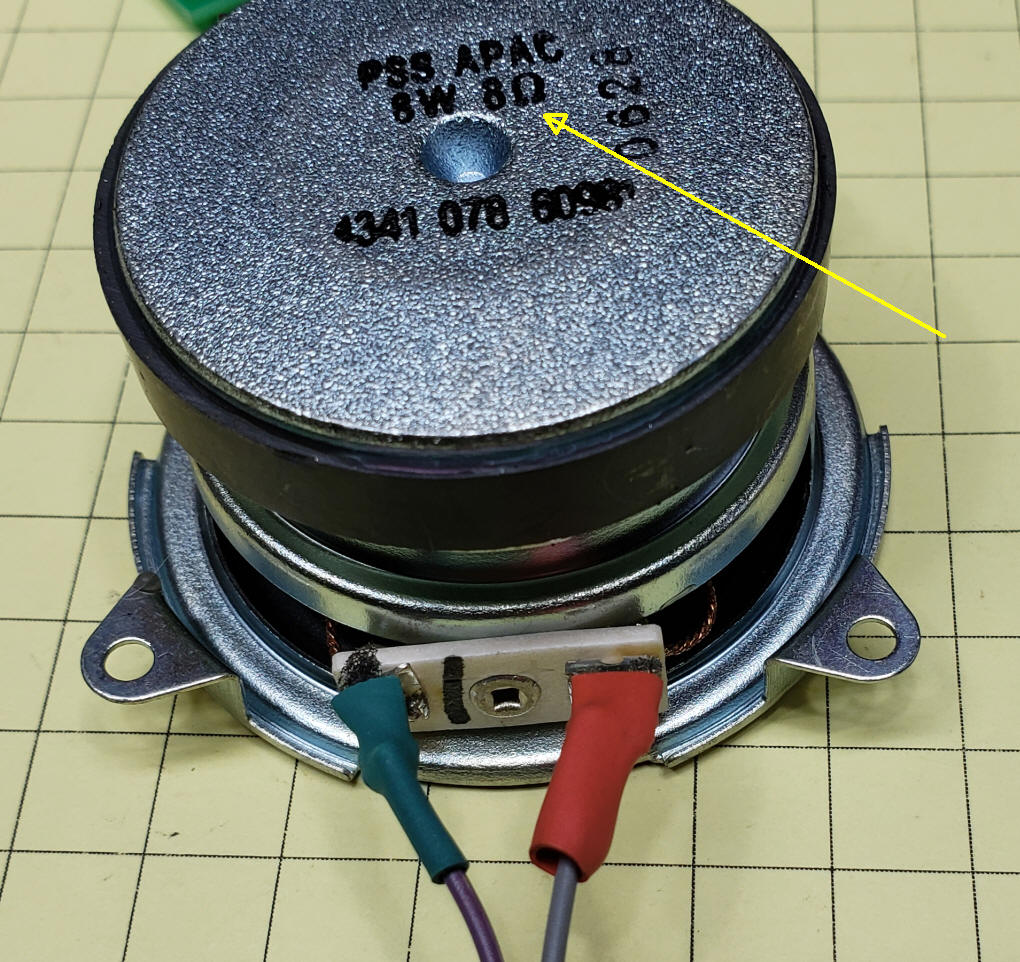
| Speakers You can directly drive a small 8 ohm speaker with the SPK1 and SPK2 pins. This setup is very easy to implement and can provide sufficient volume for many applications. The output chip on the DFPlayer will not work with 4 or 16 ohm speakers. They MUST be marked as being 8 ohm.
The two terminals on the speaker go to SPK1 and SPK2. |
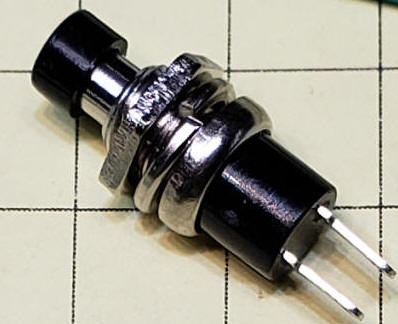
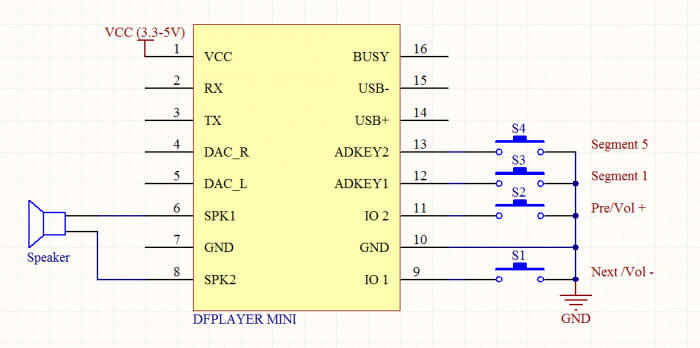
| Buttons If your objective is to play only one audio file all you need to do it add a single pole single throw push button between GND and ADKEY1. Pressing that button will plan the first file on the microSD card.
The button that plays file (segment) 1 is identified in this diagram as "S3". If you connect it between ground and ADKEY1 it will always play the first file. Similarly connecting a button between ground and ADKEY2 always plays file #5. This is switch "S4" in the diagram. If you would like to have access to additional files and control options more buttons can be added. A buttons between ground and IO1 and IO2 ("S1" and "S2" below) will plan the next and previous file on the memory card. If you hold S1 the volume will go down. If you hole S2 the volume will go up.
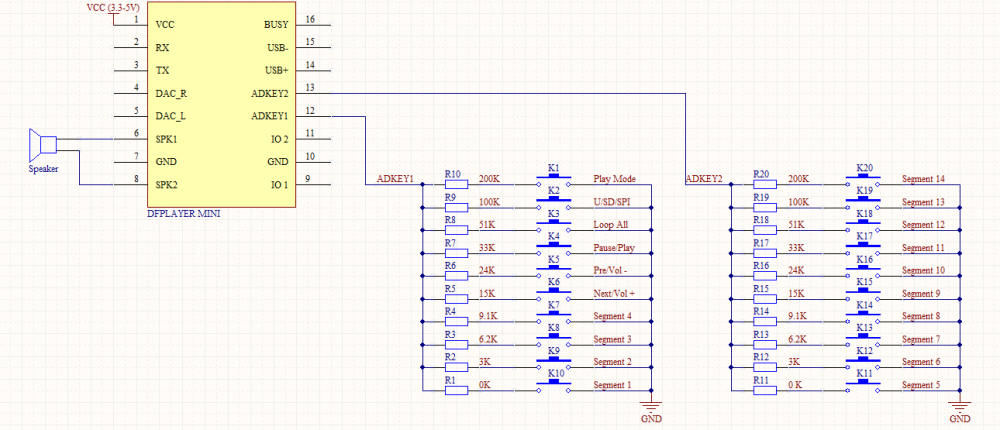
You can use the diagram below to add even more buttons. Wiring buttons with series resistors of the values shown here will give you access to other functions and files. For example, if you would like to be able to add a Pause Play button you would need to wire another button to ground then to a 33K ohm resistor then to pin ADKEY1. I didn't have a 33 ohm resistor so I put a 10K and a 22K in series giving 32K which worked fine. When a file was playing pushing the new button paused the playback. When I pressed it again the file started right where it left off.
|
| Audacity, Sound Editor This link takes you to a fairly extensive discussion of how you can load and use Audacity. It was written for an older version of the program but the substance of the program remains the same http://www.trainelectronics.com/MP3_project/#Audacity_-_Sound_Editor You can also find information on using Audacity
on YouTube: |
|
Getting Sound Files Sound files for the system are available from a variety of places on the Internet. You can also record your own. I find most of my sound files by going to Google.com and searching for 'free sound file train' (leave out the ') or 'download free railroad sound mp3' or some combination of these searches. Once you find a sound that you like the web page where it is located is likely to tell you how to download it. If not you can try right clicking on the sound file name and choosing "save link as" or "save target as". Select an appropriate place on your hard drive and save the file. Once it is downloaded you can find it with Windows Explorer and double click on it to play. If it has an MP3 extension, that is if it ends in ".mp3", it will play directly on the MP3 Sound Controller. If it ends in ".wav" or has some other sound format we may be able to convert it to MP3 with the editor (see next section). Remember that we can easily edit sound files. If you find a long file that has a really good section that you want to use we can pull that part out and use it. Once a sound is found and saved onto your computer all you need to do is to rename it with one of the numbered file names that the MP3 Sound Controller looks for. Copy that numbered file to the USB memory stick and you are ready to go!
|
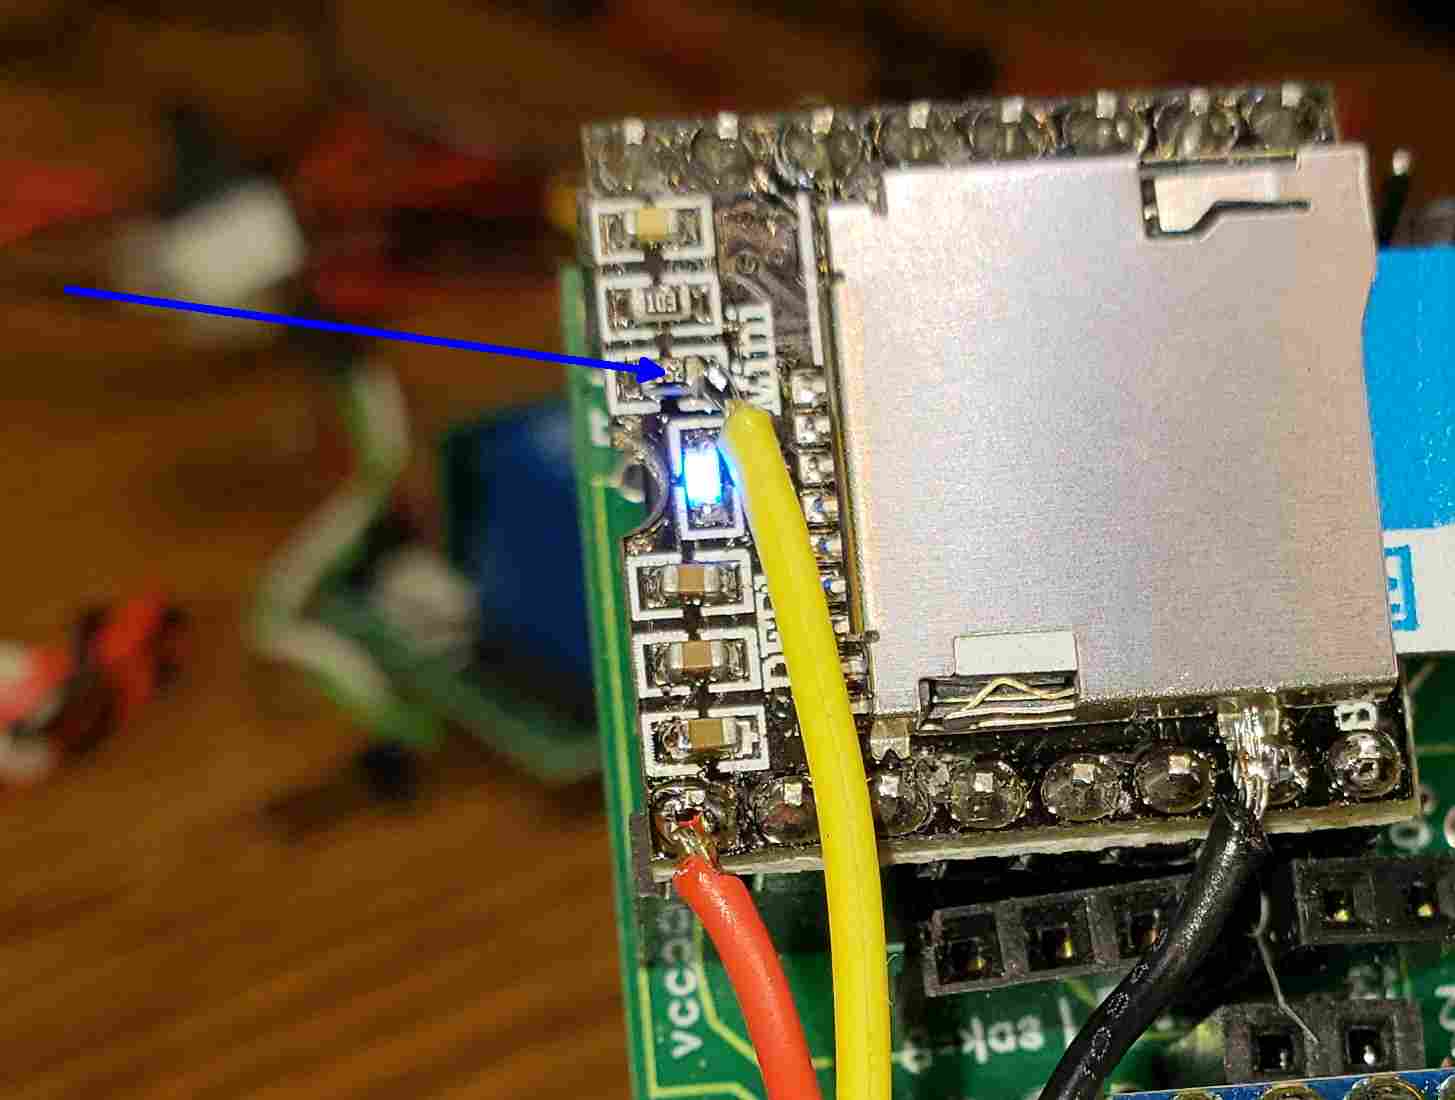
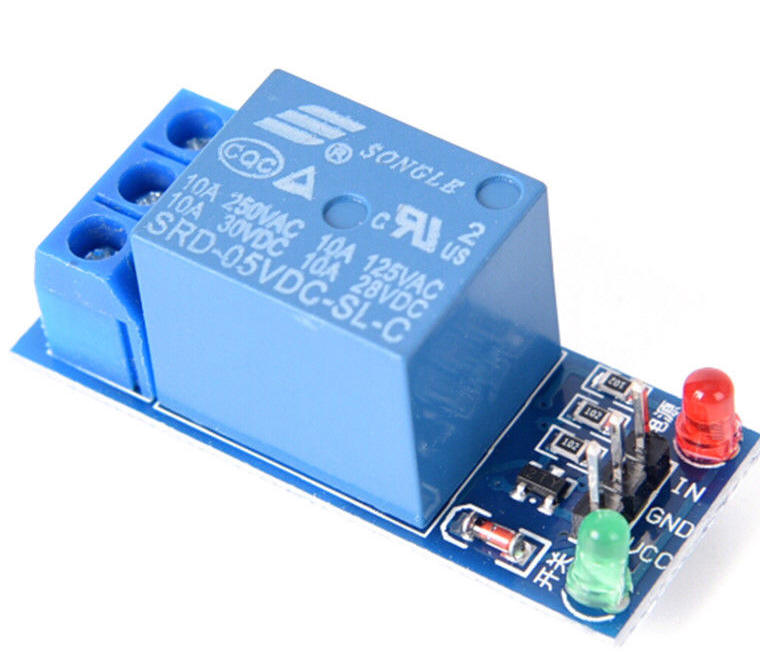
| Trigger Relay While Playing If you are working with an animation that should operate only when the sound is playing you can easily add a relay to the DFPlayer board so that the relay is triggered while the sound plays. This might be used to play music while an animation of a group of dancers moves across a dance floor. The connection to the 5 volt relay board is soldered to the top of the resistor shown here.
Supply 5 volts, ground and the above connection to trigger this relay directly.
|
| Here is a fix to provide lower power
consumption and no more clicks on power on / off http://work-now-dammit.blogspot.com/2016/08/dfplayer-mp3-module-power-onoff-clicks.html |