| I have been using 3D printers for several
years and find that some projects, especially making front panels
for various gizmos, might be better if cut from a piece of acrylic
rather than built up with a 3D printer. With this goal in mind I explored the assortment of 40 watt CO2 laser engravers / cutters that are available. I settled on one that I found on eBay. It is inexpensive (less than $400 shipped) and should do what I need.
Technical details from the above listing are here: Tech Specs for Laser Engraver What follows are my notes on setting up and using that machine. |
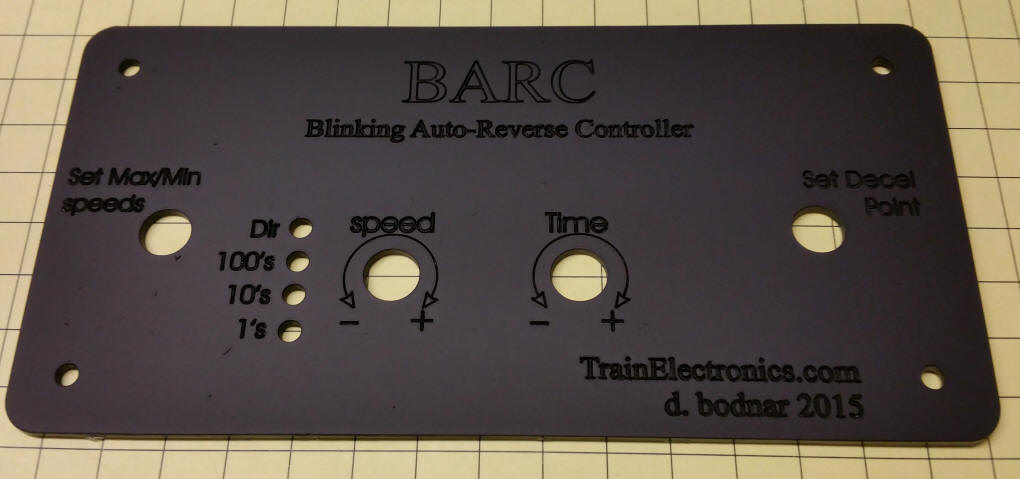
| Using the cutter / engraver to make a faceplate.
Using the cutter to cut a square (rectangular, actually) hole.
|
| Thoughts on the unit after a few days of
use: For the most part I am thrilled by the performance of the laser cutter. I had very little to do in the way of adjustments and had it working in less than an hour. Here are some Pros and Cons that I came up with: PROS:
CONS:
|
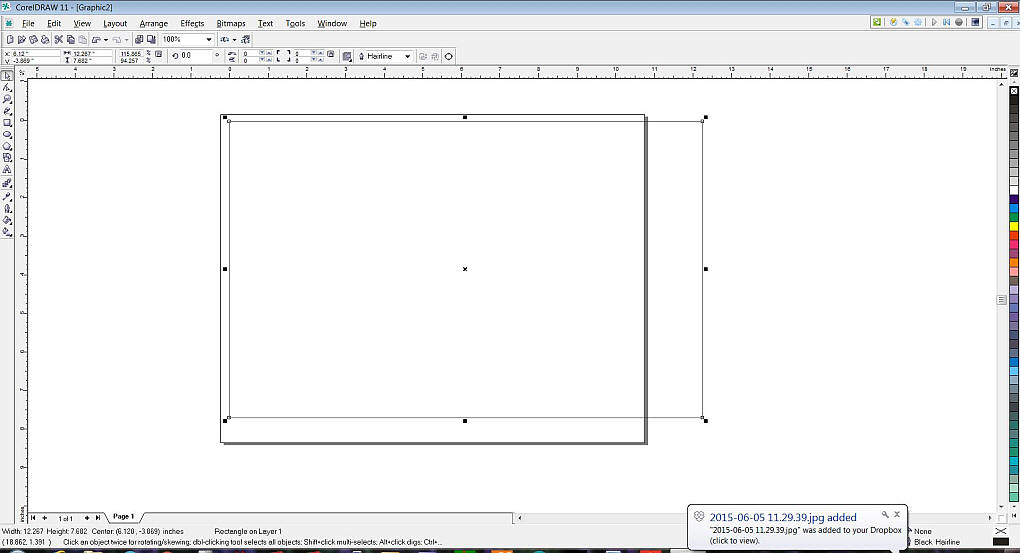
| Max Print Size I did some tests to see just how big an item can be cut or engraved. The screen below shows the CorelDraw setup. The page is set to landscape orientation and the rectangle that it will print is beyond the page edge.
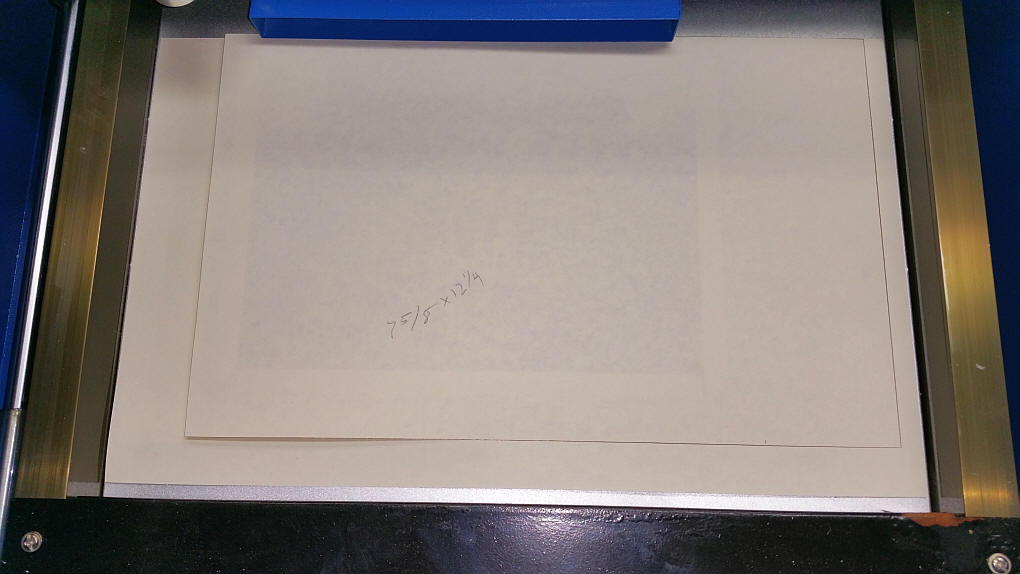
Here a piece of legal paper was laid into the print area and the above rectangle was printed. It wound up being 7 5/8" x 12 1/4". I suppose that a bit of fiddling might get a slightly larger print but this is pretty good.
|
| IMPORTANT: Things to and
not to cut with a laser cutter:
http://atxhackerspace.org/wiki/Laser_Cutter_Materials
Note that some materials can produce poisonous gasses when cut! |
|
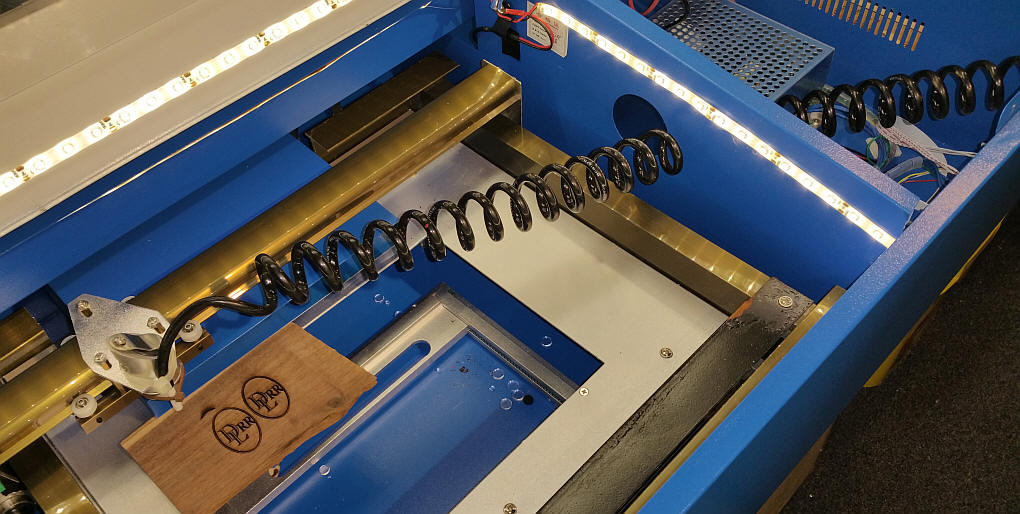
Using an Air Jet to Clear Smoke Some engravers / cutters come with a small air compressor and lines to help clear smoke from the area that is being hit with the laser. This can remove some contaminants that can mar the finish of the material. This unit does not come with such an accessory but it can easily be added. I had a compressor and flexible lines from an airbrush. The only down side is the noise from the compressor!
I simply removed the fitting on the air line and pressed a small piece of tubing into it.
Then I used cable ties to hold it to the print head on the laser. It does help to remove contaminants and gives a better print.
|
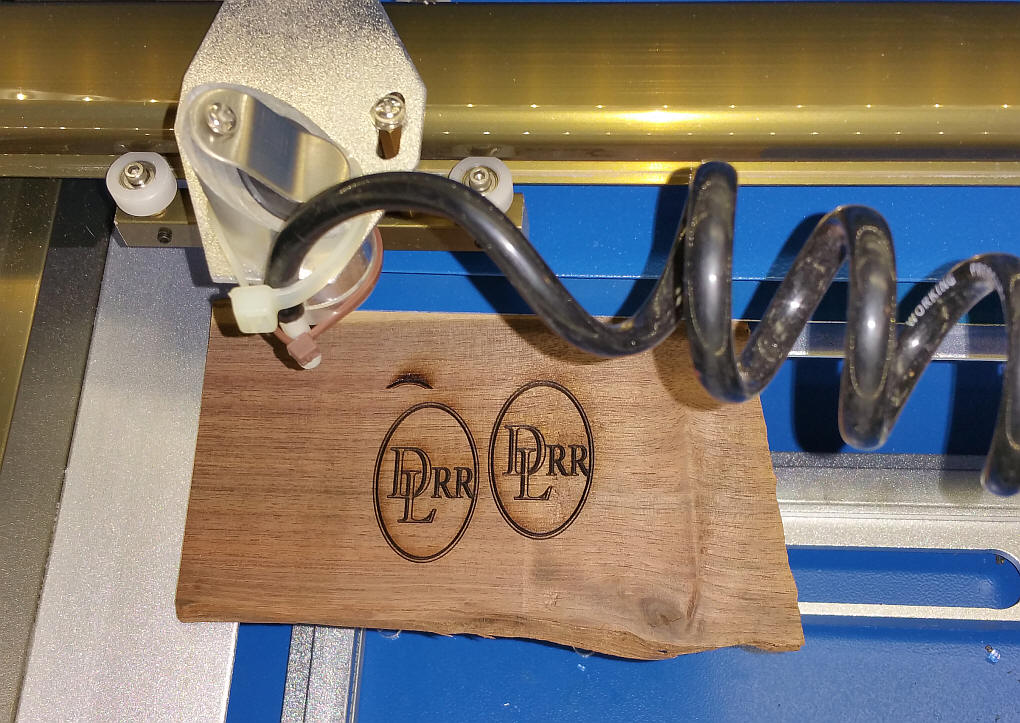
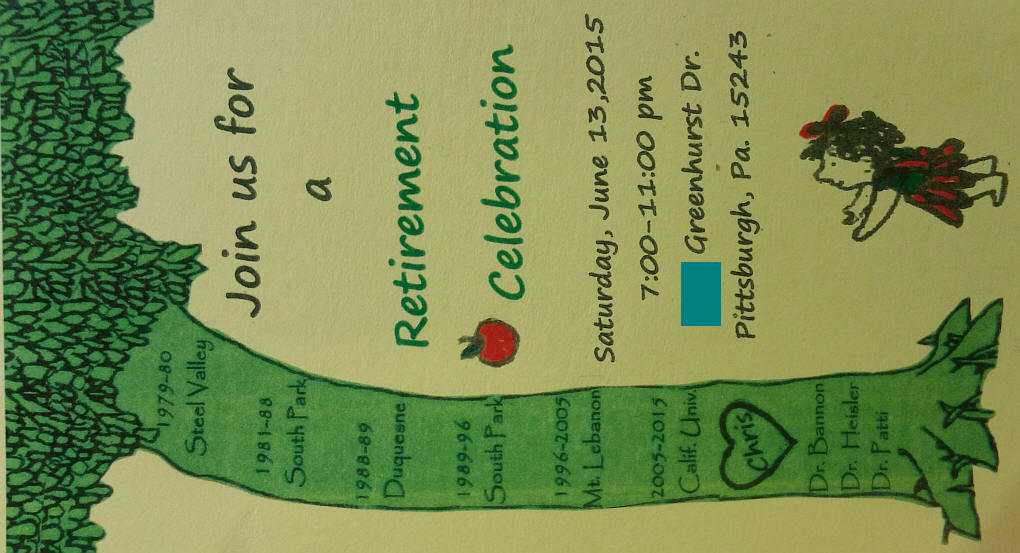
| Engraving Although not its strong suit as this unit will not do grey scale engraved images, you can make a very acceptable engraving in acrylic or wood. I experimented with making up an engraving of an invitation that I got for a friend's retirement party. Here is a portion of that invitation
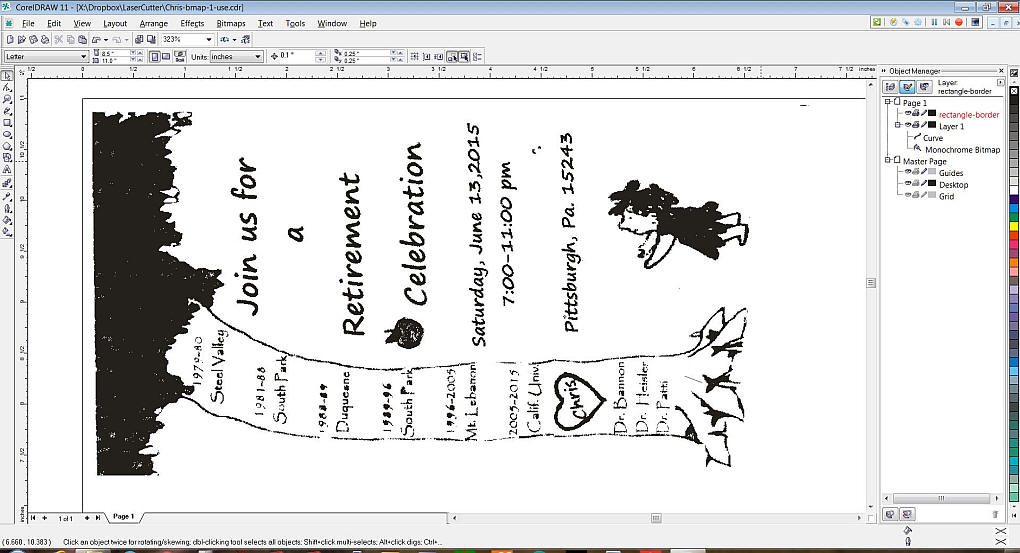
I started by scanning the image as a JPG
file. This I imported into CorelDraw. (I did try tracing
it with Corel Trace but found I got better results with the bitmap
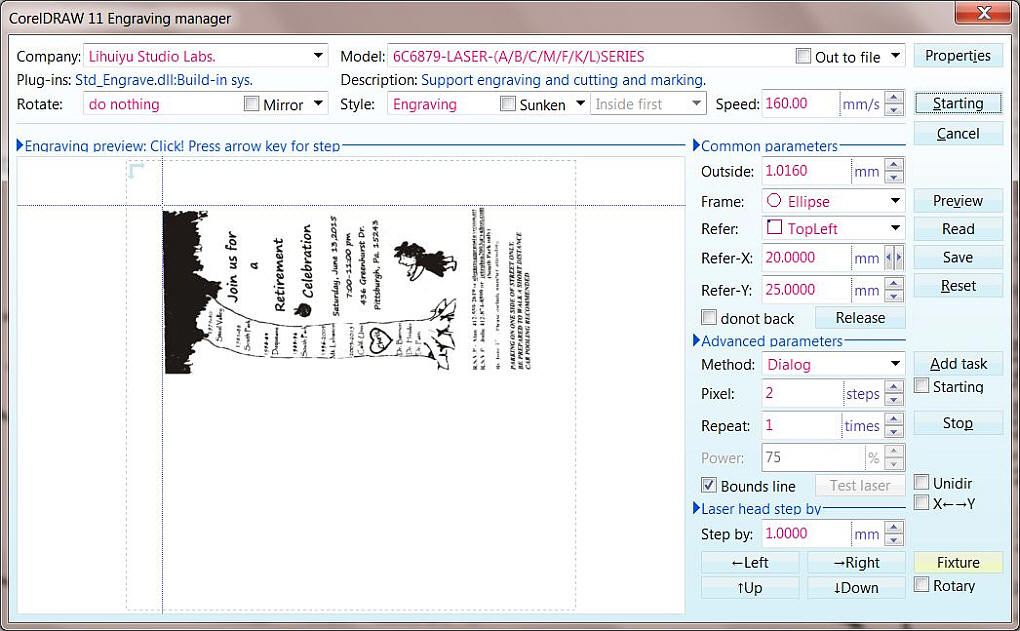
image) Here are the control setting under "Engrave" in Corel Laser - note that there is no check mark on "Sunken" - that is what gives the raised letters with everything else etched out.
Here is the finished product engraved in maple with a setting of 10 on the engraver.
|
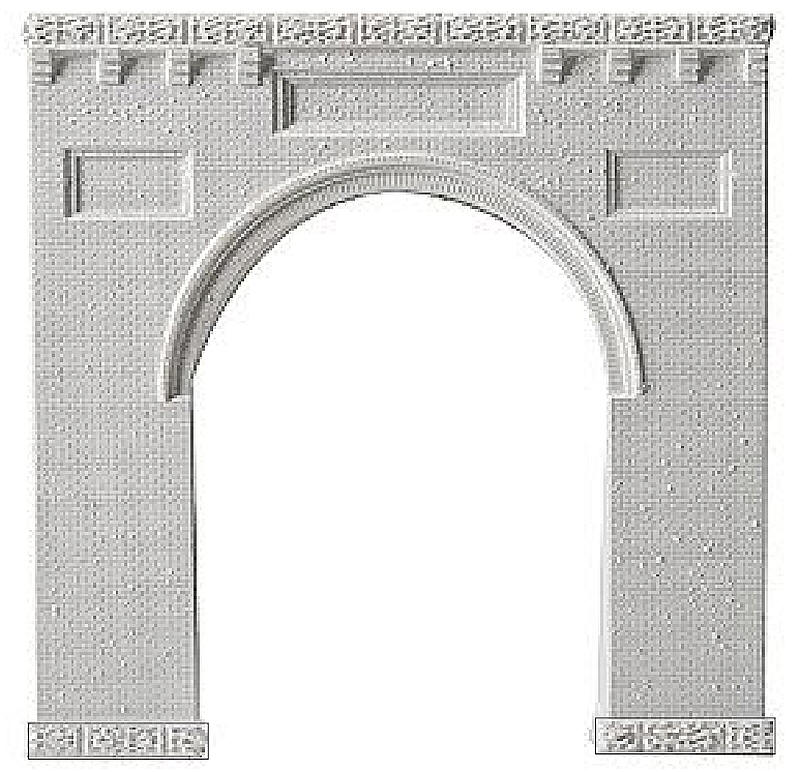
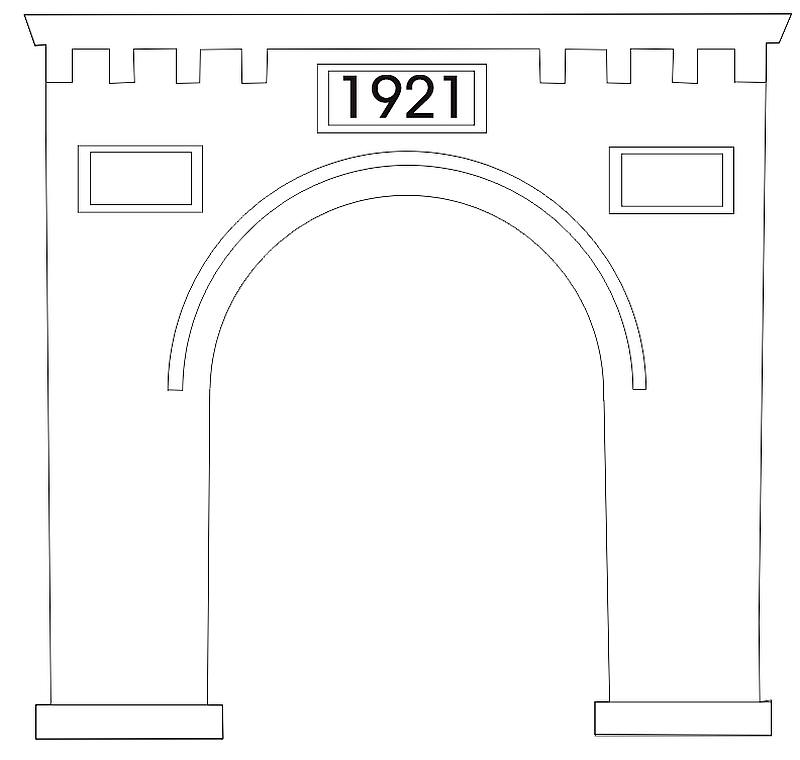
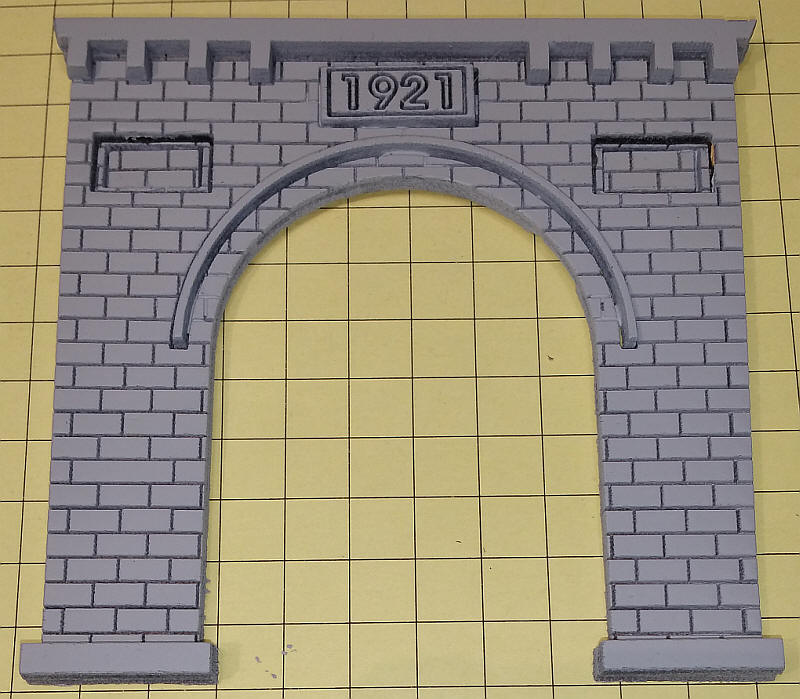
| Tunnel Portal I needed a tunnel portal for my HO module. The design is based on an image I found on Google. I moved it to Corel Draw...
and traced around it.
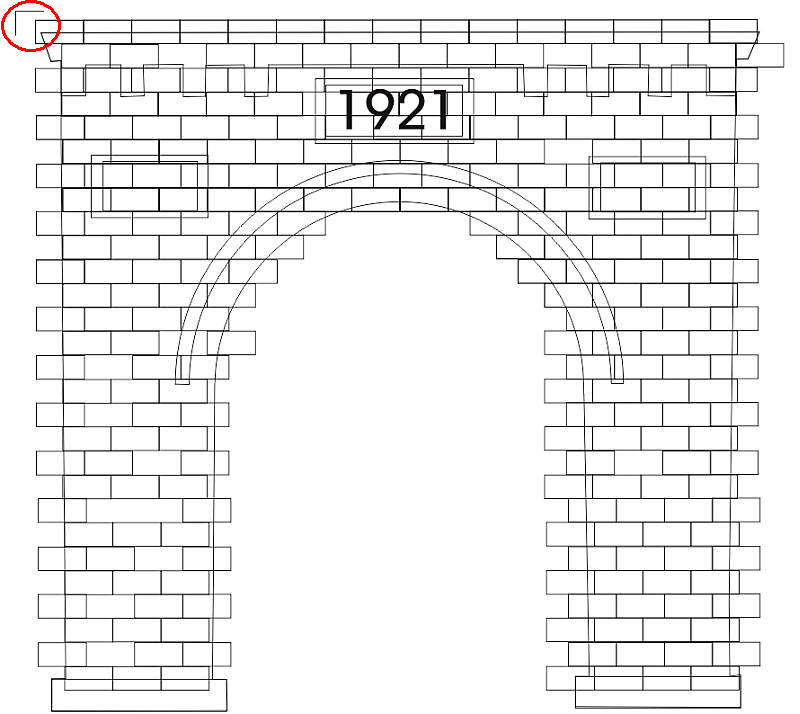
and added bricks (stone?). Note that the bricks extend beyond the outline. That was the easiest way to place them and the parts that are beyond the outline will be cut off by the cutter. The small index mark (circled in red) assures that all layers are in the right place. I make sure that I include the index mark in all layer prints.
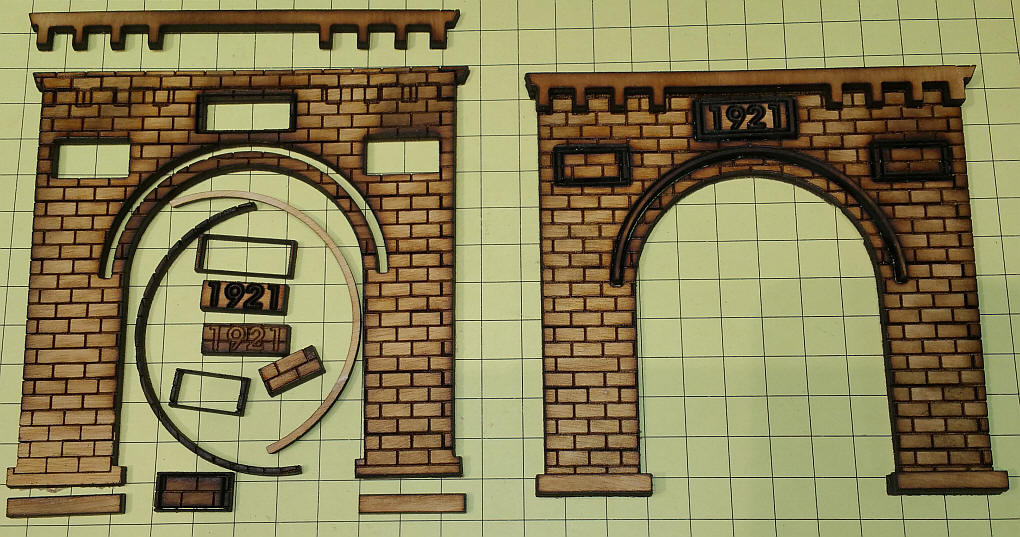
The portal was cut from 1/8" plywood salvaged from an old hollow core door. Note that the arch detail and the boxes and details at the top are raised to give more of a 3D effect.
A light coat of grey primer and it is ready to install. I don't really think the boxes on either side of the date add much and will likely remove them from the next version.
|
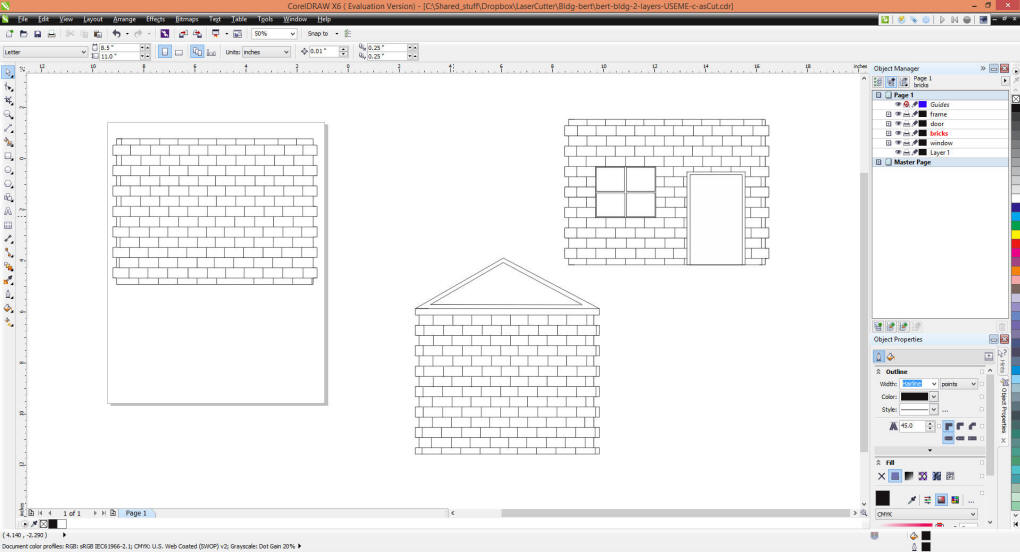
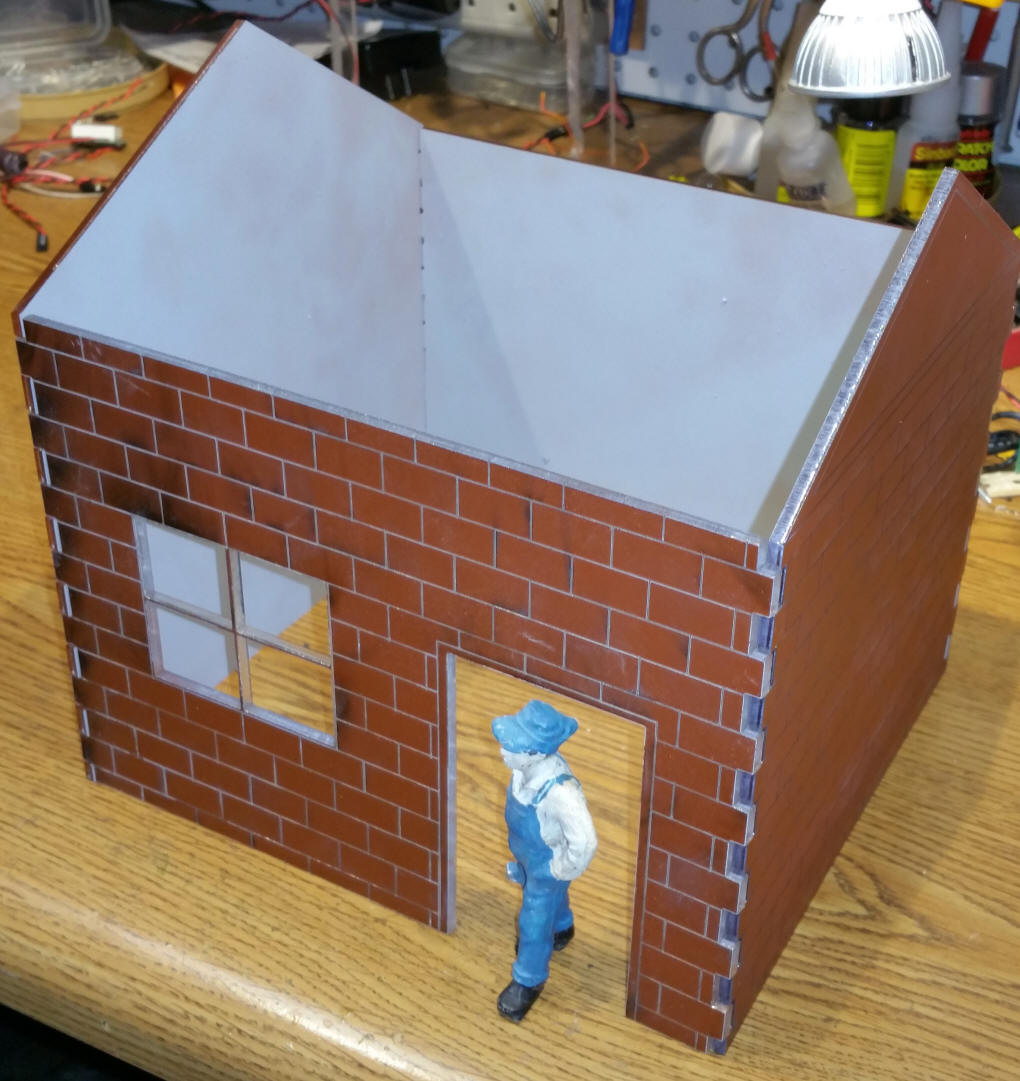
| G-Scale Shed I designed a small shed for a G-scale layout and engraved and cut the four pieces. I did a number of passes doing the grout lines for the block walls at a power setting of 5 and the outline at 15. Even at that power level it took a few repeats over the outline to completely free each side from the rectangle of acrylic. I designed the shed using CorelDraw. The frame, bricks and windows/door were each put on a separate layer so that I could selectively show or hide each for cutting.
Before cutting I painted the front of each piece in reddish/brown and the back grey. That allows the grout lines to appear in a different color than the blocks.
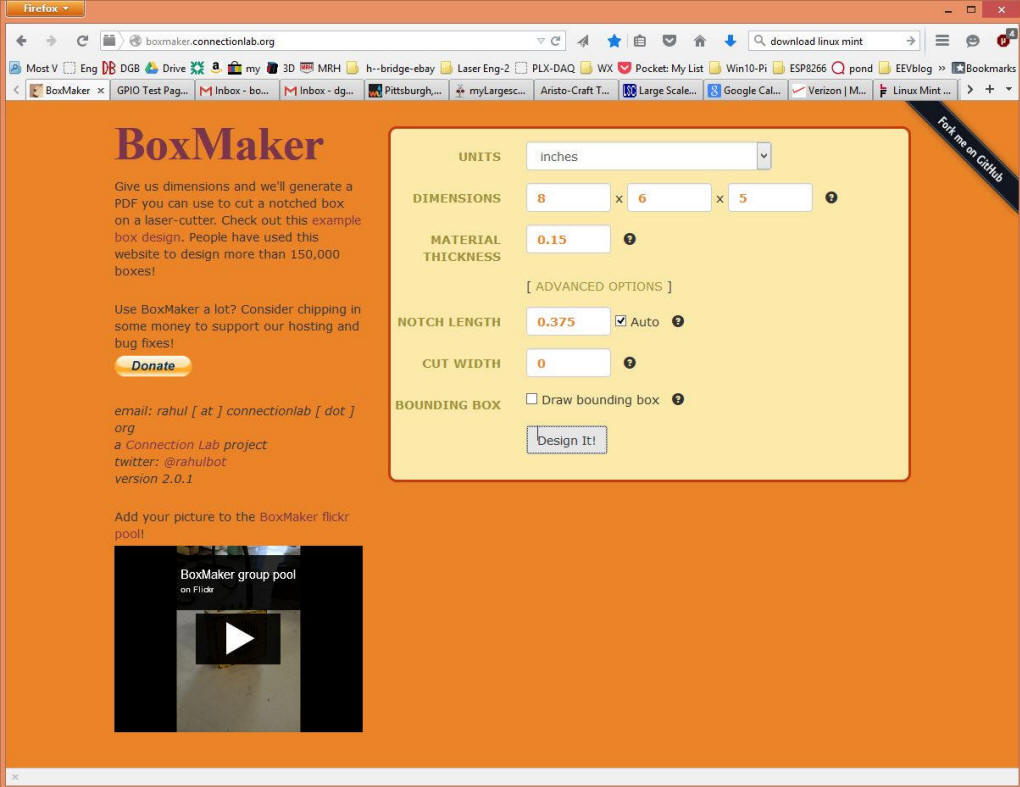
The corners were made with staggered interlocking joints. I used an online program called BoxMaker.
Once I imported the PDF from BoxMaker I just edited the file to add the window, door and peaks on the side pieces.
The roof is made from cedar. I
resawed a piece of 3/4" stock to a bit under 3/8" and used the laser
cutter to make the shingle outlines and to cut out the two sections.
I did the angle joint at the peak with the table saw.
Scaled
Down for HO Scale The only manual adjustment were making the mutton bars in the windows slightly wider to make them less prone to breaking and lengthening the "fingers" on each corner as the 1/8" material I used for the HO building was more than 25% as thick as what I used for the G building. The shed on the left was done on thin plywood that had been stained and varnished and the one on the right on 1/8" acrylic. It was nice to prove that scaling down was not an issue, especially with vector based drawings.
|
|
A
Source for High Quality, Inexpensive Thin Plywood The small building shown above is made from plywood that is slightly under 1/8" in thickness. I found a source for such plywood some years ago when I was working on a large, G-scale "Tilt-a-Whirl Train" - for this project (for details on this rather unusual layout see: http://www.trainelectronics.com/LazySusanTrain/article/index_with_flash_at_end.htm )
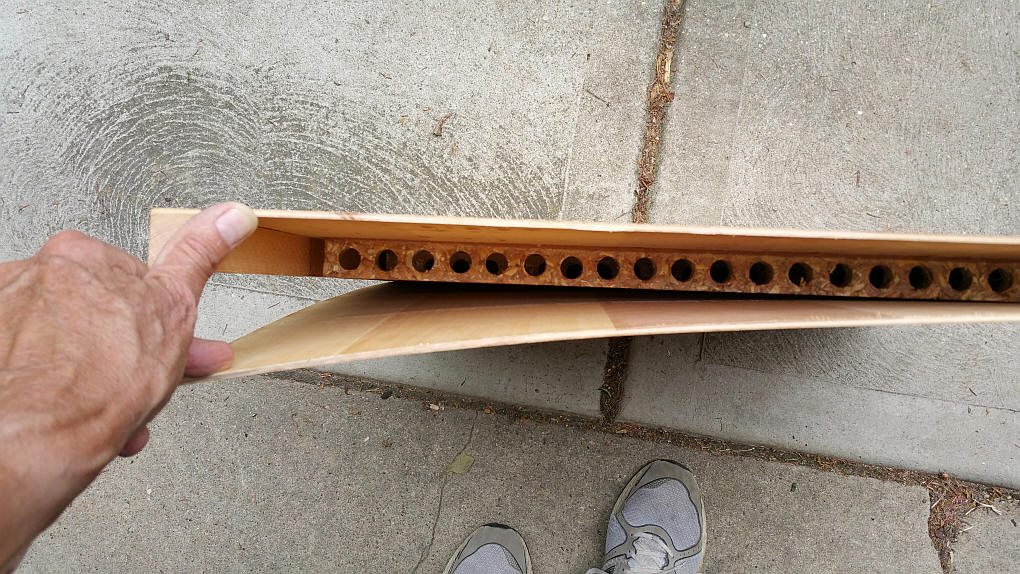
I needed a large (4' diameter), light weight platform. I made it from two hollow core doors that were bolted together and cut into the circle. The left over door material was set aside for some time till I realized that it could be used for lots of projects. When I got the laser cutter it was one of the first things that I used for cutting and engraving. To get your own supply of hollow core door plywood you need to locate a building materials recycler - the one in Pittsburgh is called Construction Junction. There I can pick up used hollow core doors for $5.00 each. With a little work each can be turned into 25 or more square feet of plywood. I first cut the doors into thirds to make them easier to handle. I then try to pull the two faces apart. If the door is old (many I have found are) and the glue has dried out you will be able to do so.
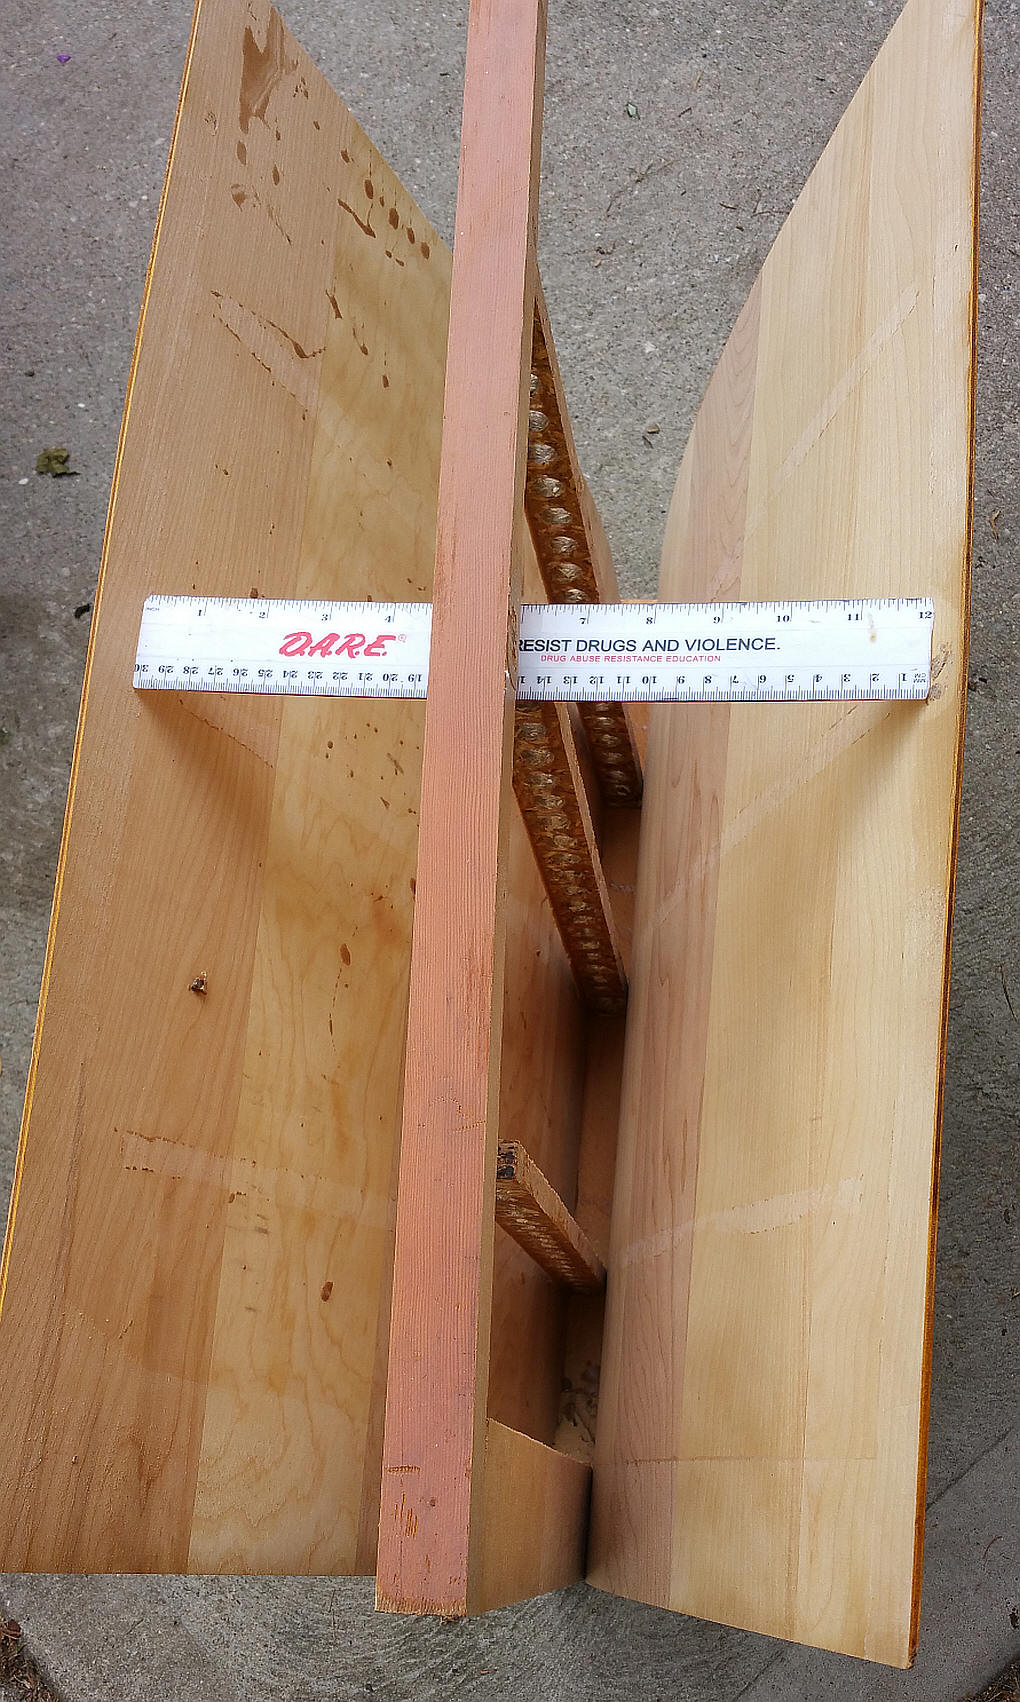
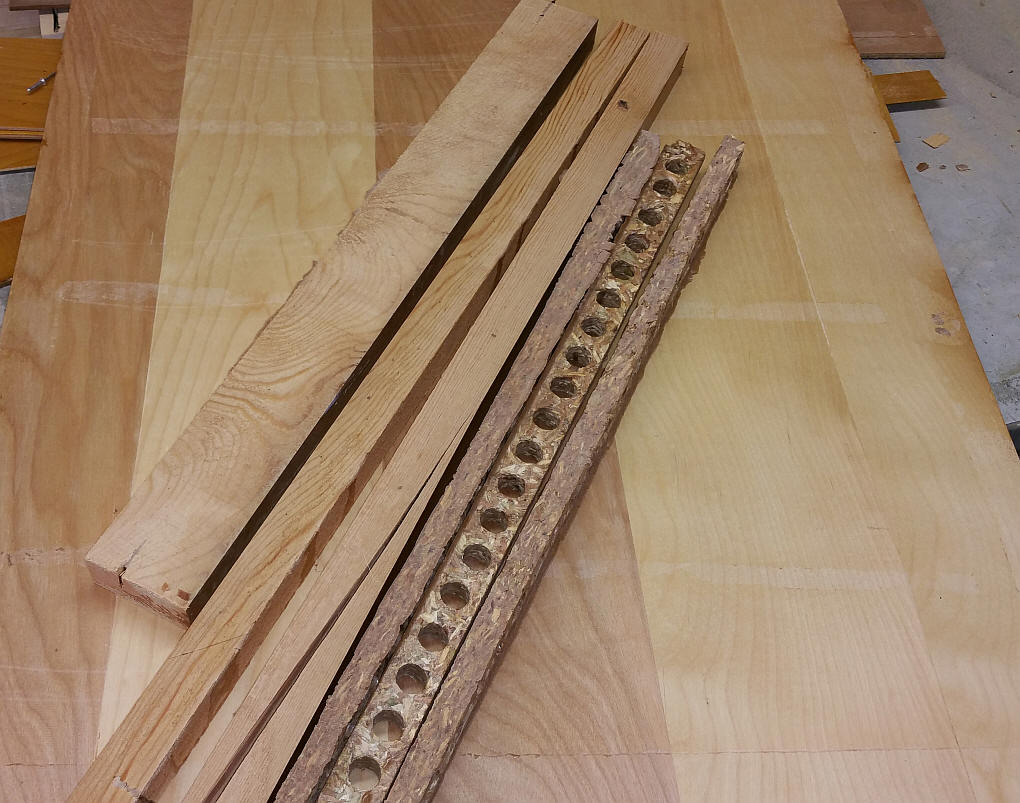
Inside you will find some sort of spacer like the perforated chip-board material that you see in the photo above. If I can't just pry them apart I use my table saw to cut off the bottom and top edges and the sides. These parts are solid wood so that hinges and door hardware can be added. Here is a door with dried out glue that just released the inner bonds and gave up the plywood skin. Very little glue remained and that was easily removed with a swipe with a chisel.
Here you see the innards of one 1/3 hollow core door. Not a bad collection of plywood for my projects!
|
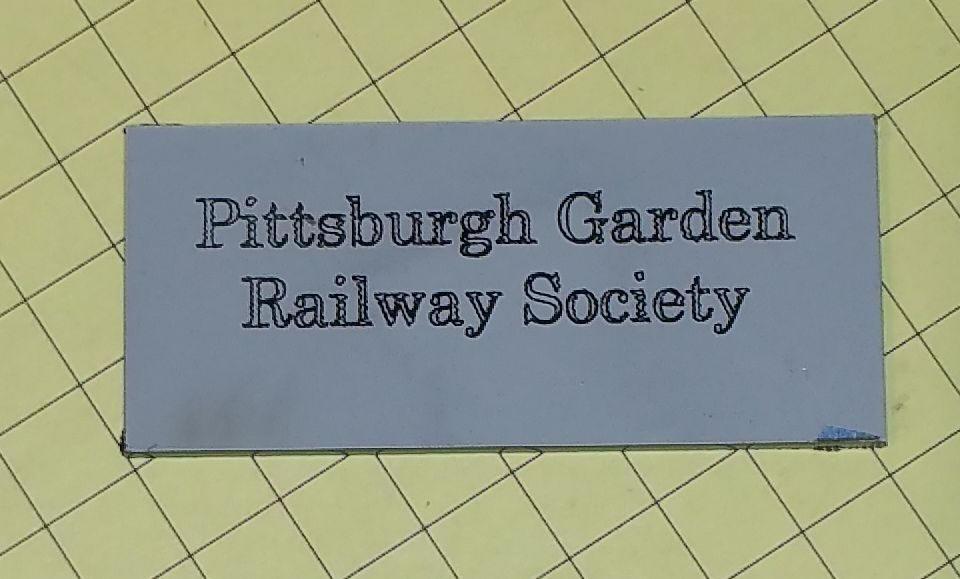
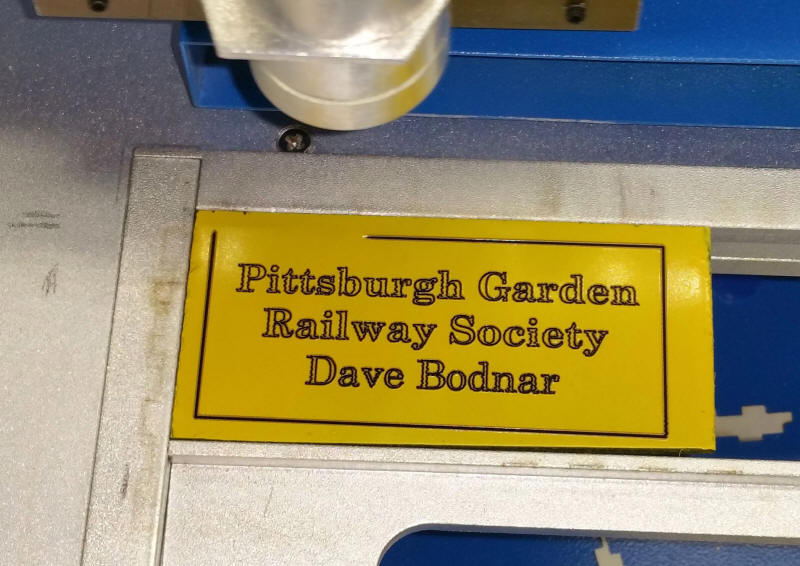
| Quick Name Tag To make this quick & dirty name tag I painted one side of a piece of acrylic one color (grey on top) and paint the other in a contrasting color (I used black on the back). I engraved the top and the back color came through. I haven't tried this with a dark color on the front and a light color on the back but it should work, too.
This name tag has been painted white on top and the back has been left clear. You can clearly see the light shining through - interesting idea: Put some LEDs behind with a little box to contain the light - cool!
|
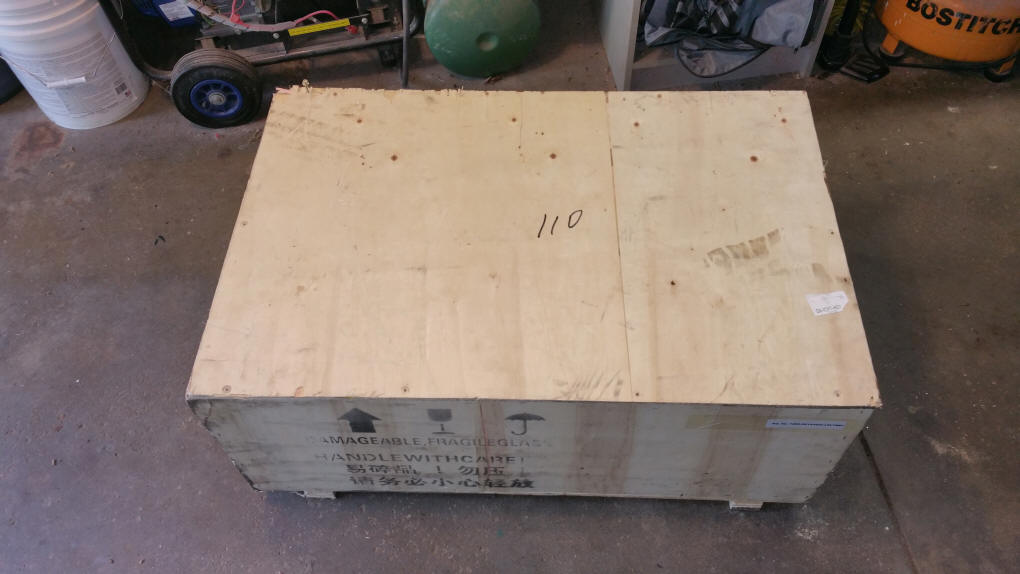
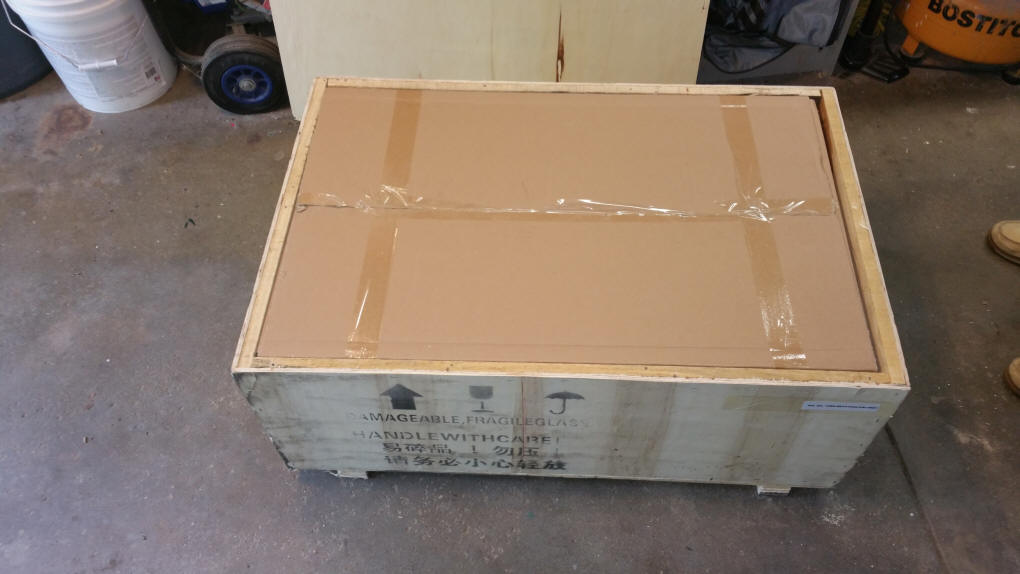
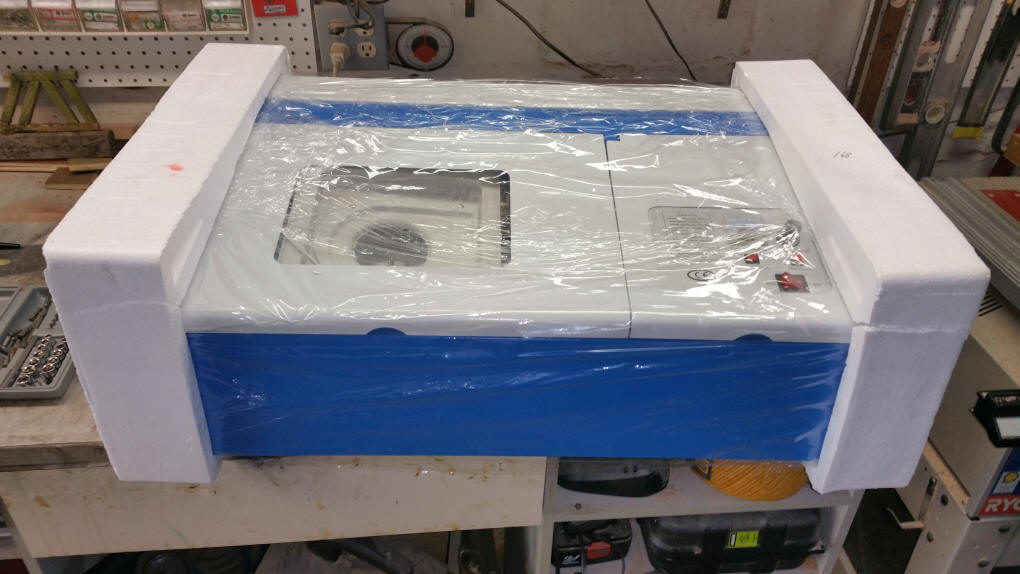
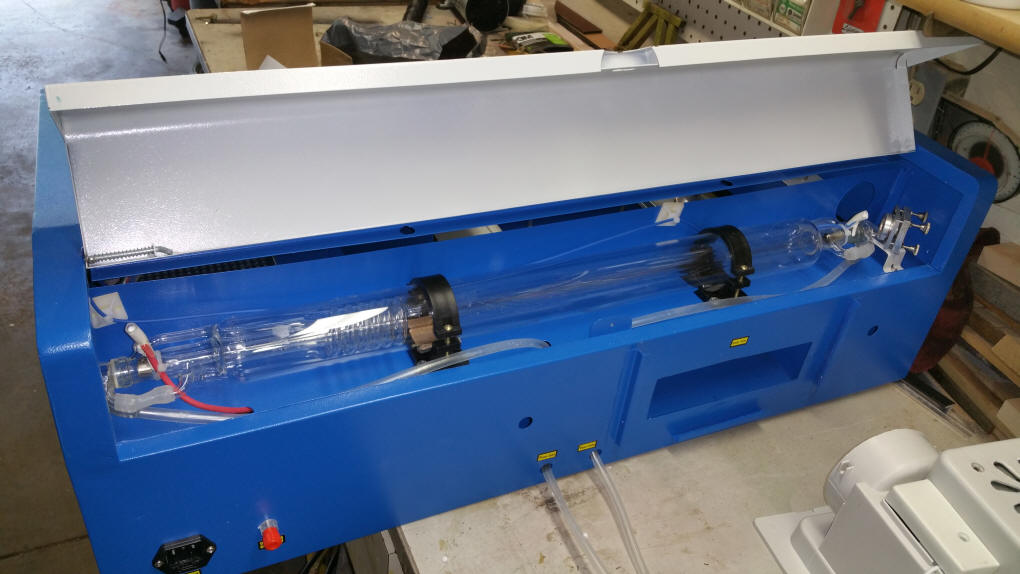
| Unboxing: The cutter came in a wooden crate with the top bolted on.
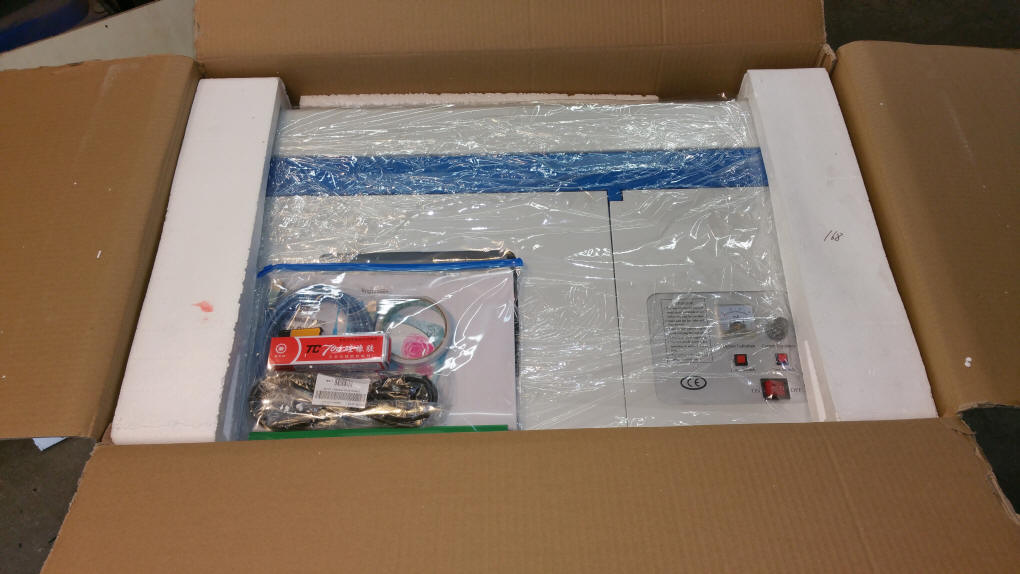
Inside was a cardboard box...
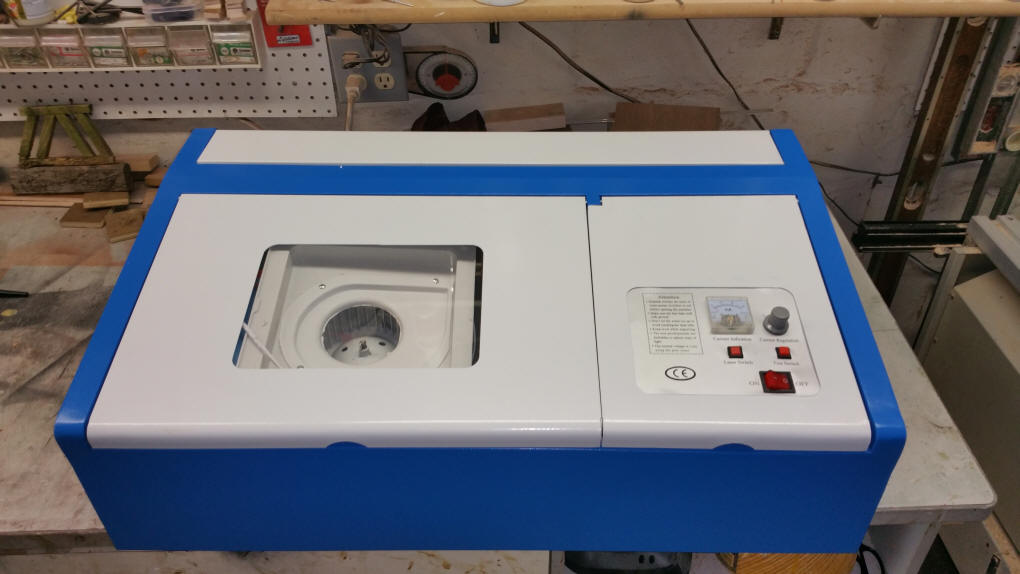
inside of that was the laser cutter packed in Styrofoam.
It appeared to have traveled quite well.
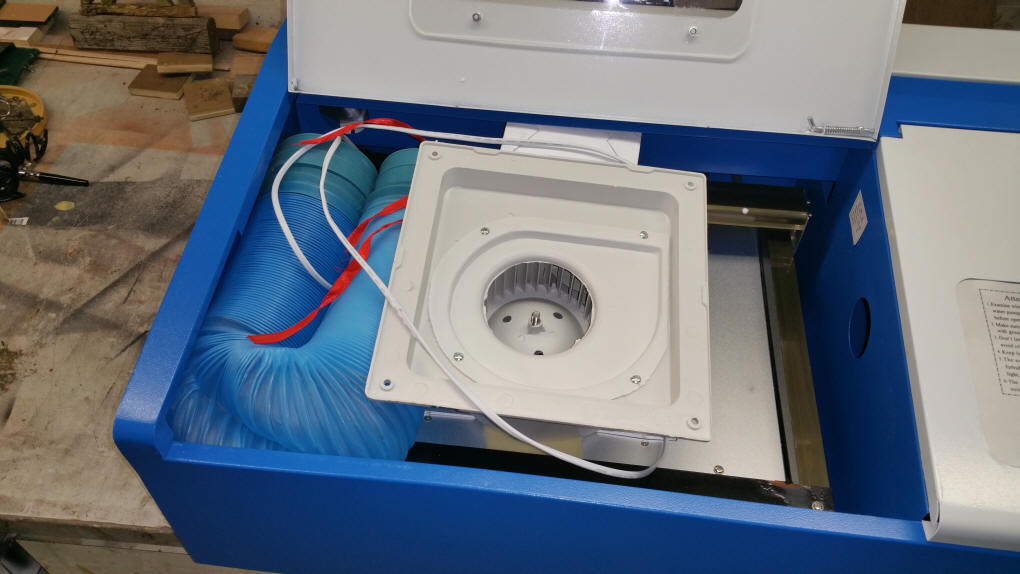
The fan can be seen through the observation window.
The fan and the exhaust duct were inside.
Some packing material had to be removed.
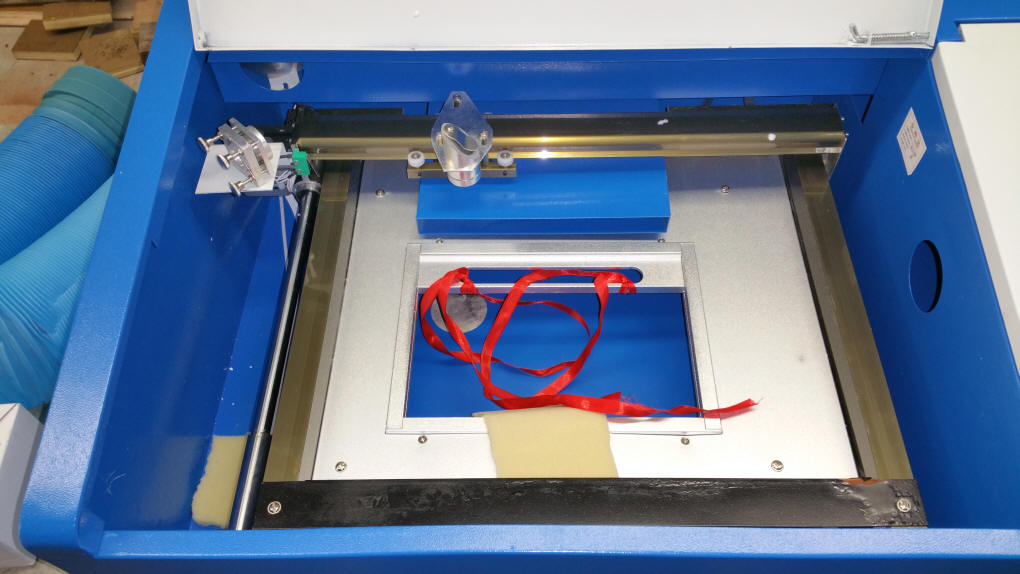
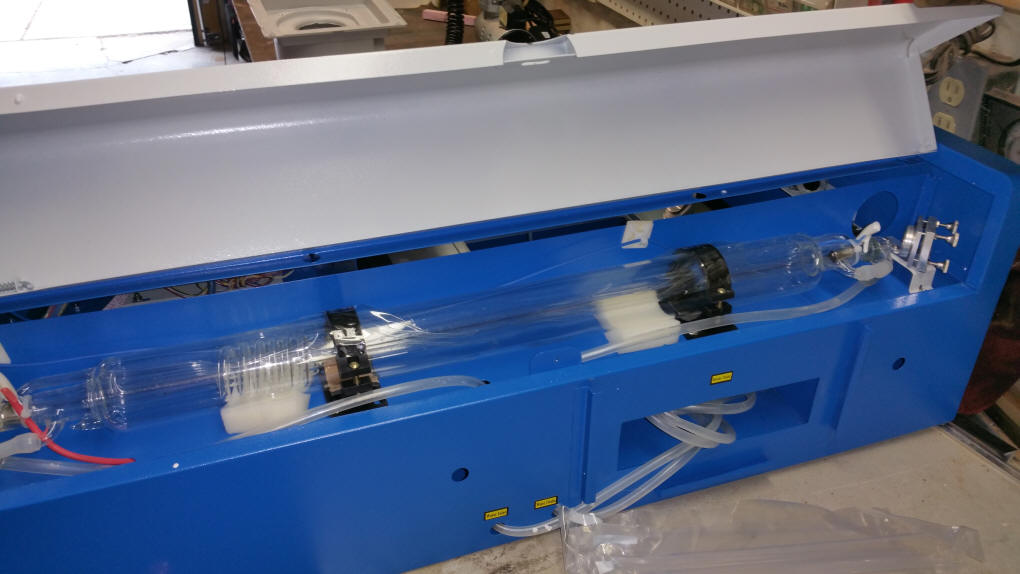
The laser tube was well packed, too.
Packing and clear tape were removed to expose the laser. Some foam still needs to be removed.
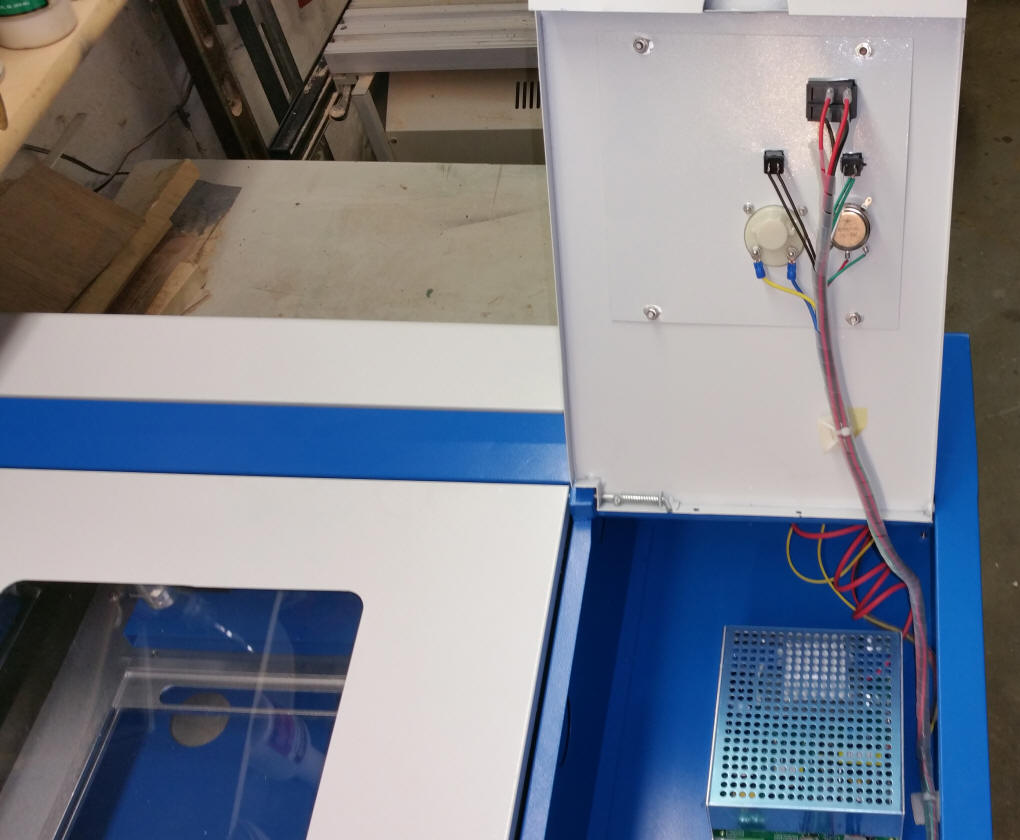
The power supply, electronics and wiring for the switches are under the panel on the right.
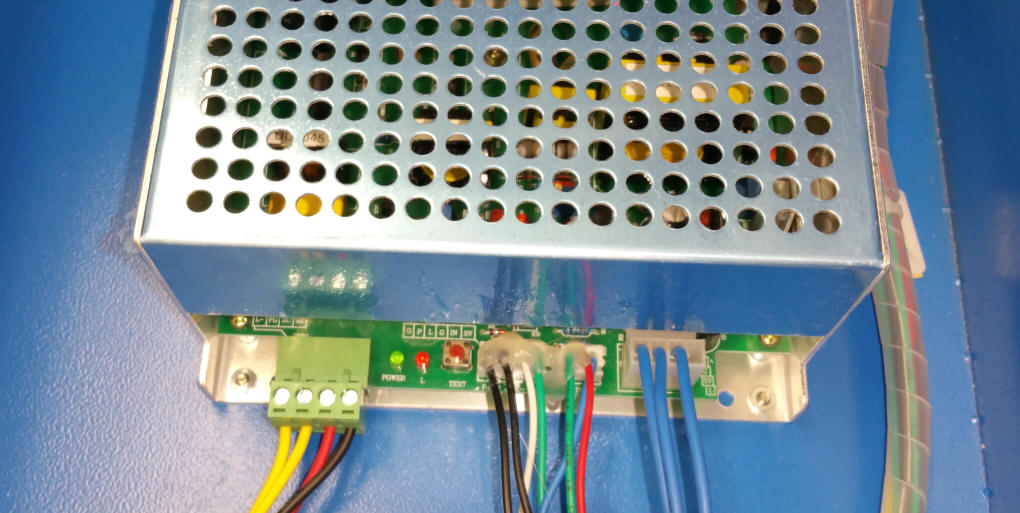
Here is a close-up of the terminals on the power supply.
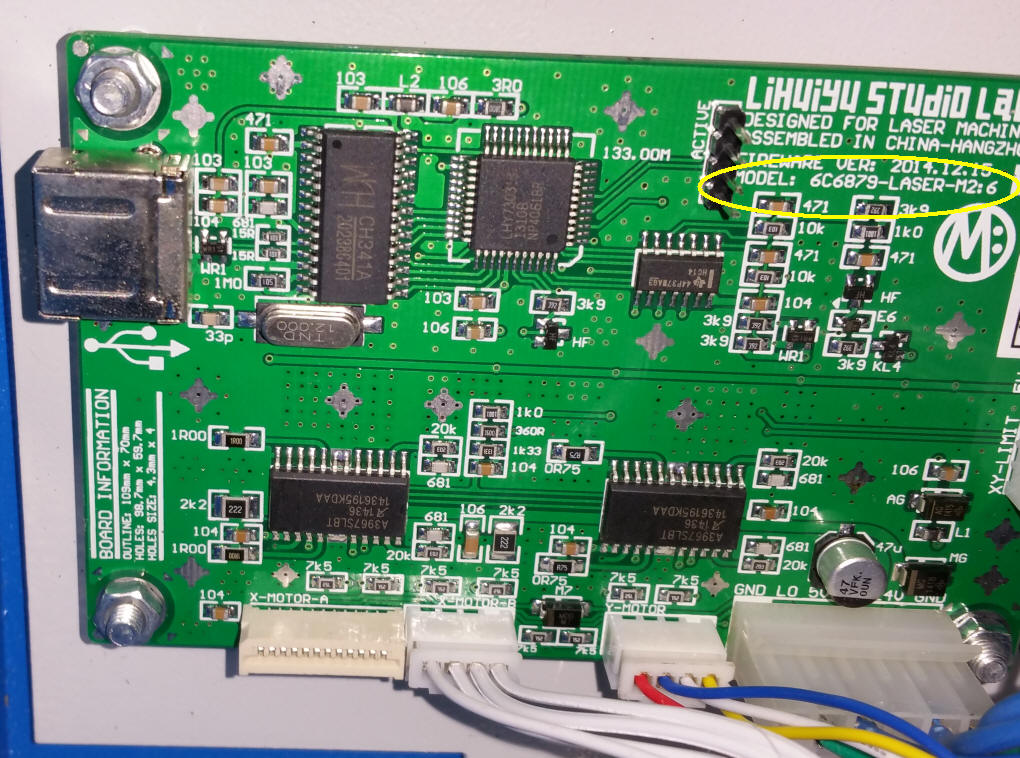
Note the model number (circled in yellow) on the control board - set the CorelLaser software to match this setting 6C6879-LASER-M2
Here is the laser tube after all of the tape and packing has been removed. Note the water lines coming out of the center of the back of the unit.
|
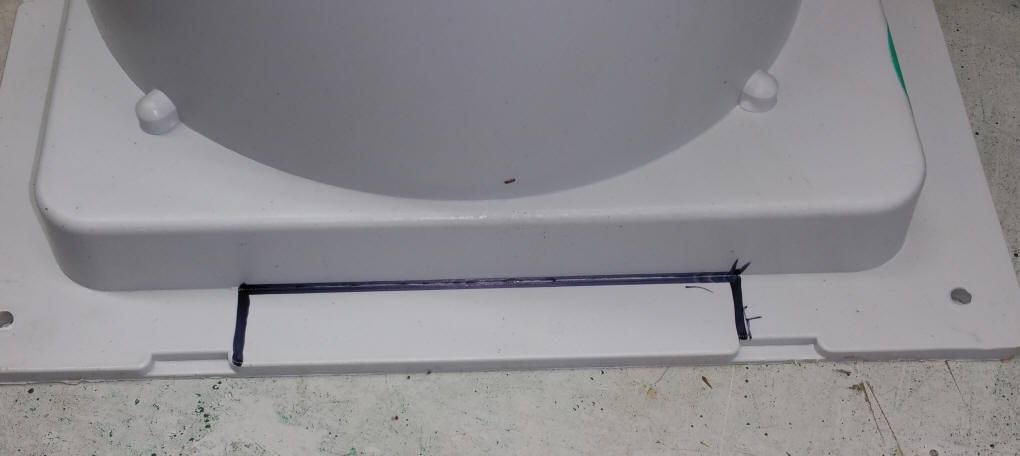
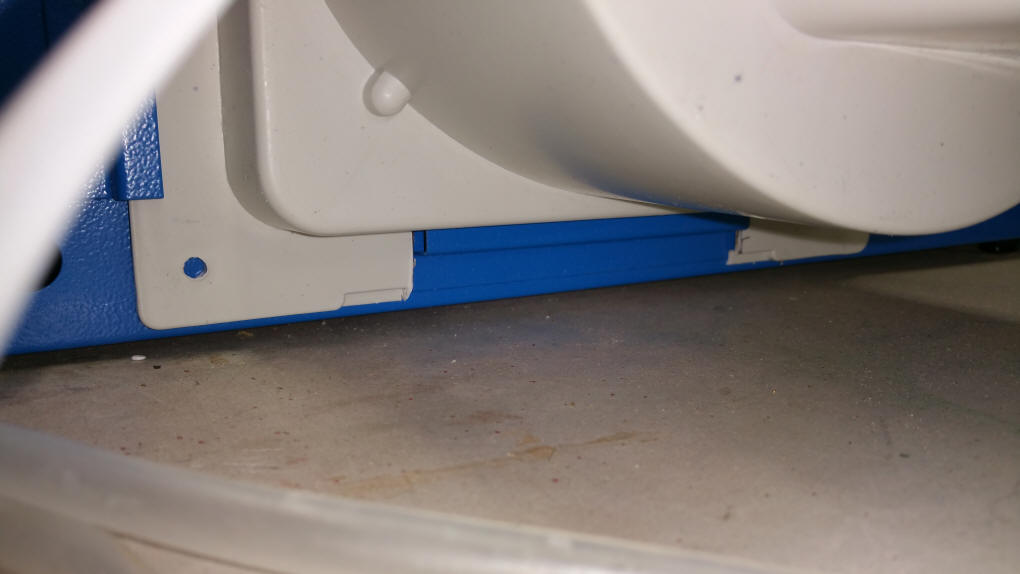
| A Minor Modification The fan housing sat too high on the back of the engraver so I notched out a section of the frame as shown here:
after notching the frame fits more closely to the top of the unit. I used wooden wedges to force the frame against the housing.
|
| Launch CorelLaser which will start CorelDraw (if it is installed) I used CorelDraw 11 which appears to be the oldest version that will work. |
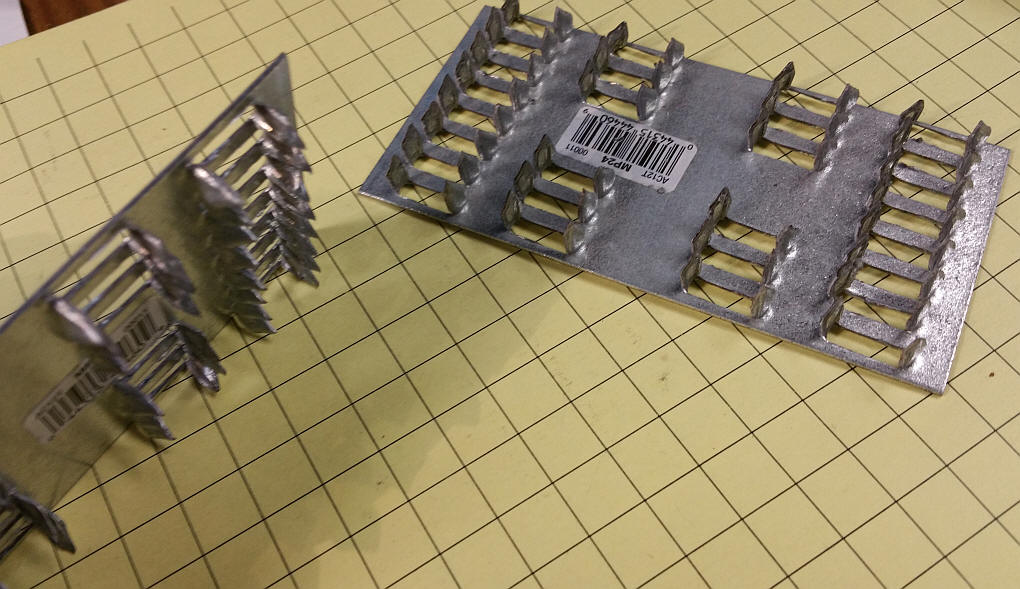
| Work bed -- to support larger items
than what will fit in the frame I plan on removing the frame and
installing a bed made up of these wood beam mending plates:
I will likely paint them black before use to keep the beam from being reflected. |
| Things to and not to cut with a laser cutter: http://atxhackerspace.org/wiki/Laser_Cutter_Materials |